Say hello to the Goldilocks of garden vegetables.
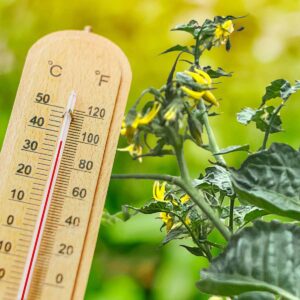
Bell pepper plants need warm weather to grow and to flower. But if it's too hot, they'll fail to pollinate, drop flowers, or even drop fruit that just set. If it's too cold, they won't set fruit and will struggle to mature any fruit already on the plant.
If you've tried to grow bell peppers in the past and ended up with only a few per plant, or even none at all, then this is for you.
I'll help you learn how to grow bell pepper plants that are big with a lot of bell peppers. This guide contains a lot of information, but it's explained in a way to help beginners and to provide insight for advanced gardeners who are having trouble with their plants.
Jump to:
Bell pepper growing: the basics
Already know the stuff in a section based on a headline? Don't skip it - each section has advice tailored toward your specific climate.
Here are the basics to successfully grow bell pepper plants in your climate, which are covered in depth in this guide.
- Adjust the sun/shade ratio, spacing, and watering to fit in your climate (plant tags are generalized)
- Find warm or cool microclimates in your yard, changing the temperature by 5-15F.
- Water consistently at least through the flowering phase
- Don't skip fertilizer - bell peppers need those nutrients more than other veggies to produce
It's also worth knowing how many bell peppers you can expect per plant, in ideal conditions. To set your expectations, most varieties yield 6-8 bell peppers per plant, while some get twice that many with good conditions.
Ideal temperatures
One of the biggest reasons bell peppers don't grow is temperature. So let's first take a look at their ideal ranges as well as when trouble starts.
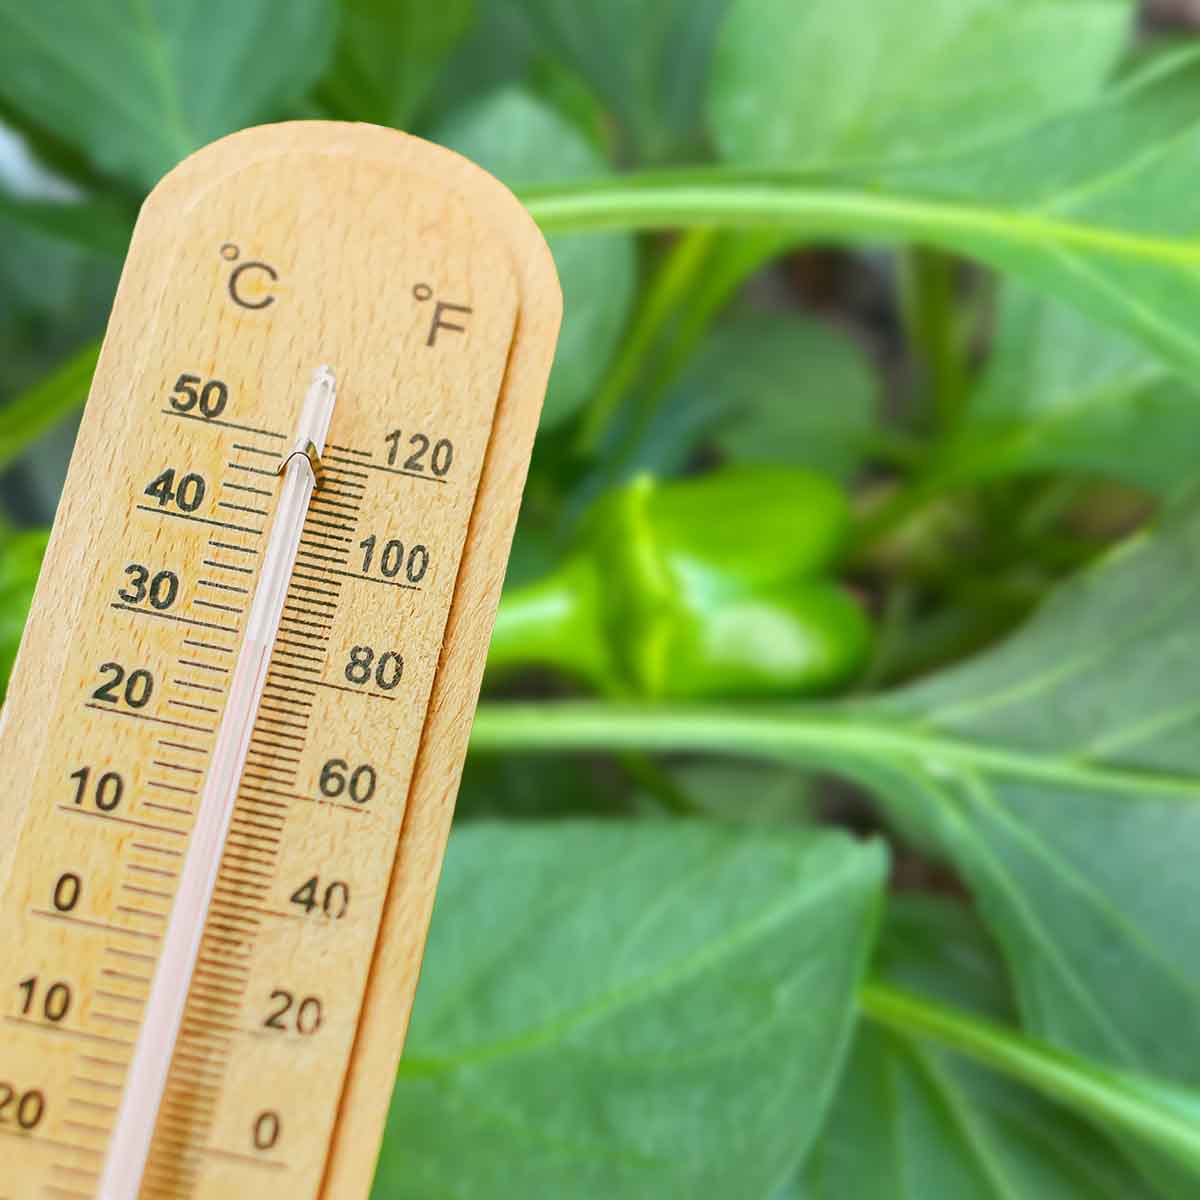
The ideal air temperatures are between 75-85F (21-27C) during the day and between 55-70F (15-21C) at night. Sources vary those temperatures a little, allowing higher temps during the day or lower temps at night.
There are several other key temperatures to note:
- Germination: soil temps should be 75-85F degrees, germinating in under a week with soil on the warmer end, and as slow as 3 weeks in cooler soil.
- Transplanting: Transplant when night time air temps are consistently above 50F. The Chicago Botanic Garden even says to wait until the soil is 60F. Plants will die in freezing temps.
- Flowering: most bell pepper plants will have trouble flowering and pollinating when it's too cold (below 60F (15C)). But when it's too hot, consistently above 90-95F, the flowers will drop, won't pollinate properly, or abort fruit that just set. The flowers also don't like nighttime temps above 70F.
Can bell pepper plants grow outside of these ideal ranges? Yes! These ideal temperatures are based on research targeted at commercial growers to maximize yields.
For example, if temperatures climb really high while flowering, you'll lose some flowers, but not all of them. One study found that plants pollinated when temperatures were above 91F (for several days), produced 15-20% fewer peppers than plants held within the ideal temperature range.
Once the temperatures return to the ideal range, the plants recover and new flowers will be unaffected by previous highs (or lows).
Extra heat and sunlight also help the peppers mature faster, as long as it isn't too hot (above 95 and they seem to really slow down). The peppers seem to grow best around 85F from my experience while gardening across different regions.
Starting bell peppers from seed
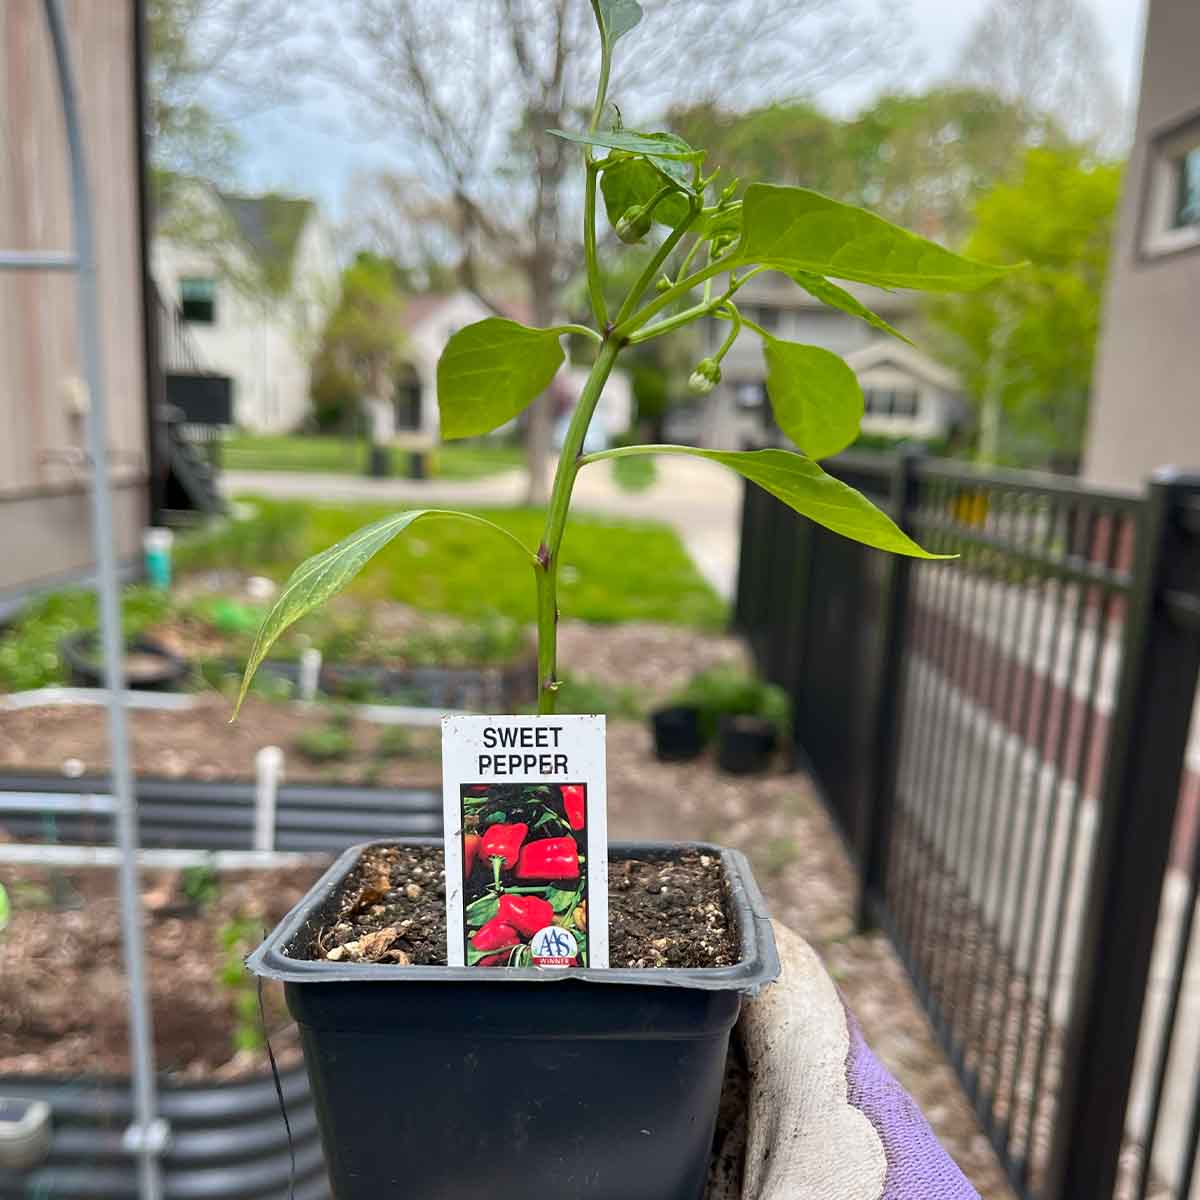
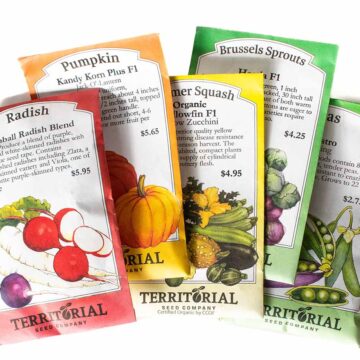
One of the main reasons to start bell peppers from seeds is to select specific varieties. Go ahead and pick fun or pretty varieties, but be mindful of the "days to maturity."
If you're wondering how to grow bell peppers when you've failed in the past, be selective and only pick varieties that work well in your climate.
Start by looking up your climate data on WeatherSpark by entering your zip code in the box in the upper right. It returns critical information on average highs, lows, humidity, and more for an entire year. Toward the bottom, the section titled "Growing Season" even lists the number of frost-free days to determine the length of your gardening season.
Days to maturity
The next step is to find bell peppers that can mature before frost sets in. Base this on the "days to maturity" label. But there are some caveats...
Days to Maturity is a pretty loose term and not every seed vendor follows the same rules. But bell peppers are pretty consistently labeled for when they are mature and green. Peppers will continue to ripen to red (or orange, etc), which usually takes an extra 3 weeks.
The average bell pepper will be labeled as mature in 75-80 days. A good number of varieties mature sooner, in 70 days or less. This guideline is also based on perfect conditions - so in cooler climates a bell pepper that is listed to mature in 70 days will probably take closer to 90.
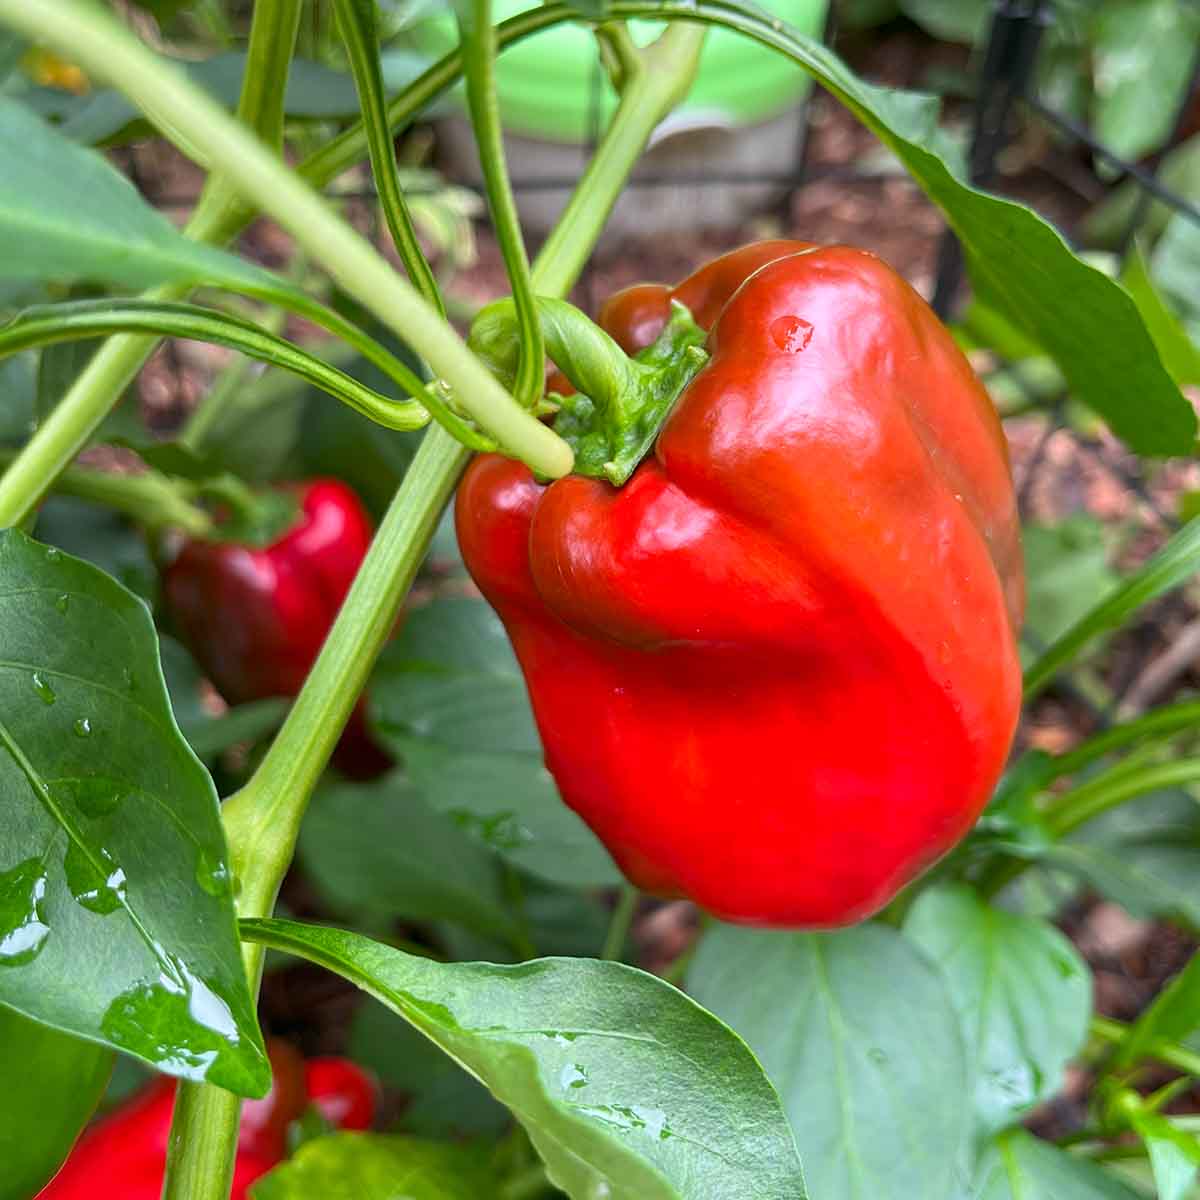
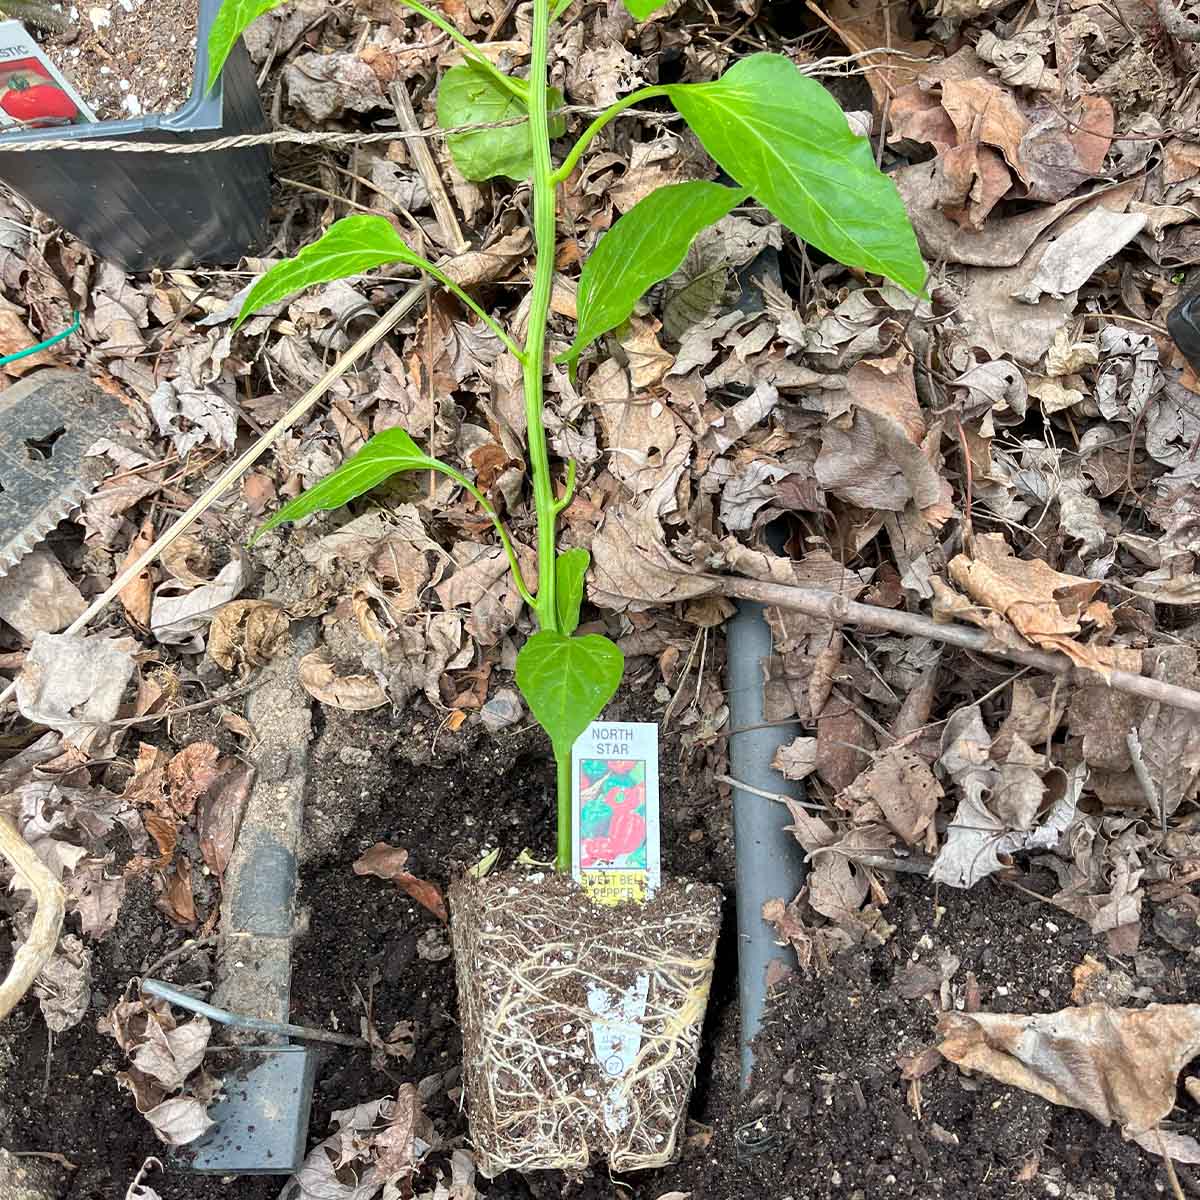
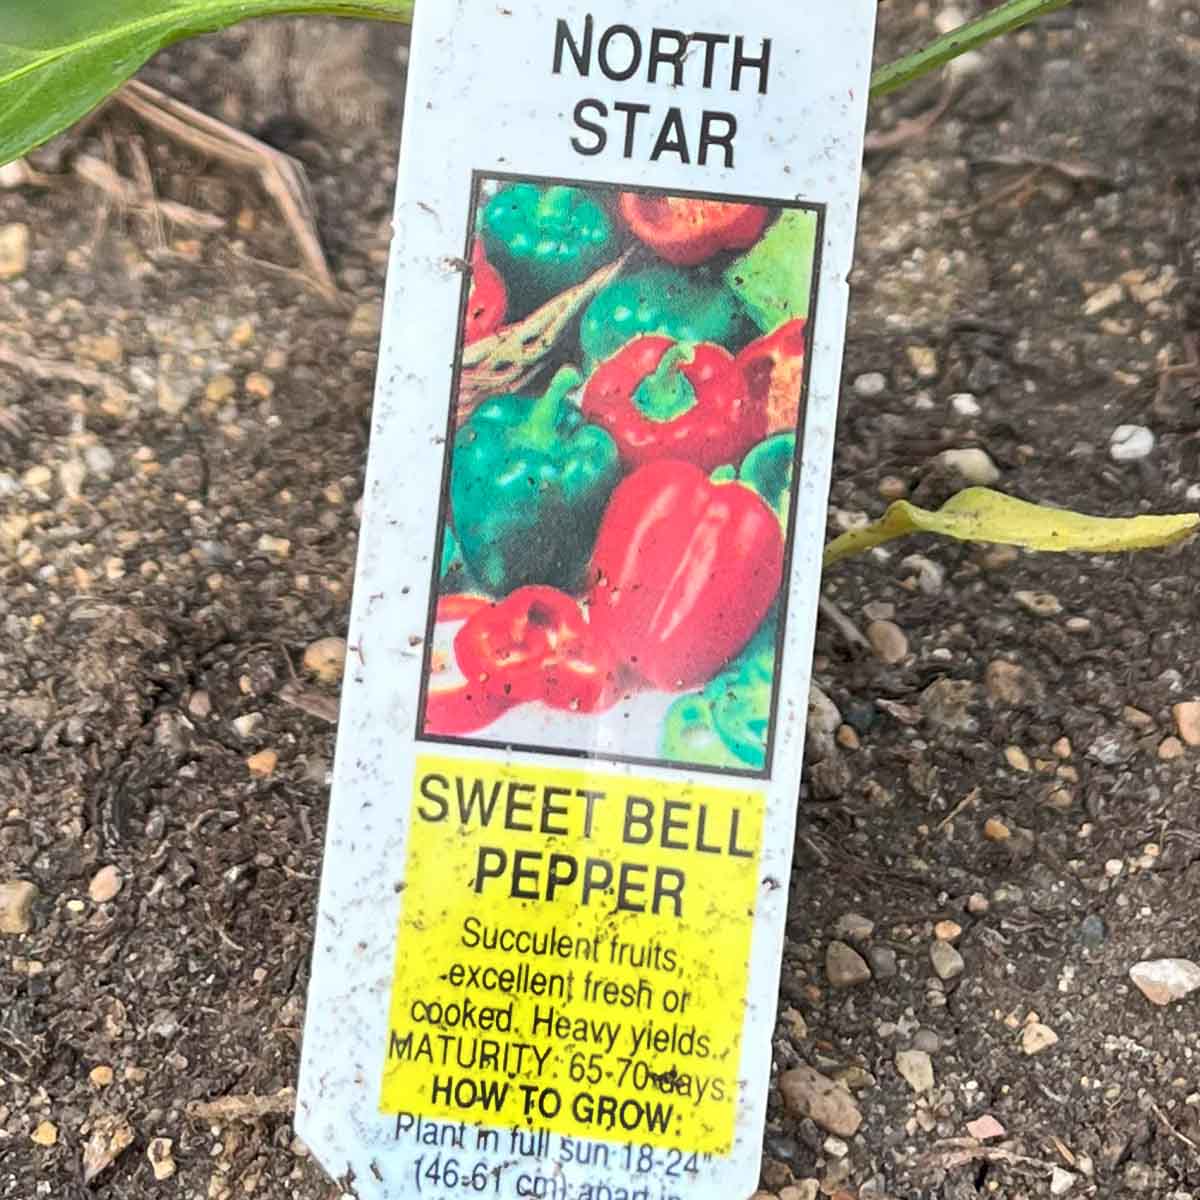
I live in the Chicago region (USDA zone 6A) and the North Star bell pepper I grew took 80 days to reach maturity, when the label says it takes 65-70 days. It took another 3 weeks to turn fully red.

Varieties for your climate
One of the keys to successfully grow bell peppers is to choose a variety suited for your climate.
- ❄ Cool summers: get fast maturing varieties, stick to 70 day or less. In cool summers a 70-day bell pepper will take closer to 90 or even 100 days to green-mature, and 110-120+ for red-ripe. Suggestions: Ace (50 days), Chablis (62 days), Doe Hill (65 days and a good keeper), North Star (70), Orange King (72), Early Sunsation (yellow, 70), King of the North (70, cited as best performer in the north by UW-Green Bay). For cool & very short season areas, stick to 60 days or less. (UW Green Bay cold-climate vegetable list, pdf)
- 🌡 Hot & humid: look for disease resistant varieties since most diseases thrive in humidity. Tobacco Mosaic Virus is a problem in the Southeast. Suggestions: Big Bertha, Cali Wonder 300, Emerald Giant, Karma, Colossal, King Arthur, Lady Bell, Red Knight. (Giant list of disease resistant bell peppers)
- 🌵 Hot & arid: Look for varieties adapted to heat and have bushier growth to shade the peppers and the soil. Suggestions: California Wonder, Yolo Wonder, Keystone Resistant Giant, Gypsy, Emerald Green, Big Bertha, and Early Sunsation (listed as bushy and shady even in Texas heat).
If you live in the warmers parts of the Midwest, you can grow almost any bell pepper you want. Look for varieties that mature in 75 days or less if you want to reliable pick them fully ripe, but you can have luck with 80 days.
When to start your seeds
Bell peppers need warm soil and warm days to grow, so they are transplanted 2-4 weeks after your last average frost date.
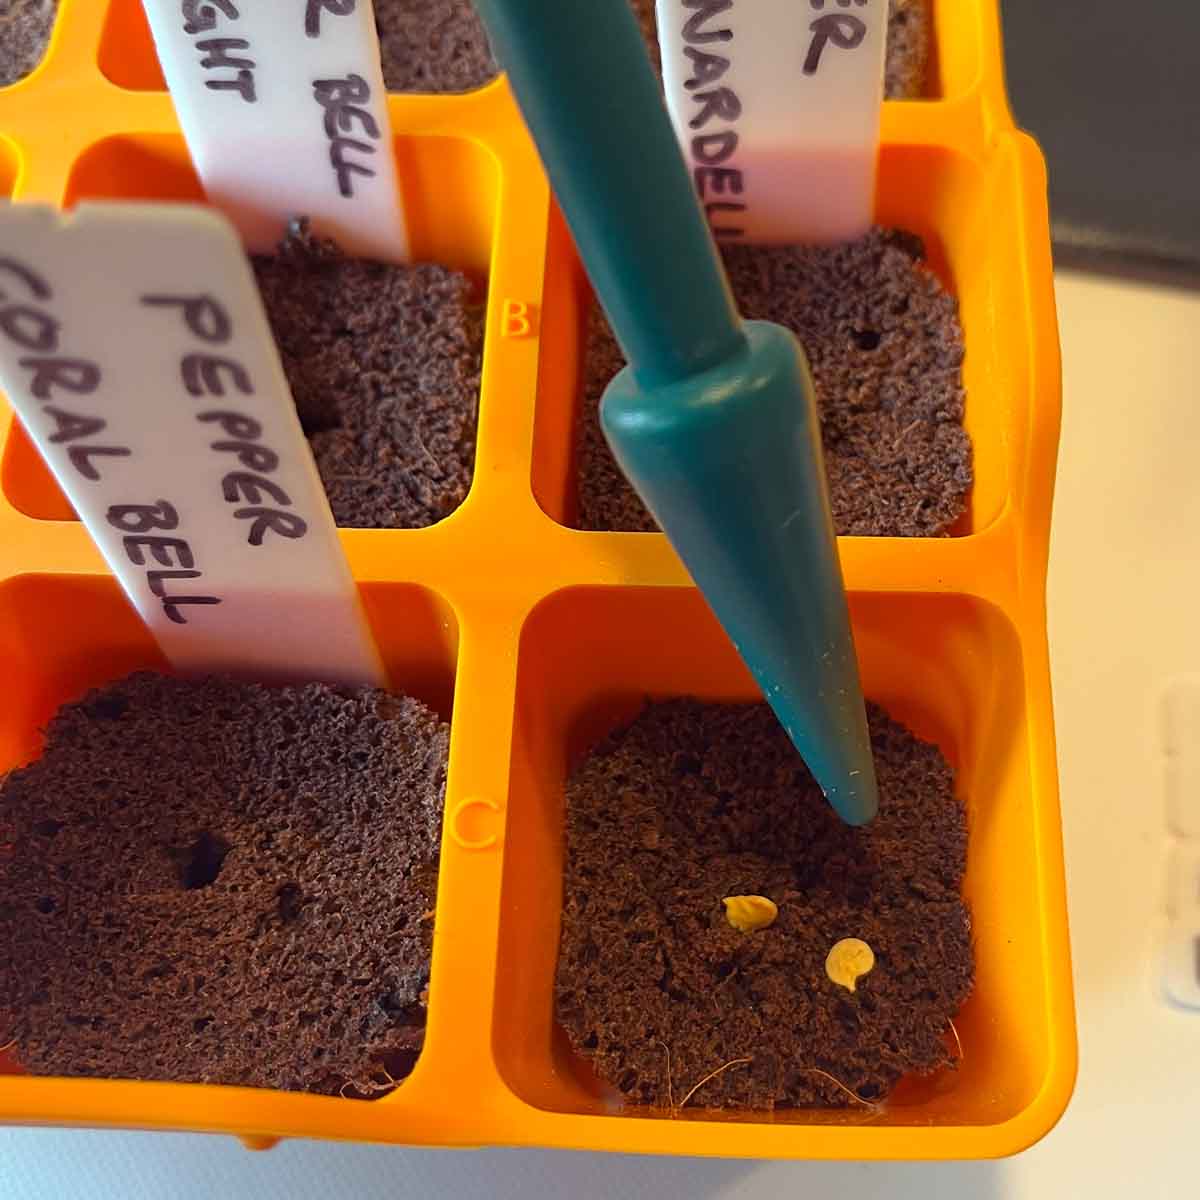
Look up your average last frost date with your zip code on Almanac.com (or use the data from WeatherSpark). Then start your seeds indoors 8-12 weeks before that. Pepper seeds prefer a really warm soil to germinate (80-85F), so a heat mat really helps.
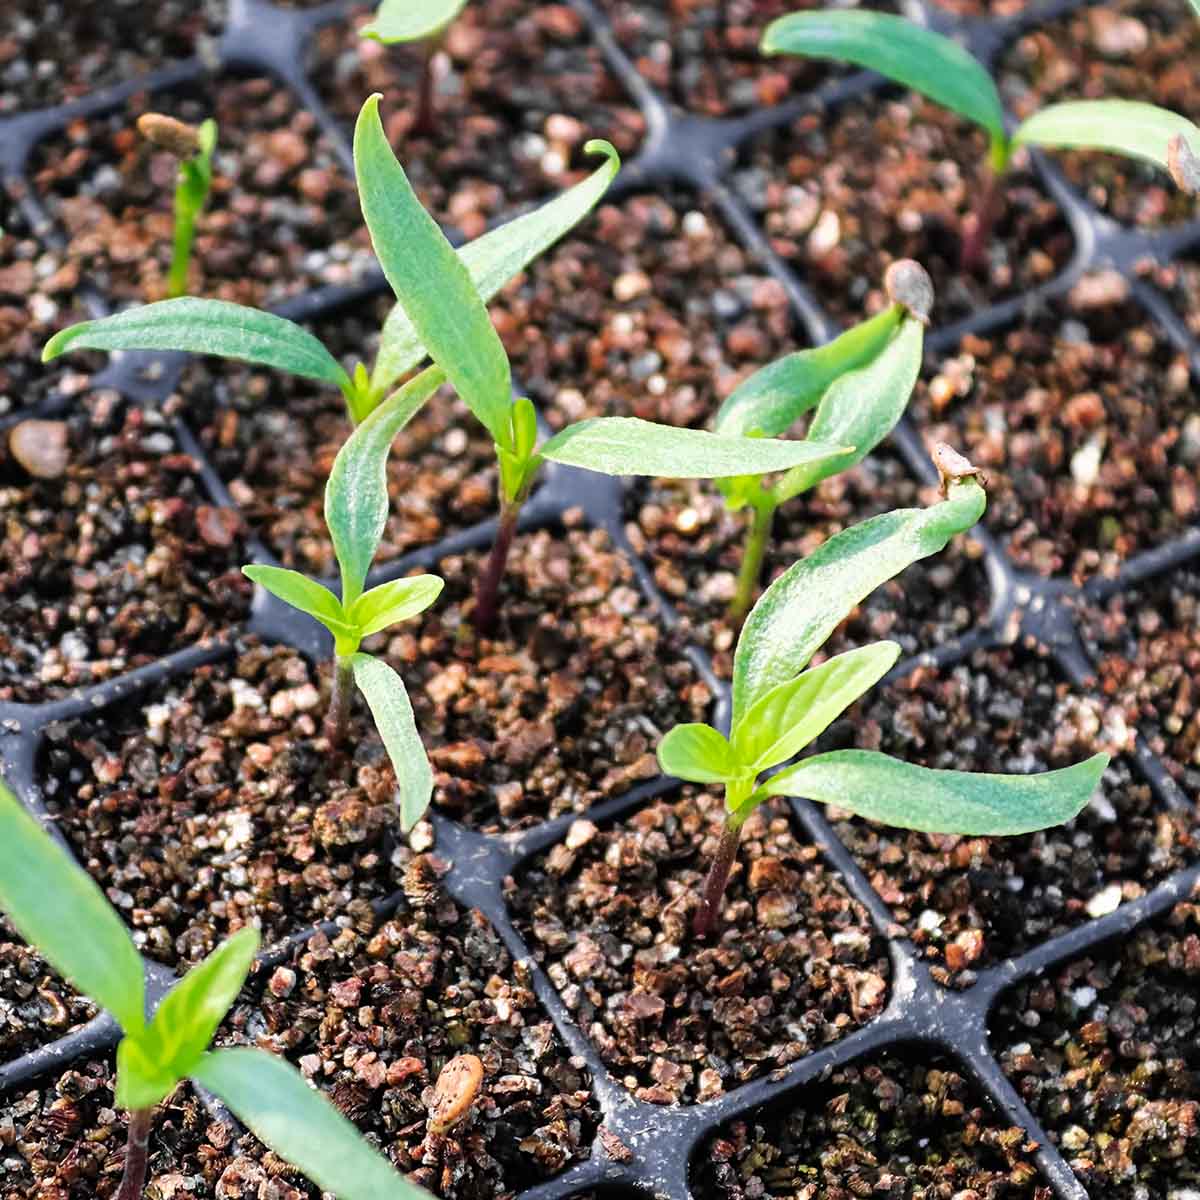
Once the seeds develop their first set of true leaves, you can pot them up. Make sure to use soil with good nutrients or the bell pepper plants will grow too slowly. They will also need a lot of light.
❄ A note for colder climates: start your seeds early so you can transplant a more mature plant. Older bell pepper transplants produce earlier than younger plants, when comparing a range of ages from 4.5 to 8.5 weeks old at transplant. Be sure to pot them up as they grow so they don't get root bound.
Keep your seed trays warm
Peppers won't germinate in cool soil. Even indoors you'll likely need an extra source of heat to keep the soil between 75-85F. I use a heating mat and set them in a south-facing window. You can also set them on top of the fridge (unless it's a built-in).
Pepper seeds can germinate as quickly as 5 days in warmers soils, but can take several weeks in cool soil.
Potting up
Once your bell pepper seedlings have 2 sets of true leaves, you can move them to a 1.5" or 2" pot. Resist the temptation to transplant them into an even larger pot right away.
When you use too large of a pot, the little seedling's roots can't reach the majority of the soil to soak up water. That leaves most of the soil wet and can cause root rot or breed mold, fungus, or gnats.
However, once the seedlings start to fill out the 2" pots, transplant them again to a 3" or 4" pot. Research has shown that transplants with larger root balls (from having space to grow in larger pots), handle outdoor transplanting better and produce slightly more peppers.
A paper by Todd Joseph Weinmann (2010) (pdf), summarized his findings, saying: "Results showed that the larger the container volume, the higher the pepper yield, regardless of variety." They tested pot sizes to maximize growth in nurseries, with the largest pot just under 3x3x3 inches.
This applies even if you buy seedlings from a nursery. If you aren't planting them right away, you might benefit from potting them up.
Pick your site strategically
Generally speaking, bell peppers like full sun (at least 6-8 hours), in well draining soil. They are heavy feeders, so they grow much bigger and faster in nutrient rich soil.
Based on your climate, there are a few caveats on how to grow bell peppers better in your area:
- ❄ Cool summers: get as much sun and heat as possible, raised beds and pots really help, and look for warm microclimates
- 🌡 Hot & humid: benefits from afternoon shade, or even daily 30% shade cloth
- 🌵 Hot & arid: afternoon shade and/or 30% shade cloths are almost a requirement
Providing a warmer site (for ❄ cool climates)
Raised beds and pots can give bell pepper plants the boost they need in cool & short season climates because the soil warms up faster than the ground. Pots warm up the fastest but also need the most water.
The other benefit to growing in pots in short season climates is their mobility. If you get a late spring or early fall cold snap, you can bring them indoors. If the bell peppers haven't fully matured before fall's cool weather seeps in, you can bring them into a garage and set them on a heat mat to finish ripening.
Bell pepper plants are happy in a 5 gallon pot. I've used these pots from Vivosun (amazon link) for the past several years, leaving them outdoors over winter and reusing them the following spring.
(This is an affiliate link so I get a small commission if you make a purchase. I try to be as transparent as possible, letting you know if I own the product and how I like it. These have lasted 3 years so far, and still going strong.)
If you have a larger barrel or pot you can grow multiple plants. I've used all kinds of pots and have the best luck with black fabric pots. They warm up fast without getting too hot, they don't get waterlogged, and they are still breathable.
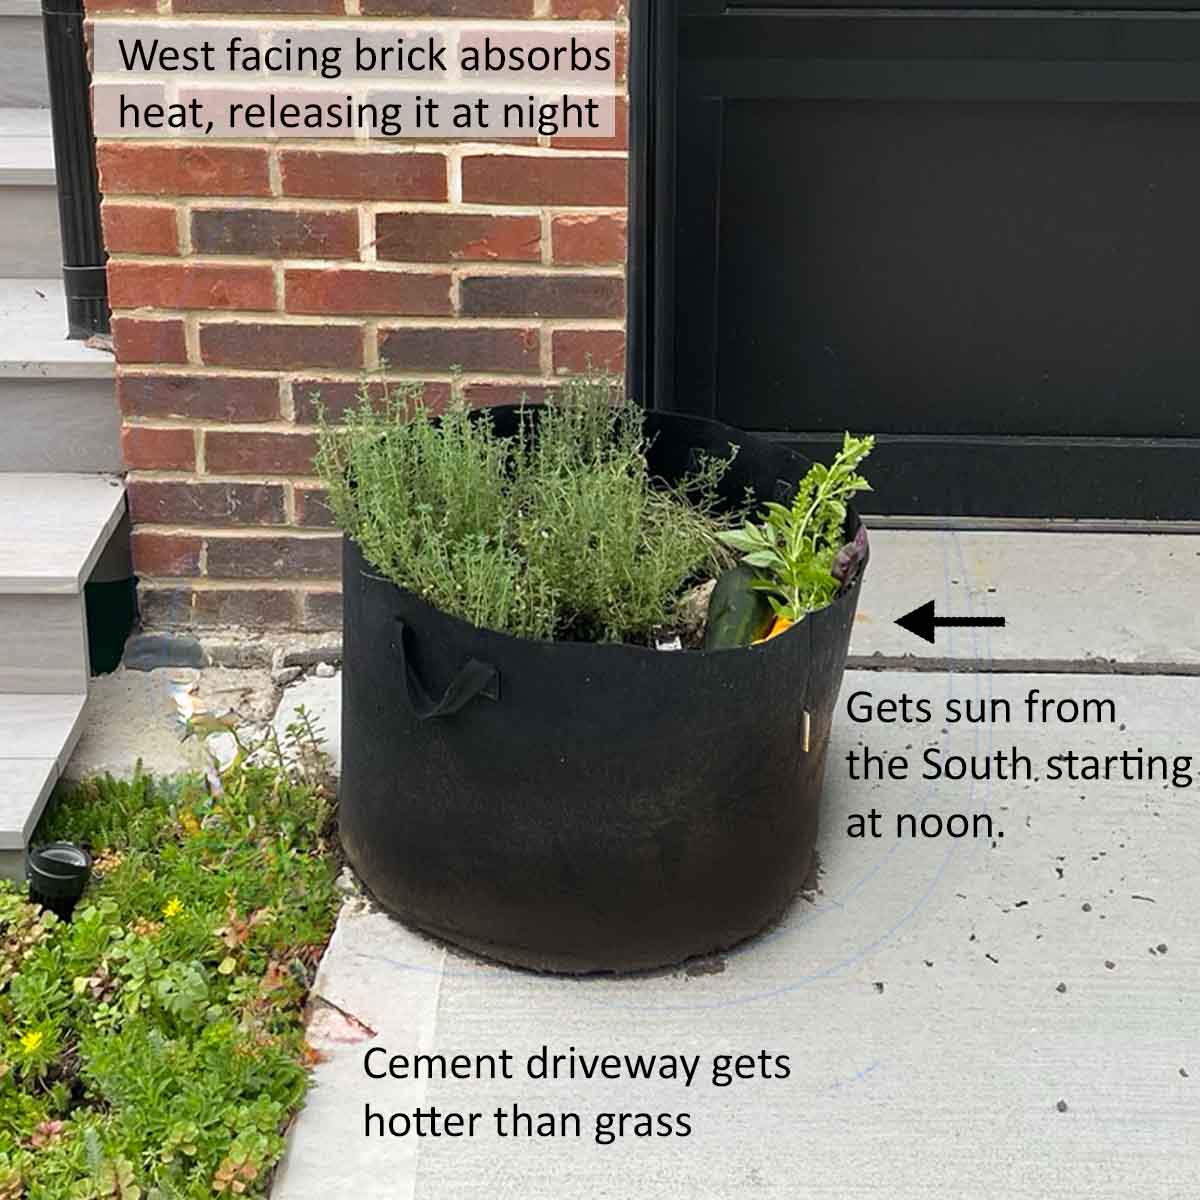
The other trick is to look for warm spots in your yard. These will be next to a south or west-facing wall, near brick or stone, or on a patio or paved driveway (which is always hotter than grass).
Providing shade in 🌡 hot climates
In hot climates, bell peppers plants suffer from several problems. When the weather is too hot, flowers won't set or properly pollinate. Sometimes the peppers mature slowly if it's too hot, only picking up speed once the temperatures cool going into fall. And lastly, the peppers are more susceptible to sunscald (basically a sunburn).
So how do you grow bell peppers in a hot climate? Provide some shade!
If you have a perfect spot that gets dappled afternoon shade (but not too much shade), you can try growing bell peppers there. Otherwise, the easiest solution is to use shade cloth.
Shade cloth lets in a certain amount of light, strategically providing enough light while keeping the plants cooler. According to research, in hot climates peppers grow best under 30% shade cloth, when compared to no shade, or more shade. Here are some shade cloth options on Amazon. (Affiliate links. I used this vendor and it worked out fine. Nothing fancy, nothing bad to report either).
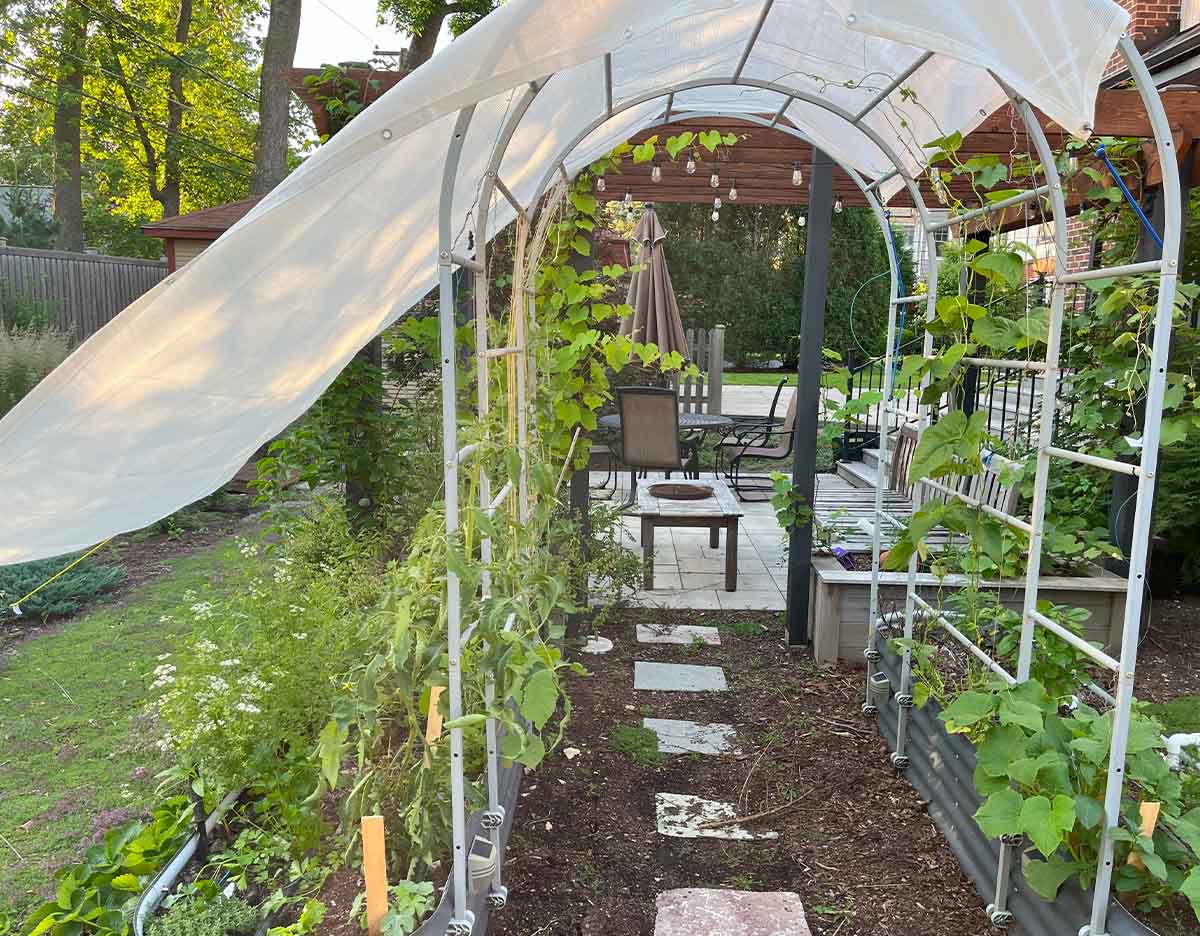
How should you set up shade cloth? Pretty much anything will work, as long as your plants still get some air flow.
- Put wire tomato cages around the pepper plants and secure a sheet of shade cloth over the top
- Drape it over tunnels built with flexible PVC pipes or trellises
- Secure it over tall posts anchored into the ground
- Anchor it to a high point above the peppers, then secure it to the ground (like a lean-to or the side of a tent)
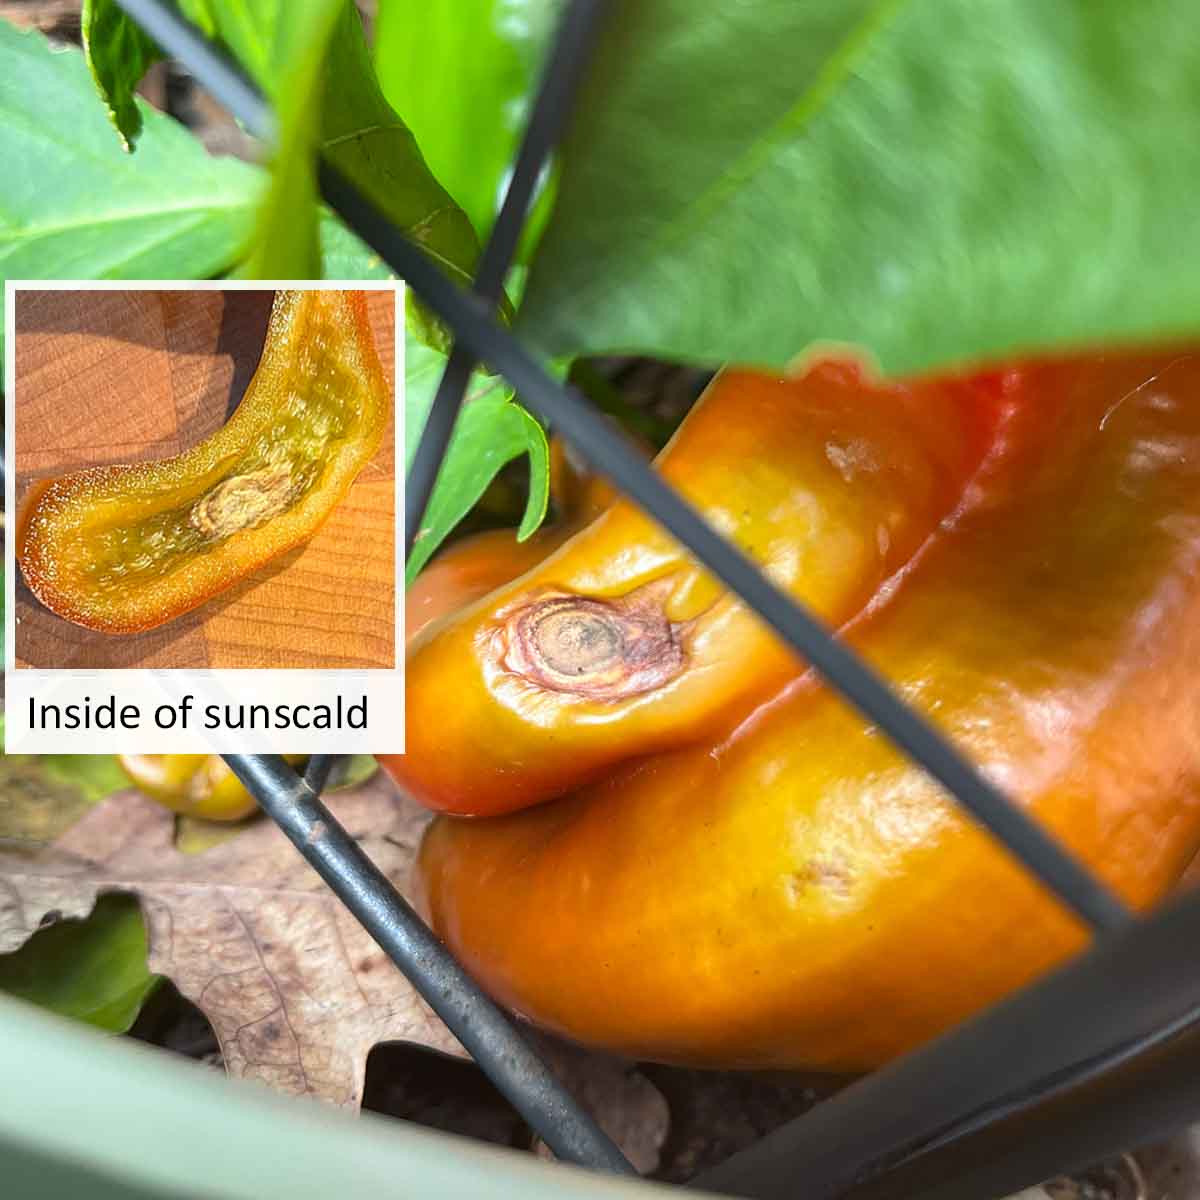
Sunscald
Lastly, sunscald happens when the pepper gets too much direct sunlight, especially in hot weather. The exposed spot turns a tan color and usually grows as it's exposed more and more every day.
It's a big problem in hot & arid climates, like the Southwest, as well as the hotter parts of the Southeast. Even places like the Midwest aren't immune, but it's much less of a problem - and likely only affects a pepper here and there.
Bushier plants shade the peppers, preventing sunscald. But in intense climates in the South, shade cloth might be needed and can prevent sunscald entirely.
If you do get a pepper with sunscald, pick it right away before it gets worse. You can still eat it if you cut away the burned part and there are no other signs of spoilage.
Transplant timing
Bell peppers should be transplanted when there's no longer a risk of frost, because freezing temperatures will kill the plant. That usually means you should wait until 2-4 weeks after your average last frost date.
I know it's tempting to set them out as early as possible to get a jump on growth, but bell peppers don't grow until it's warmed up considerably. They'll sit there stubbornly with their arms crossed, waiting until it's warmer!
Instead, when the weather warms up, if you're itching to get started, you can try start hardening off your transplants for 2 weeks. (More on that in the next section.)
If the weather is warming up early this year and you want to get your peppers plants out closer to the average last frost date, be ready with cold weather protection. You can cover them with a cloche, set them in a greenhouse, or move potted bell pepper plants indoors, if necessary.
Tips for your climate:
- ❄ Cool summers: remove any mulch in the garden or raised beds a week before transplanting. The soil warms up faster with direct sunlight. Reapply mulch a couple weeks after transplanting.
- 🌡 Hot & humid: use mulch to keep the soil cooler once the weather warms up
- 🌵 Hot & arid: keep mulch on at all times to slow moisture loss in the soil
Your soil matters too!
- Clay soil warms up the slowest in spring but retains the most heat at night. Plants will be slower to grow after transplanting than someone with loamy or sandy soil.
- Sandy soil warms up the fastest in spring, but needs more water and nutrients.
- Loamy soil is the easiest to work with - it's the happy medium.
When you transplant, mix an extra source of slow-release nitrogen (like blood meal) into the planting hole. This front loads nitrogen to encourage bushier and taller growth, ultimately supporting more bell peppers.
Blood meal comes is granulated and easy to work with. It won't burn the roots like some regular fertilizers can if they come into direct contact with the roots. Here are some options on Amazon, and you can also find bags at hardware stores, or any store with a live plant section.
Hardening off
When you start seedlings indoors, they have a pretty cushy environment. There are no big temperature swings, the light isn't too bright, they get water on schedule, and there's no wind.
If you expose the plants to the outdoor elements all at once, they kind of freak out and go into shock, called "transplant shock." It takes them a week or two to recover and start growing again.
"With all this stress, your precious pepper or tomato plant goes into survival mode. To save moisture, it closes the stomata on the leaves, the small pores through which water transpires. Instead of growing bigger, it diverts resources to develop a thicker waxy cuticle to protect the leaves. It goes nearly dormant as it struggles to begin growing in its new environment," as explained by Steve Reiners, Professor of Integrative Plant Science at Cornell.
To reduce the stress of transplanting, you can harden off the plants. This involves setting them outside for a couple of hours, and then bringing them back in. You gradually increase the amount of time they spend outside over the course of two weeks.
During this 2-week period, the plant's growth slows so it can direct energy into developing roots, thickening the cell walls, and other protective measures.
Is it necessary?
Now here's the kicker - while hardening off is widely circulated advice, it might not be as important as it seems. Steve Reiners continues in this article to explain that "A perfectly hardened plant will take some time to adjust before it starts growing again. A nonhardened plant will also take time to adjust to the outside conditions. Its change is more abrupt, and it may show more damage. But both will start growing again at about the same time."
He also concludes that both hardened and unhardened plants in his trials produce the first vegetables at the same time.
How to harden off your bell pepper plants:
- Once daytime temperatures reach 50F, set the plant outdoors for 2-3 hours in a shady spot, shielded from the wind.
- Increase the time the plants spend outside by an hour or two each day, eventually bringing them in when you go to bed.
- Toward the end of the two weeks, leave your plants out overnight, as long is the overnight temperatures stay above 50F.
If you DON'T harden your plants, here are some tips to follow:
- Pot up your plants as they grow indoors to allow for bigger root balls, which helps adjust to the outdoor environment
- Soak the root ball before transplanting and provide enough water after transplanting
- Plant on a cloudy day to avoid the harsh sun
- Protect the transplants from strong winds
Spacing
In general, bell pepper plants should be spaced 18 inches apart. This gives them enough room to grow without competing for nutrients. But you might want to make some adjustments based on your climate.
❄ In cooler climates, closer spacing at 10-12 inches can create a slightly warmer microclimate as the denser foliage traps extra heat as it radiates off the soil at night. 🌵 In hot & arid climates, closer spacing can slow down water evaporation from the soil and add humidity to the planting area.
Closer spacing might reduce the number of bell peppers per plant since they are competing for nutrients (and water). You can add more plants to make up for the lower yield.
🌡 In hot and humid regions, adding more space can help keep the plants cooler and improve air circulation. A lot of diseases thrive in humidity, so allowing extra air flow between the plants can reduce that pressure. Aim for 20-24 inches apart.
Do different pepper varieties need to be isolated?
Bell pepper plants can cross pollinate, but you don't need to worry about it unless you are saving seeds.
When a pepper plant is cross pollinated, the bell pepper that grows will be true to the original variety of the plant it grows on. For example, if you planted a North Star red bell pepper and it's fertilized with pollen from a yellow bell pepper, the North Star plant will still produce a red North Star pepper.
However, the seeds inside that red North Star pepper could be a cross between the red and yellow peppers. If you save seeds, you won't know what you'll get. This is either frustrating or exciting, depending on your point of view!
This holds true for almost every garden vegetable, with corn being the major exception. That's because the corn kernels you're eating are the seeds.
Fertilizing schedule
Bell pepper plants need a lot of fertilizer to flourish and grow large peppers. Forgetting to fertilize is one of the biggest mistakes people make.
Other vegetables like tomatoes or zucchini can get by with minimal fertilizer - they might not be as productive but you'll still be pretty happy with their yield.
However, if you skip the fertilizer for bell peppers, they will have really stunted growth and very few peppers that struggle to mature. Below is a general schedule to follow.
- Seedlings: after germination, when you pot them up, make sure the soil has a good amount of nutrients, or add a slow-release fertilizer or water with a liquid fertilizer.
- Transplant: at transplanting, mix in compost or a slow release fertilizer into the hole for planting. Make sure it's a type that won't burn the roots. Add an extra source of nitrogen to encourage leafy growth, like blood meal.
- After transplanting: use a balanced fertilizer 2 weeks and 4 weeks after transplanting. This encourages more leafy growth that will eventually support more peppers (and provide shade).
- At flowering: remove flowers for 4-6 weeks after transplanting (to promote leafy growth). Once you let flowers set, apply a balanced fertilizer.
- Bell pepper growth stage: fertilize every 4 weeks after the first flowers open. Use a balanced fertilizer.
- Maturing stage: once the bell peppers are larger, you can use a balanced fertilizer every 2 weeks if they need help growing and ripening to red, orange, yellow, etc.
If you know yourself and this is too finicky for you to reliably follow (no judgement, I've been there!), here's a simplified version:
- Transplant: add a high nitrogen fertilizer to the planting hole (that won't burn roots, like blood meal)
- Once a month: use a balanced fertilizer
Soil adjustments
Heavy clay soils hold nutrients really well, you won't have to fertilize as often once the bell peppers flower. Once every 6 weeks should be sufficient. On the other hand, if you have sandy soil, nutrients wash through it easily. In that case, you might need to fertilize more often.
Front-loading nitrogen
A lot of guides mention something like, "a nitrogen-heavy fertilizer will produce leaves instead of fruit." In general this is true, but Michigan State makes a case for front-loading the nitrogen to purposefully promote leafy growth early on.
The idea is to provide an extra boost of nitrogen at transplant, and even up to the flower stage to help the plant grow taller and bushier. This ultimately supports more bell peppers.
That said, some guides suggest heavy nitrogen fertilizers throughout the entire growth cycle, but those guidelines are based on research for greenhouse growers with significantly different conditions than our outdoor gardens receive. I would not suggest doing this.
In fact, a research study by Vadillo et al. (2024) specifically looks at outdoor growing conditions and they found that a balanced fertilizer performed the best. (They did not look at front-loading).
Critical stage for watering
We all know vegetables should be well watered, but I'm sure you've gotten lazy at some point just like me. The plant struggles a bit, but you assume it will eventually bounce back, right?
Bell pepper plants have a critical stage where they need water. It's from transplant until you let the first flowers open. Failure to provide adequate water will significantly reduce the number of flowers, which means you'll get less bell peppers.
Research conducted by Ferrara et al. (2011) showed that, "during the vegetative phase, water stress significantly reduced the number of flowers per plant." In the study, well watered plants had triple the number of flowers as water-stressed plants.
They further found that setting fruit (once the flowers were pollinated) wasn't affected by water stress, although consistently irrigated plants did perform better overall.
My conclusion is that if you tend toward laziness as the season drags on, you can get by. Just make sure you are watering really well for the first 4-8 weeks after transplant.

Removing flowers & pinching back plant
Want to know the secret to growing bigger bell pepper plants that produce more peppers? You should try removing early flowers and pinching back the plant stems.
This lets the pepper plants get bigger so it can support more peppers.
Why you need to remove flowers
Bell peppers plants love to flower early. I routinely see 6" tall nursery plants with several flowers. If you leave those early flowers on, you'll have super short plants that only produce a couple of peppers.
Once the flowers start to set, the plant moves its resources away from leafy growth and into bell pepper production. So it's important to remove flowers to let the plant reach a decent size first.
In general, you'll want to remove all flowers from the plant for 4-6 weeks after transplanting. You can let them start to flower once the plants are at least 12" tall and starting to look a little bushy.
This is important in all climates, even in cooler areas with short growing seasons.
Consider pinching back / topping the plant
Pinching back the plant, sometimes called 'topping,' is done to encourage more growth and stronger branches, which ultimately grows more peppers. Some gardeners swear by it and others claim it does nothing. So I've reviewed a bunch of research studies, looked to some experts for advice, and conducted my own test to get to the bottom of it.
First, how do you top a bell pepper plant? Pinch off the top cluster of 3 sets of leaves. MIGardener has a really excellent video that explains how it works and why you want to do it. If this confuses you at all, this video is a must-watch. At 8 minutes he demonstrates topping the plant, showing how small the plant still is at 30 days.
Now let's look at some research. A study conducted by Joshi et al. (2025) found that pinching pepper plants back twice after transplant yielded the biggest plants and most peppers. It appears that pinching it back twice is much more effective than just once.
They found that "pinching at 30 and 45 days after transplantation was found to be most effective which holds a significantly positive impact on both the growth and yield." They continue on to emphasize "the importance of pinching frequency and timing is demonstrated by the fact that double pinching consistently performed better than single pinching or no pinching."
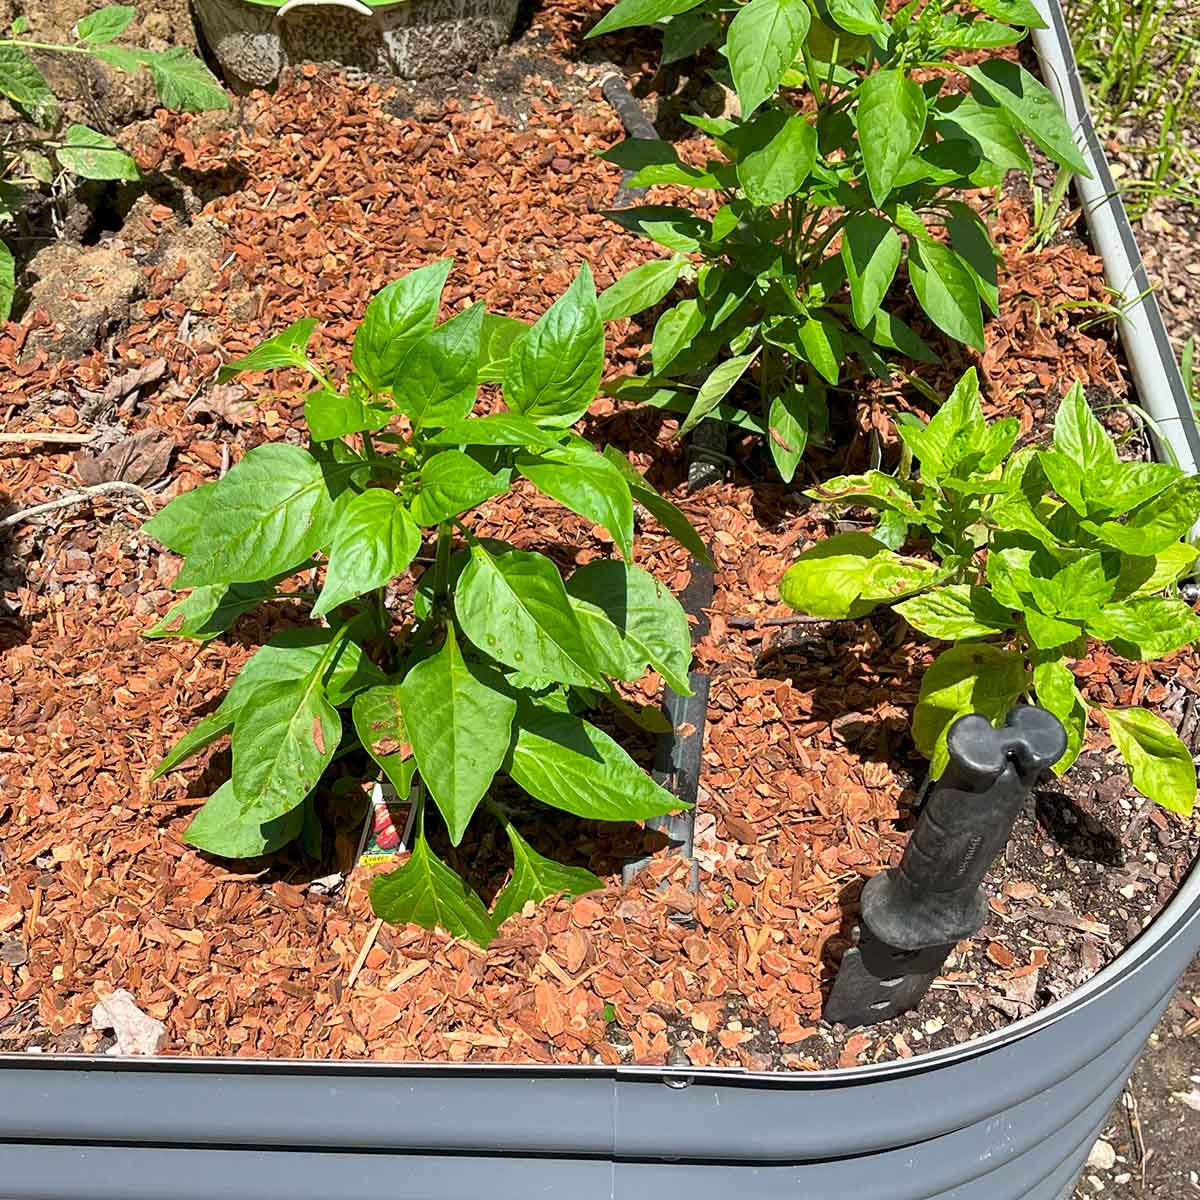
I experimented with this in my Chicago garden. I transplanted two North Star bell peppers next to each other, both getting full south-exposure sun. I pinched back one plant at 3 weeks and again 2 weeks later, leaving the other one untouched.
The plant that I pinched back produced 15 bell peppers, compared to only 6 for the other one. It's not a perfect test by any means, but it does follow the research results.
❄ That said, it may not work as well in cooler, short season climates. It can set the plants back too much to set and ripen peppers before your season ends. Try experimenting with it if you have the space.
🌡🌵 In hotter climates this helps create a bushier habit that can help shade the bell peppers from sunscald.
Growing bell peppers: a timeline
I wanted to share how bell peppers grow throughout the season with actual timelines and photos. I tracked the progress for a North Star bell pepper from a local nursery. I live in the Chicago area, zone 6A (the updated USDA zones).
If you are interested, I have an even more detailed timeline documenting the bell pepper growth stages. It follows the flowering and ripening stages more closely.
The photos are all completely unedited, with no color changes so you can get an accurate representation (rather than pretty colors and contrast that pops). A lot of these were taken on cloudy days (because that's when I like to garden!).
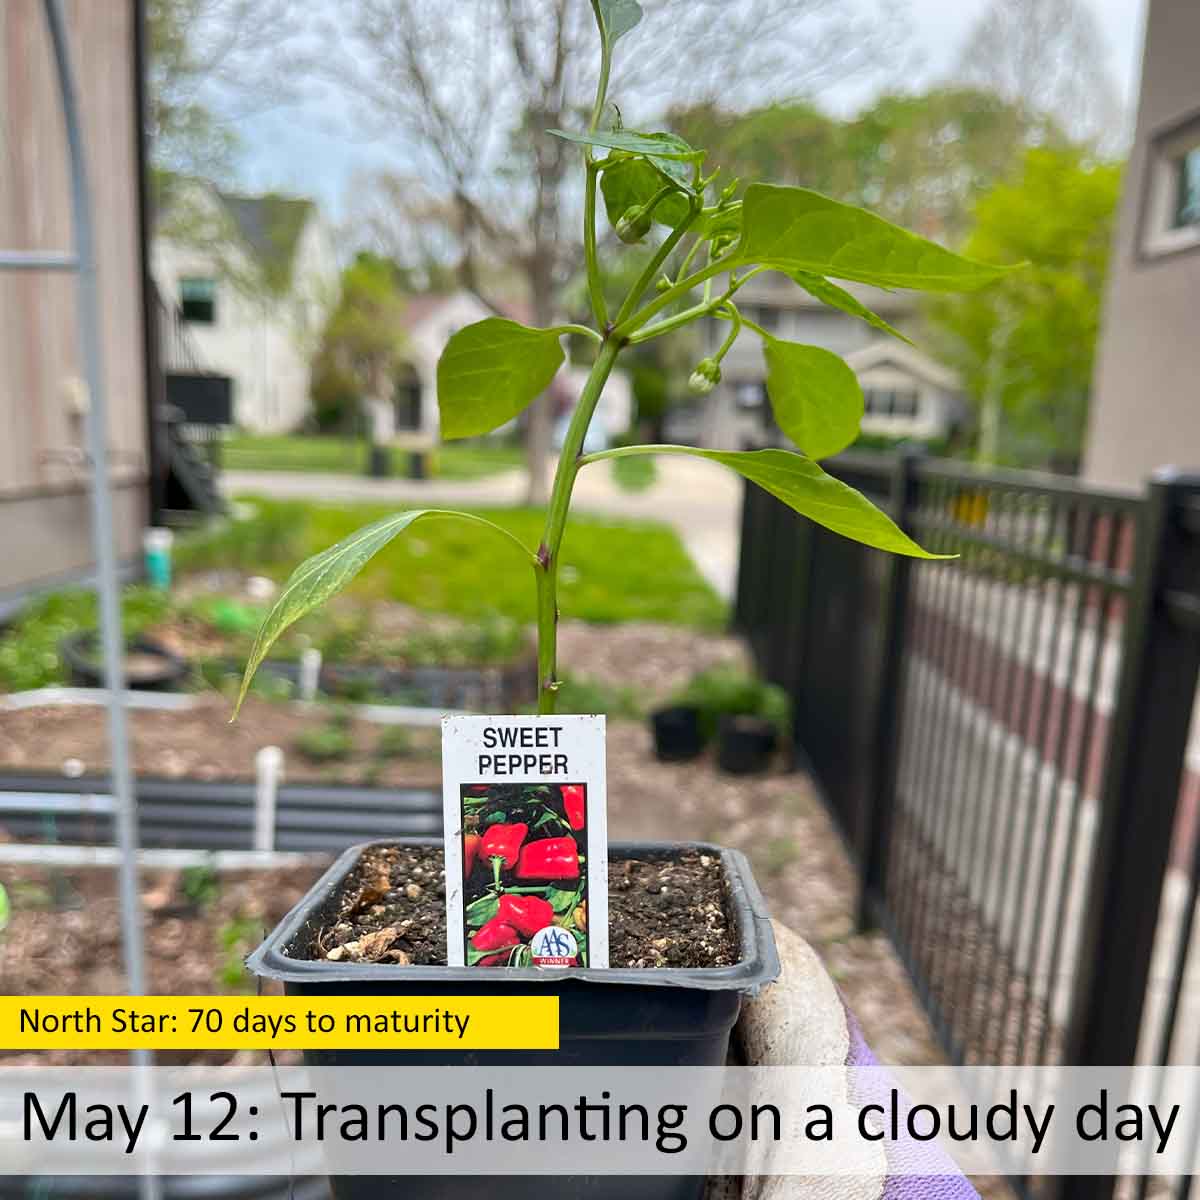
Transplanting on May 12:
The pepper is listed as 70 days to maturity. As we walk through the timeline, you'll see that it took longer for my growing zone (80 days), even with a summer well above average temperature.
I transplanted the peppers on May 12th in an 18" metal raised bed. I pinched off the flowers you can see were already forming at the top of the plant.
We had a warm spring with a really warm 10-day forecast. I wanted to take advantage of the mini heat wave and got the plants outside a week before I normally would. That week we reached a high of 95 degrees, dropping to a high of 57 later that week. Welcome to the erratic weather in the Midwest!
The nights averaged between 55-60F degrees, with a few nights dropping down to high 40s. I didn't provide extra warmth and the plants were fine and showed no signs of struggle.
At 3 and 4.5 weeks after transplant, I pinched the tops back to encourage bushier growth. (It's suggested to do this at 30 and 45 days, so I wasn't perfect on my timing).
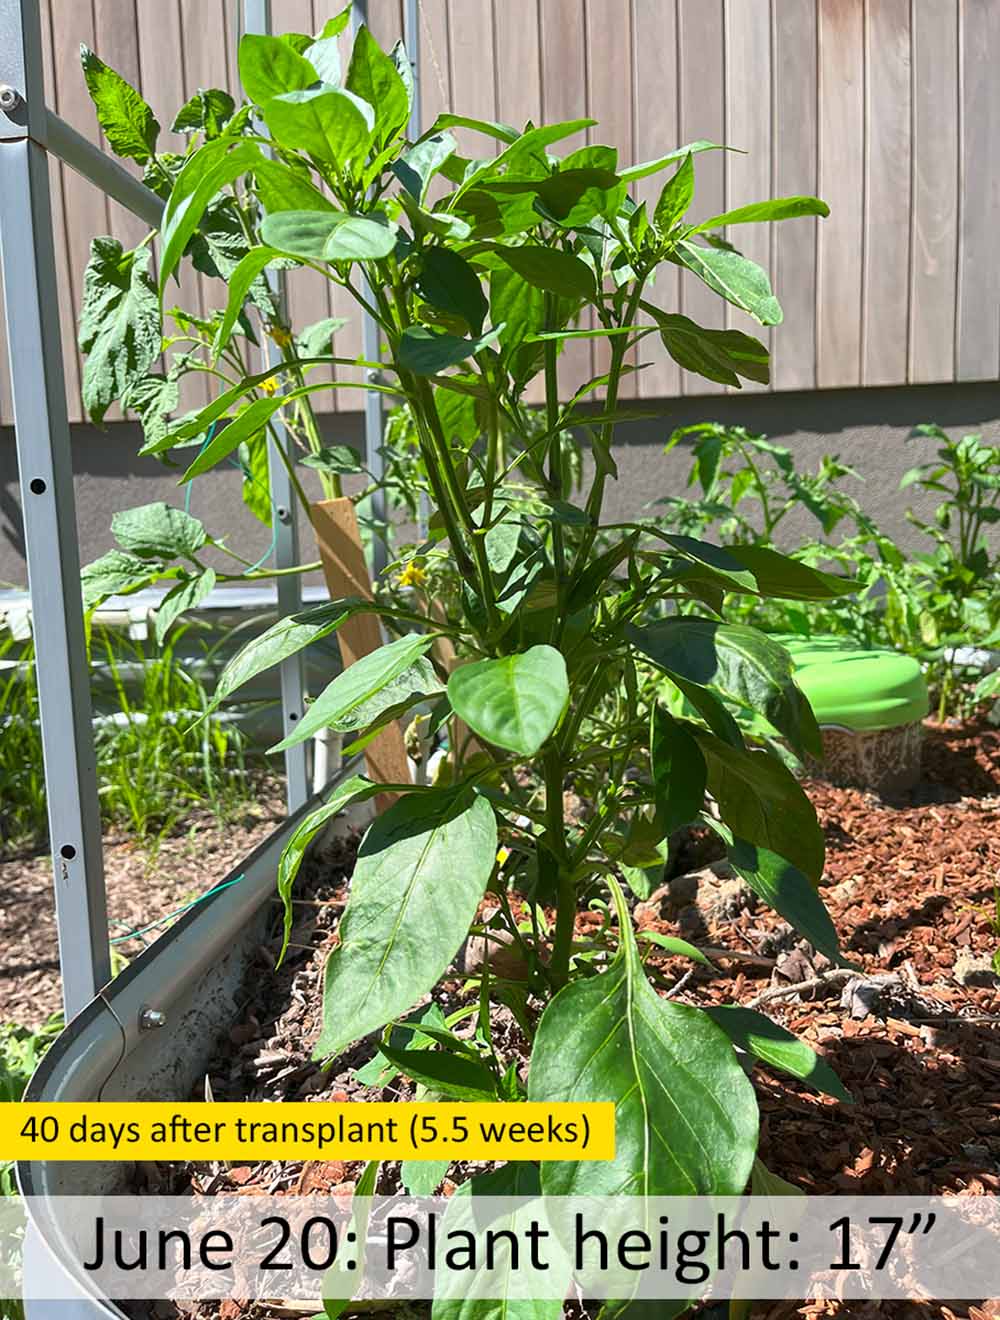
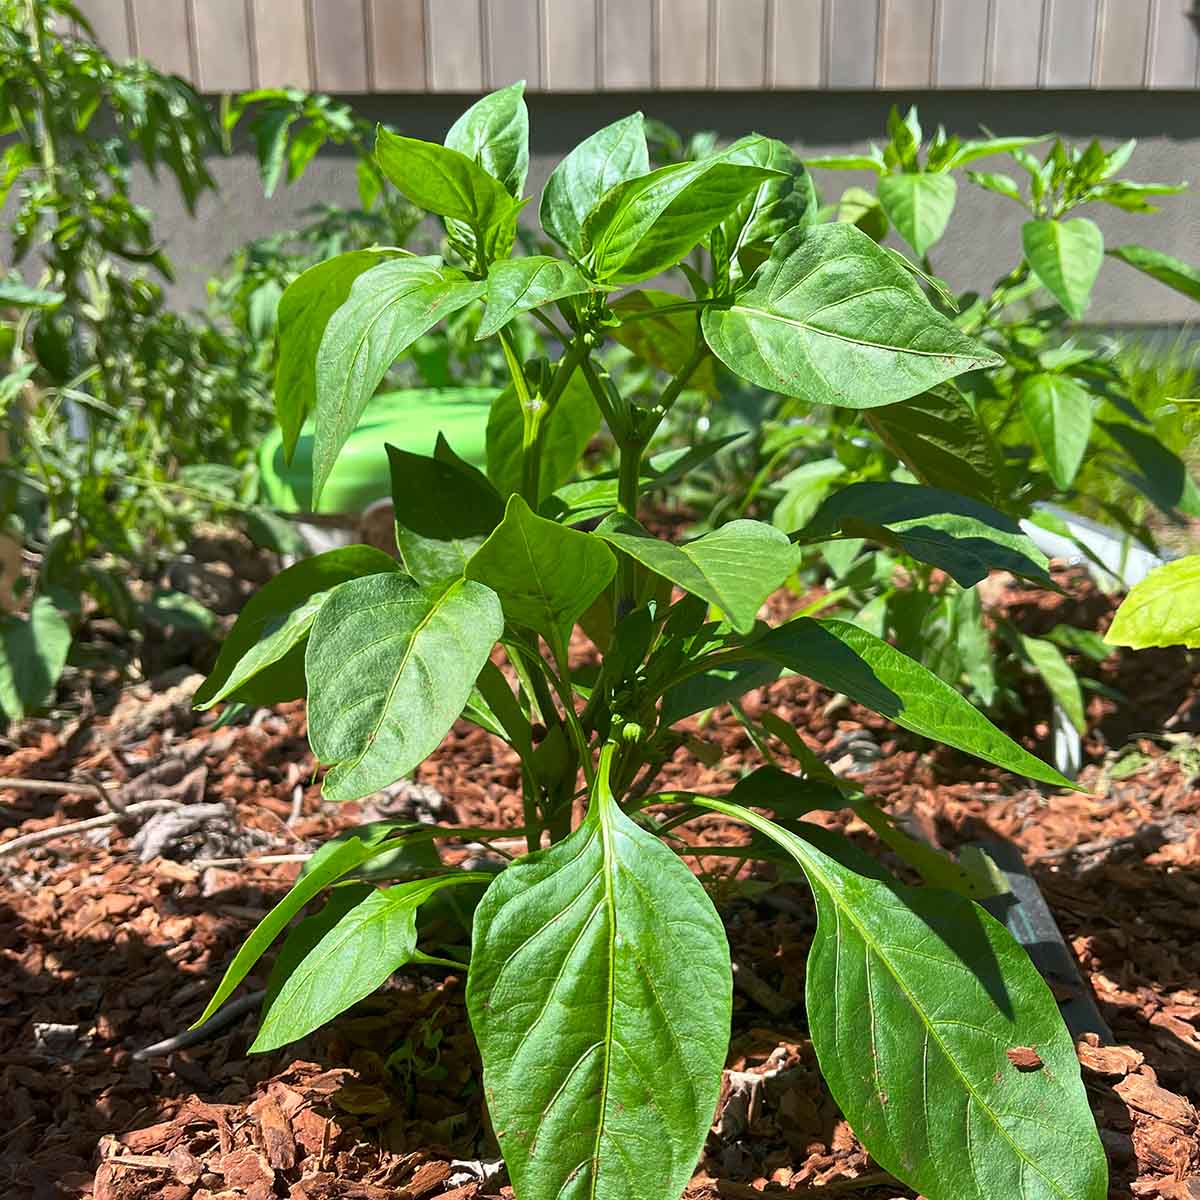
June 20: plant reaches desired height
The plants grew pretty well so I didn't pinch them back any more and let them flower and set fruit. We had another incoming heat wave with 10 days above 90F, averaging closer to 97-99F. (That's an extended, really hot period for my area).
During the heat wave, I hung shade cloth, added mulch where it was thin, and misted the plants at the hottest part of the day. I was worried flowers wouldn't pollinate during the heat wave.
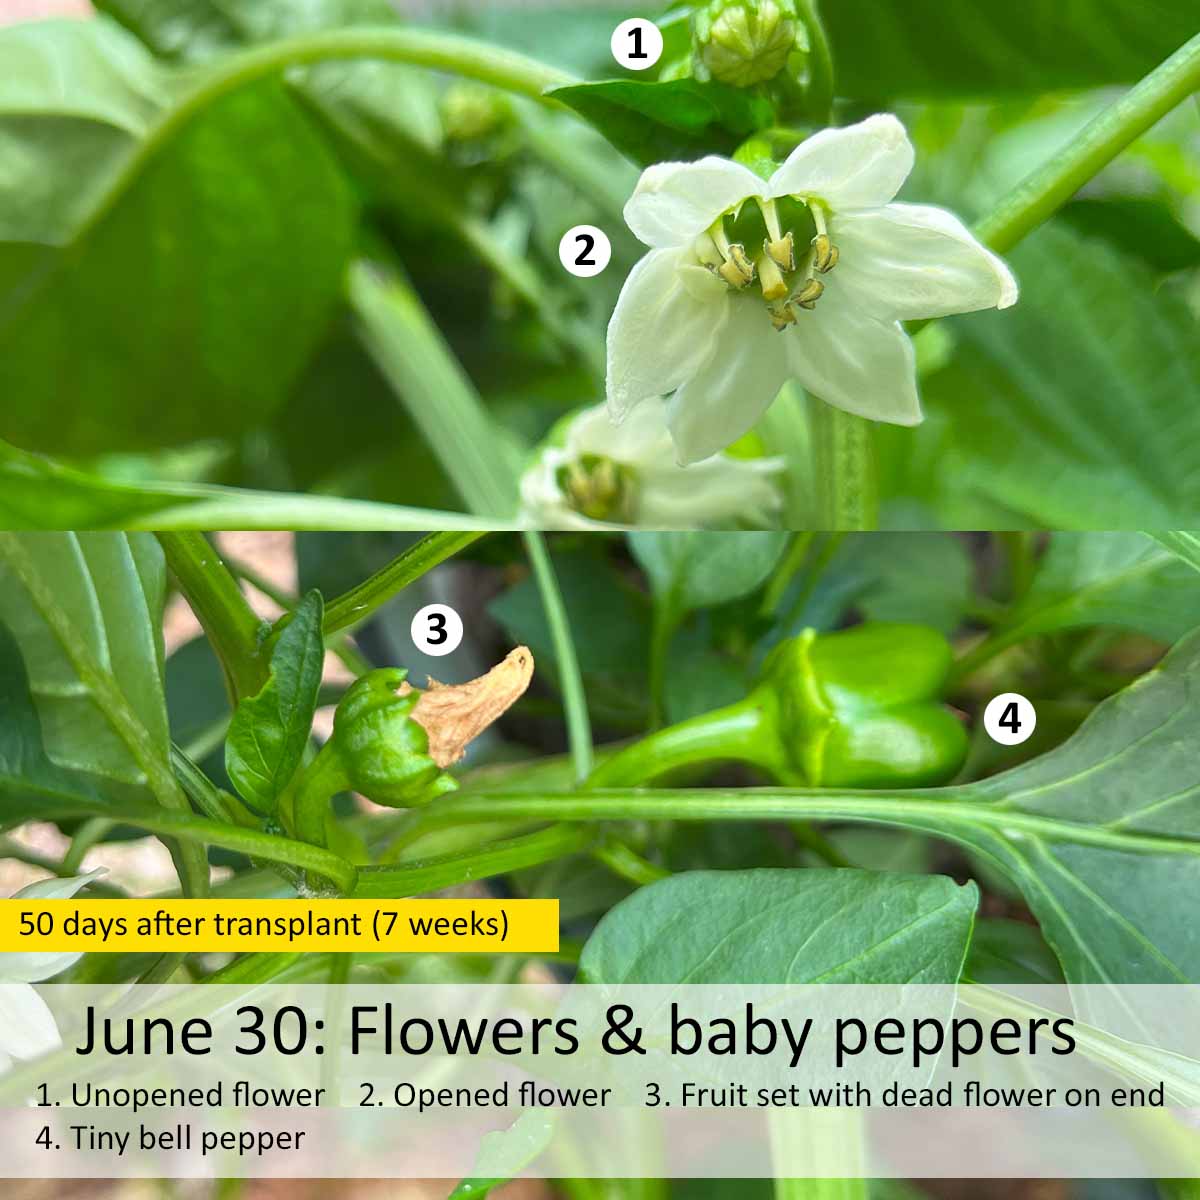
June 30 & July 4: signs of peppers!
Once I stopped pinching back the plant, it didn't take long for the flowers to show up and set fruit.
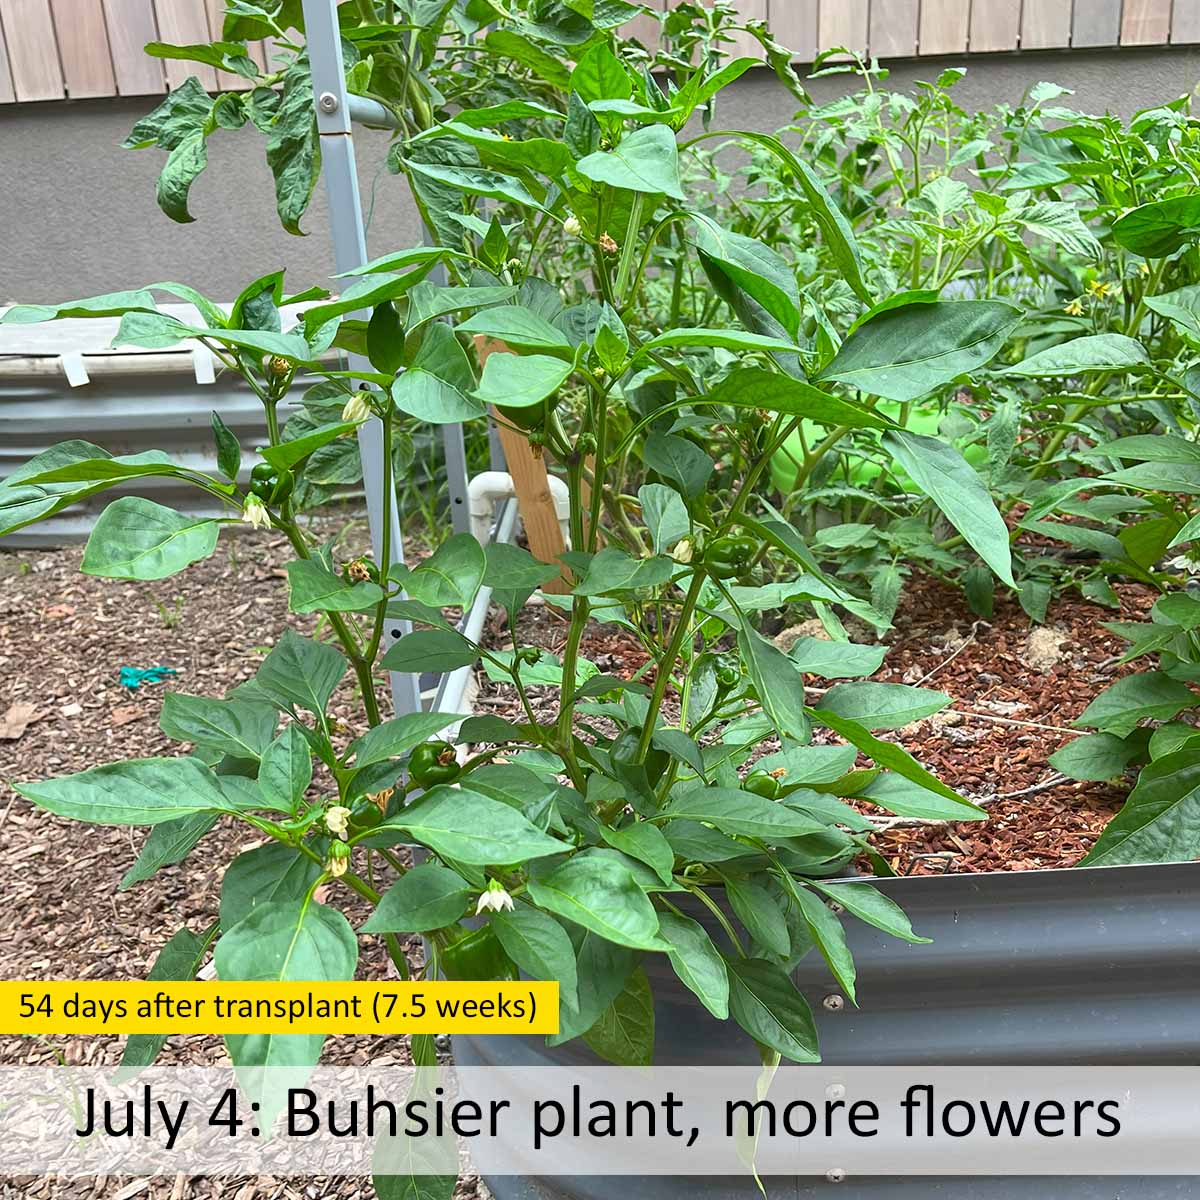
The plant is noticeably bushier than it was just 2 weeks ago. The height hasn't changed much (if at all). It also has a lot more flowers - at least 2 dozen at this point.

Mid-July: need to cage or stake the plant
This is why bell pepper plants really need to be caged or staked. The bell peppers weigh too much for the branches, even in a light wind event like I had one night. (Small sized peppers, like jalapenos, I've found are fine without extra support).
Even though the bell peppers were small, I still ate them. The walls were thinner than if they were fully mature, but they were still very crunchy with that classic green bell pepper flavor.
Before the branch broke off, I had 15 bell peppers on the plant.
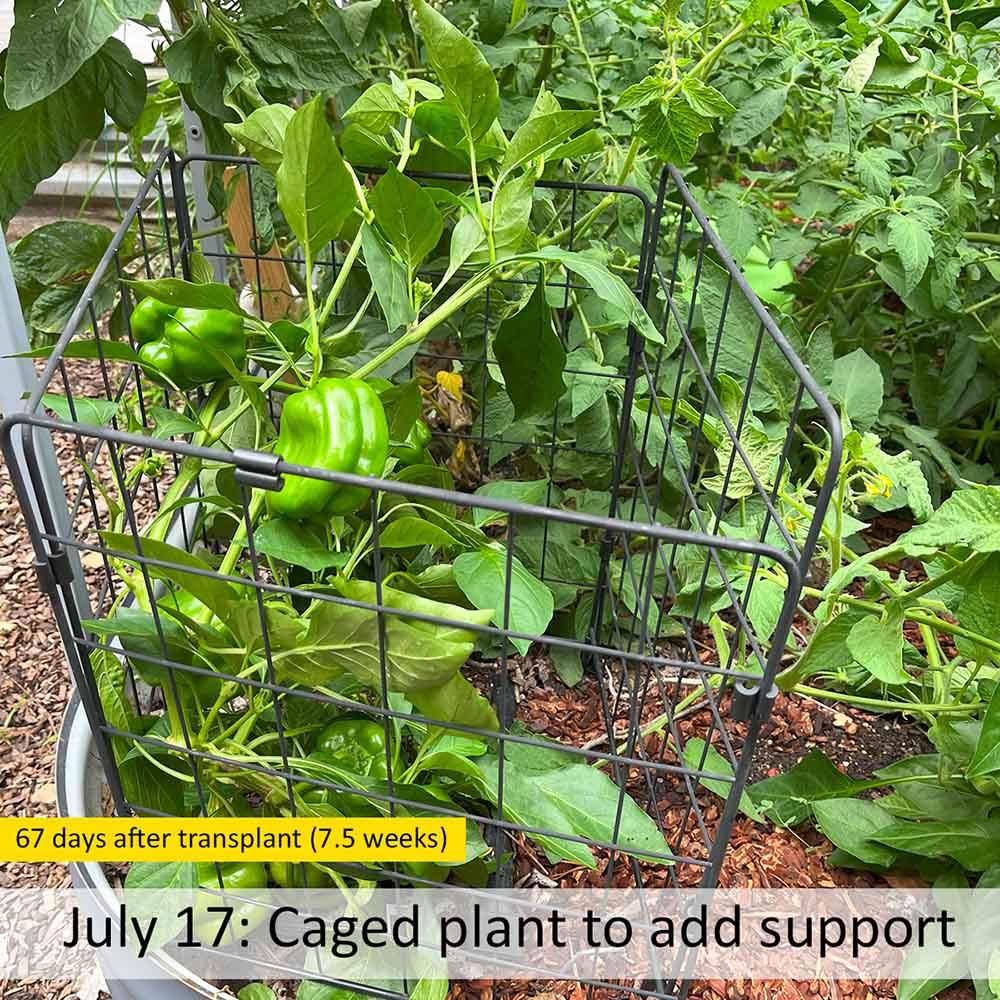
I relocated a cage I used to keep rabbits off my currants to the bell pepper plant after the branch broke. It's not fancy and far from perfect, but it provided enough support for the rest of the growing season.
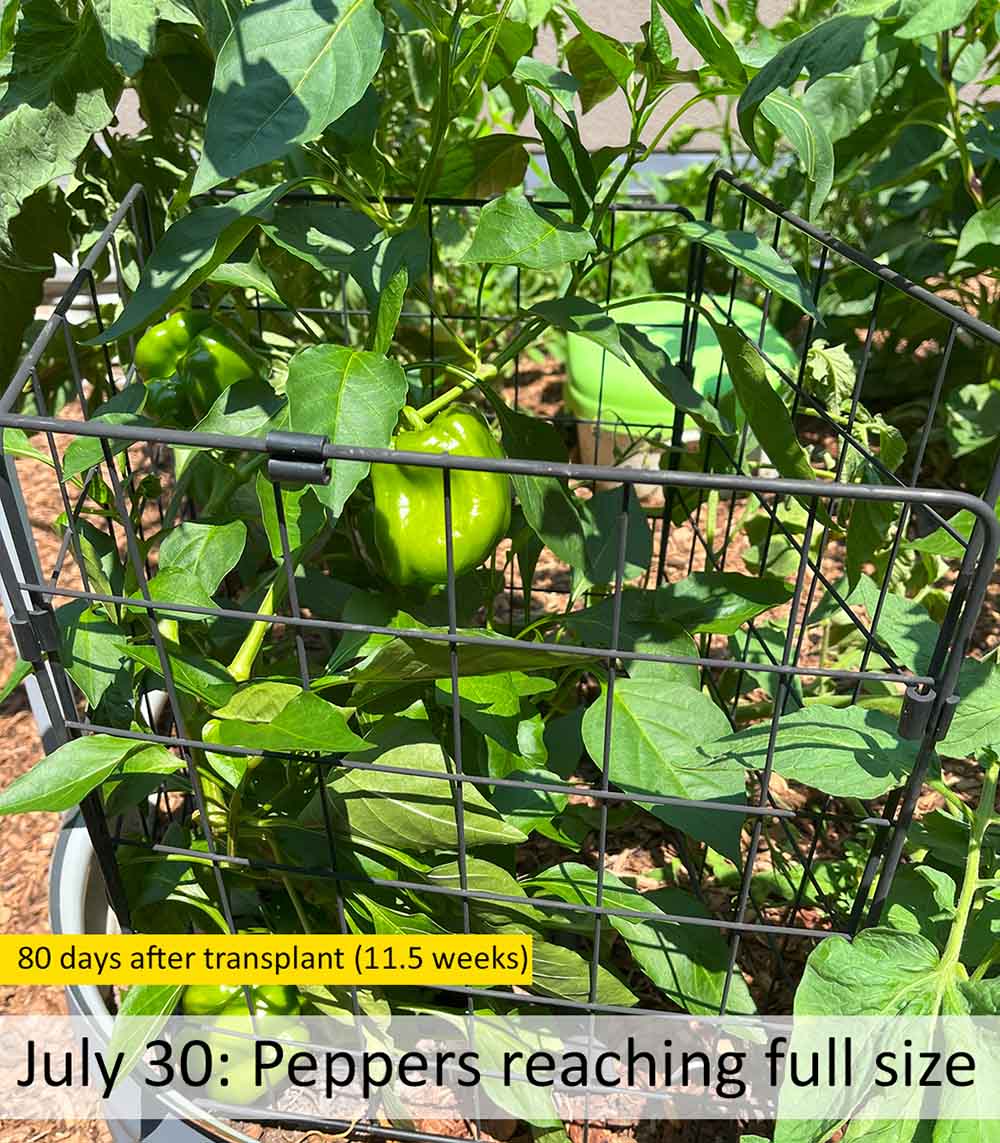
About a month after the flowers first set fruit, the bell peppers started reaching full size. Some of the flowers may have set 5 weeks earlier, but no more than that.
Our weather in June was well above average, clocking in with an average high of 87F. July's average high was 86F, providing a sweet spot of warm weather, but not too warm.
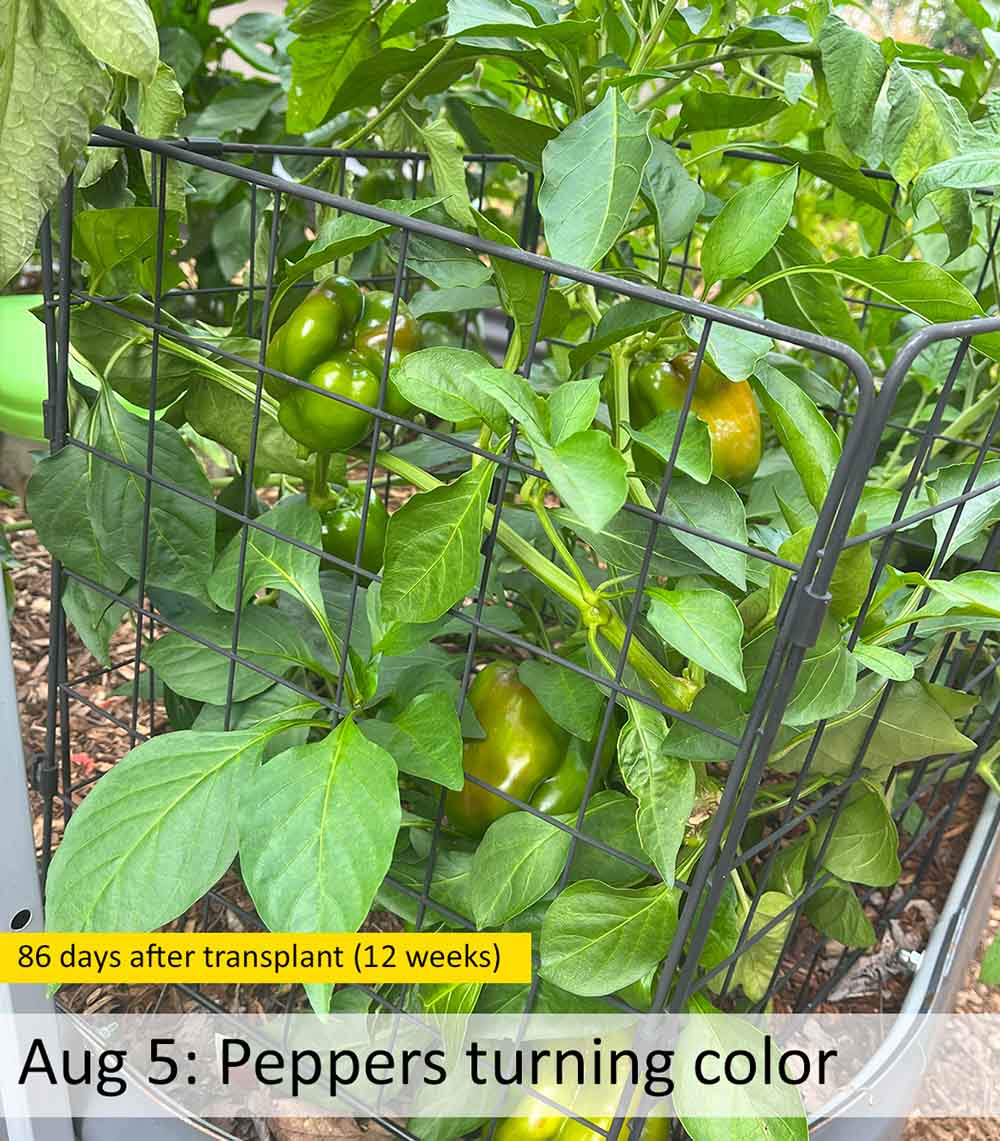
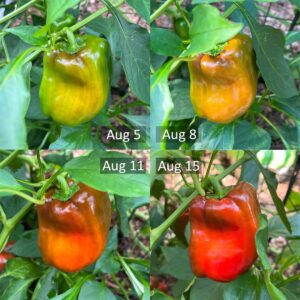
Quickly turning colors
Once the bell peppers seemed to reach full size, it didn't take long to notice hints of blushed red color. The color starts first on the areas facing the sun. It will take about another 3 weeks to be fully red. Keep in mind, they can be harvested at any point!
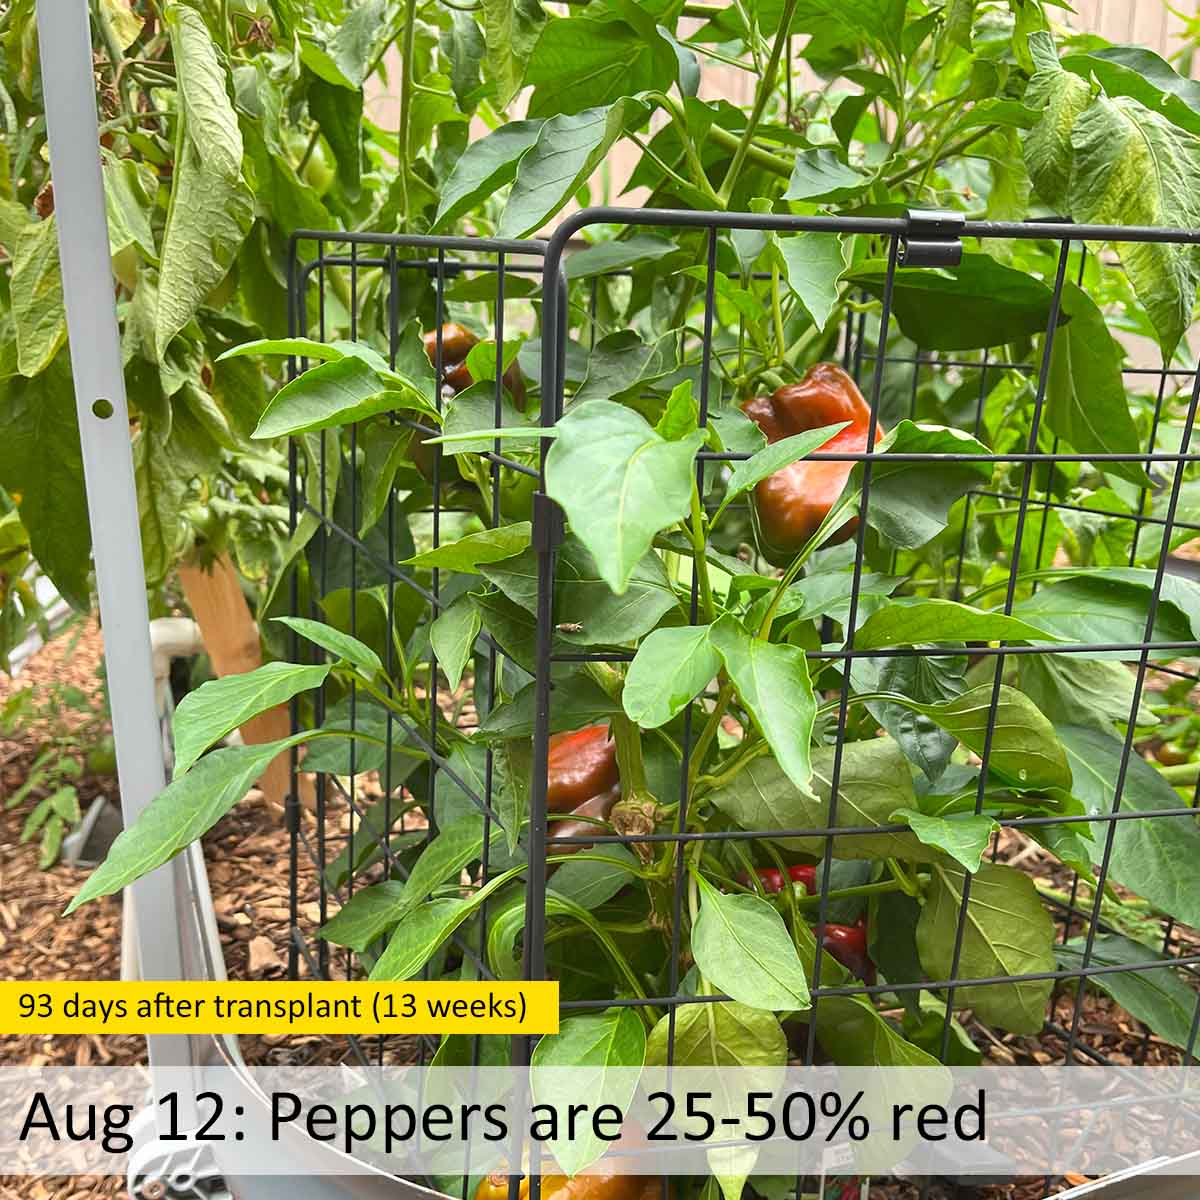
A week after the first signs of color, most of the full-green spots are gone on the front of the peppers. The parts facing the sun are showing first bright red spots. The backs are still green-ish, turning red.
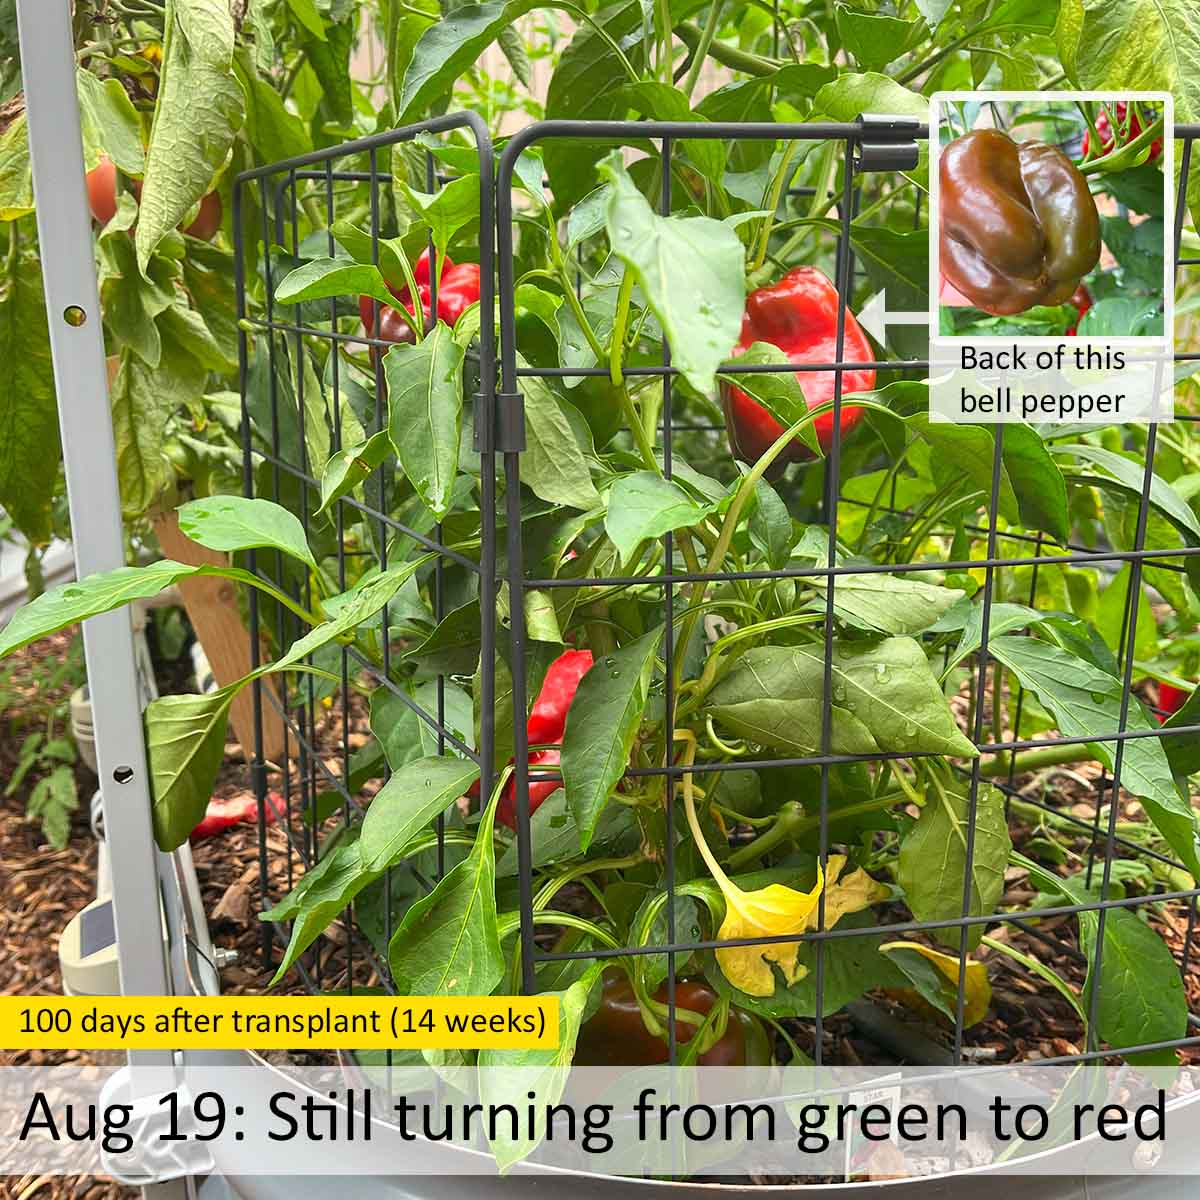
2 weeks after the bell peppers first started turning color, the front of the peppers are all bright red. The backs are still brown with the last hints of green. They will be fully red in another week.
They turned fully red about 4 weeks after they were full sized, and 3 weeks after they showed the first signs of color.
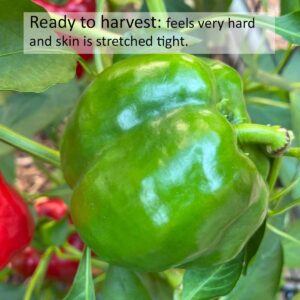
When to harvest bell peppers
If you see a large bell pepper on your plant and you want to eat it, you can! They can actually be harvested at any point, even when they are small they'll still be crunchy (but not as thick-walled).
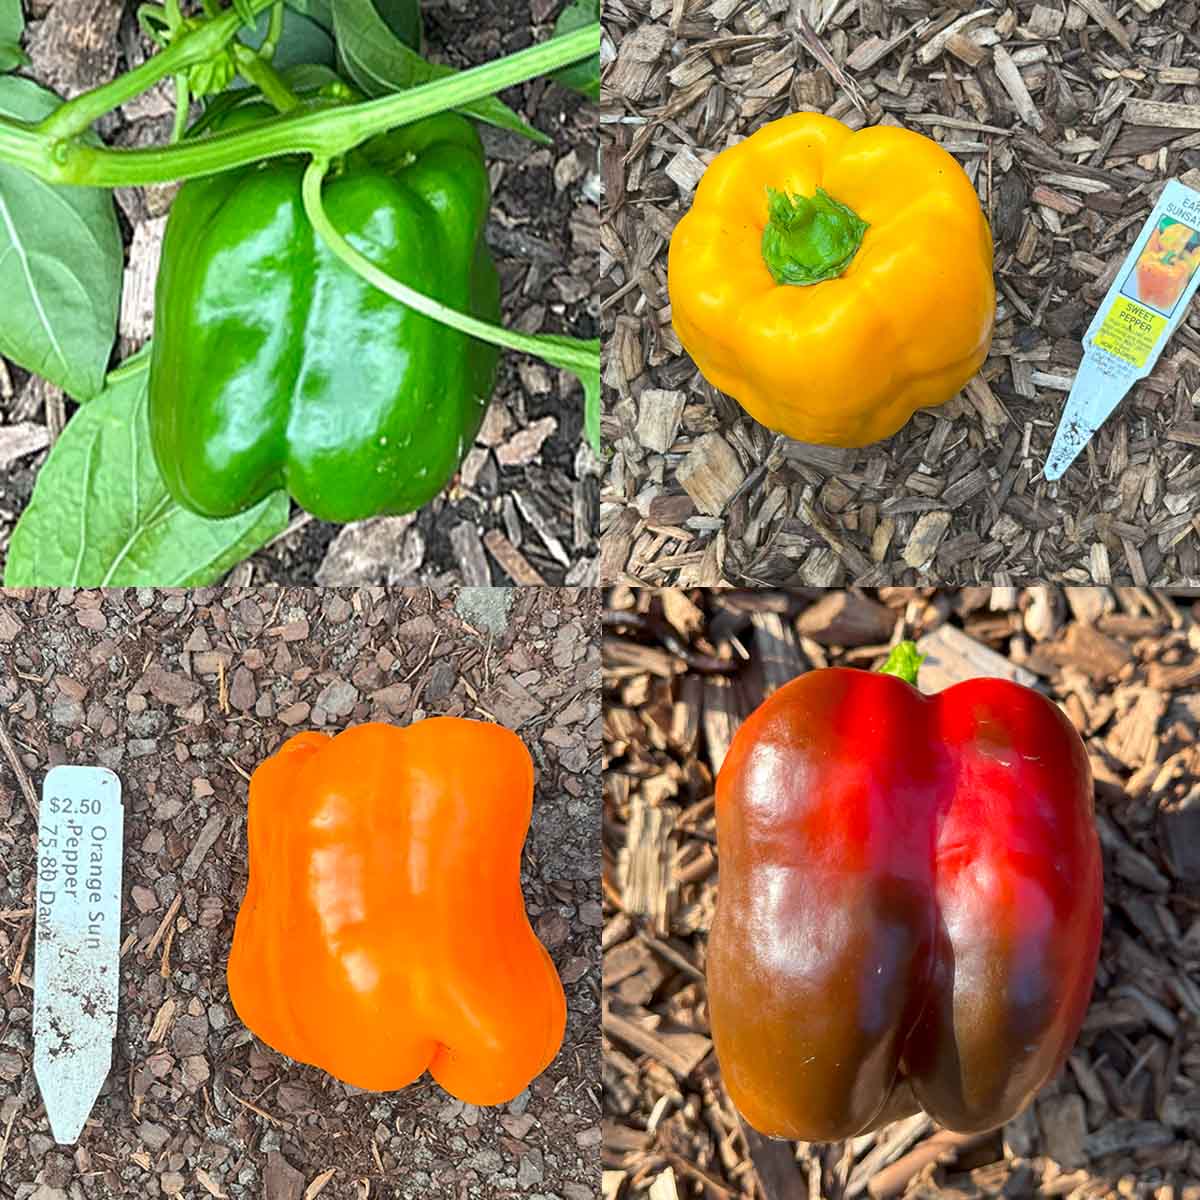
How do you know when bell peppers are mature? When they are full-sized, green, and firm, they are ready to pick. Or you can leave them on the plant to continue to ripen to red, orange, yellow (or even purple), which usually takes an extra 3 weeks.
You will see one or two peppers start to change color first. A bell pepper that's turning from green to red will look like a brown-purple color, until the red gains more ground and eventually turns bright red.
If you're peppers are really slow the ripen, and you're season is coming to an end, you can do a few things to try to speed them up.
- Remove flowers that show up late in the season - the plant won't have enough time to grow a fully mature bell pepper in short-season areas
- Harvest some of the mature bell peppers - this allows the plant to distribute it's finite resources to the remaining bell peppers, ripening them faster.
- I talk about these options in more detail in this article by Tenielle Jordison on Homes & Gardens.
More resources
I've also written bell pepper guides very tailored to particular climates. Instead of reviewing every step, the guides cover specific adaptations for your area.


If you liked this guide, check out my other garden resources.


CB says
Thanks for the very helpful article! What width in inches do you recommend for the cage?
Veronica T says
My cages are about 18" square. They don't have to be big, just enough to support the main stem and any heavy side stems. Those round wire tomato cages work well too.