Are you new to growing bell peppers and want to know what to expect? Or maybe you've grown them in the past but they haven't produced well. I'm here to help!
I've documented the bell pepper growth stages so you can follow along in your own garden. This guide shows you how long it takes for the plant to flower, set fruit, produce mature green bell peppers, and finally, ripen to their full red, orange, or yellow color.
A few tips & tricks are peppered throughout the article (pun intended!), along with a link to my full bell pepper growing guide at the end.
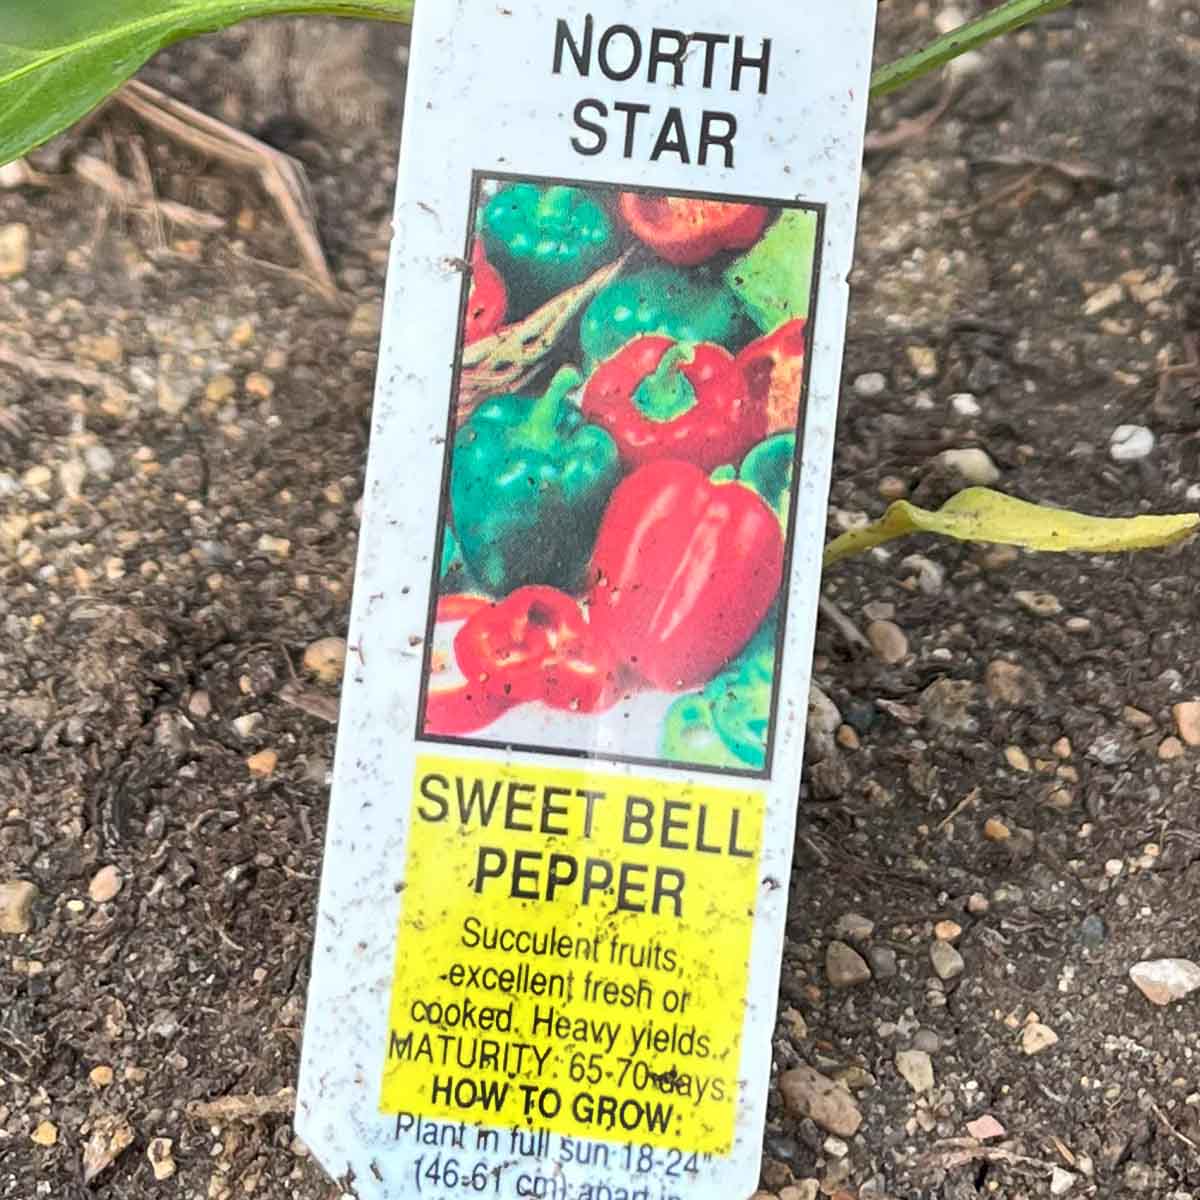
The photos are from my North Star bell pepper plant, growing in the Chicago area (Zone 6a). This location is in the middle of US climate ranges. If you're cooler, each growth stage will take a little longer, and will be shorter in the warmer areas of the country.
Jump to:
Days to maturity
First, we need to quickly tackle the term, "Days to Maturity." This will help you follow along with the growth stages, demonstrating the time it actually takes bell pepper plants to grow and ripen.
"Days to Maturity" is a pretty loose term and not every seed vendor follows the same rules. That said, bell peppers are typically labeled for when they are mature and green. Peppers will continue to ripen to red (or orange, etc), which usually takes an extra 3 weeks.
The average bell pepper will be labeled as mature in 75-80 days. Early maturing varieties are listed as 70 days or less.
These guidelines are based on perfect conditions - so in cooler climates a bell pepper that is listed to mature in 70 days will probably take closer to 90 or 100.
I live in the Chicago region (USDA zone 6A) and the North Star bell pepper I grew took 80 days to reach maturity, when the label says it takes 65-70 days. It took another 3 weeks to turn fully red.
Plant stages
I tracked my bell pepper plant growth stages from transplant until fully ripe. The plant is in a raised bed with a garden soil mix from a local nursery made of topsoil (mostly clay), sand, and mushroom compost.
It's south-facing with no obstructions, getting full sun from sunrise to sunset. Plants are spaced 18 inches apart.
The photos are all completely unedited, with no color changes so you can get an accurate representation of the plant (rather than pretty colors and contrast that pops). A lot of these were taken on cloudy days (because that's when I like to garden), so they may look dull at times.
Transplanting day
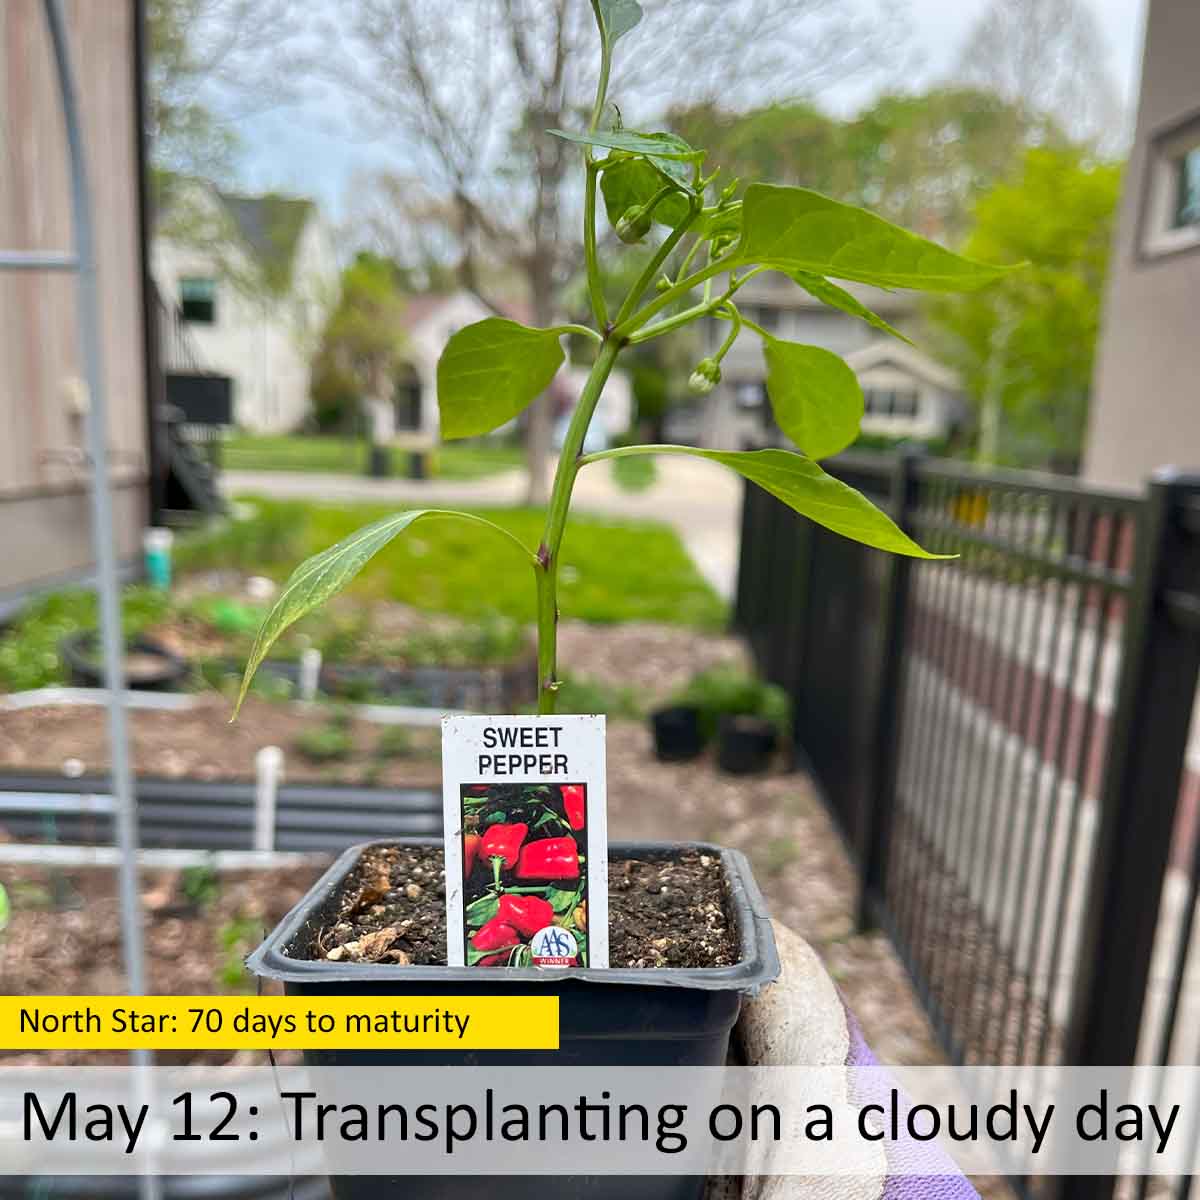
The North Star pepper is listed as 70 days to maturity. As we walk through the plant's timeline, you'll see that it took longer for my growing zone (80 days), even with a summer well above average temperature.
I transplanted the peppers on May 12th in a metal raised bed. Here are some notes at the time of transplant to make that happen:
- Cloudy day: I transplanted on an overcast day because it's easier on the plants, especially since I did not harden them off.
- Removed flowers: I pinched off the flowers you can see were already forming at the top of the plant - so it can focus on leafy growth.
- Fertilizer: I mixed a balanced fertilizer into the planting hole.
- Nitrogen boost: I added blood meal to the transplant hole for an extra boost of nitrogen without burning the roots. The extra nitrogen promotes leafy growth at this stage.
We had a really warm 10-day forecast early in spring. I wanted to take advantage of the mini heat wave and got the plants outside a week earlier than previous years. That week we reached a high of 95 degrees, dropping to a high of 57 later that week. Welcome to the crazy weather in the Midwest!
The nights averaged between 55-60F degrees, with a few nights dropping down to high 40s. When temperatures drop below 50F, bell pepper plants can really struggle and sometimes suffer a little cold damage.
However, I took a gamble because the temperature in that part of the yard is consistently warmer than the reported temperatures on weather apps, so I didn't provide extra warmth. The plants were fine and showed no signs of struggle.
Vegetative growth stage
From transplant until about 4-6 weeks later, you want to make sure the plant stays in a vegetative growth stage. You want it to grow taller, produce more branches, and make a ton of leaves.
The more leafy growth the plant can put out at this stage, the more bell peppers it can support. Each leaf absorbs sunlight and converts it into energy through a complex system. The more leaves you have, the more energy it can produce.
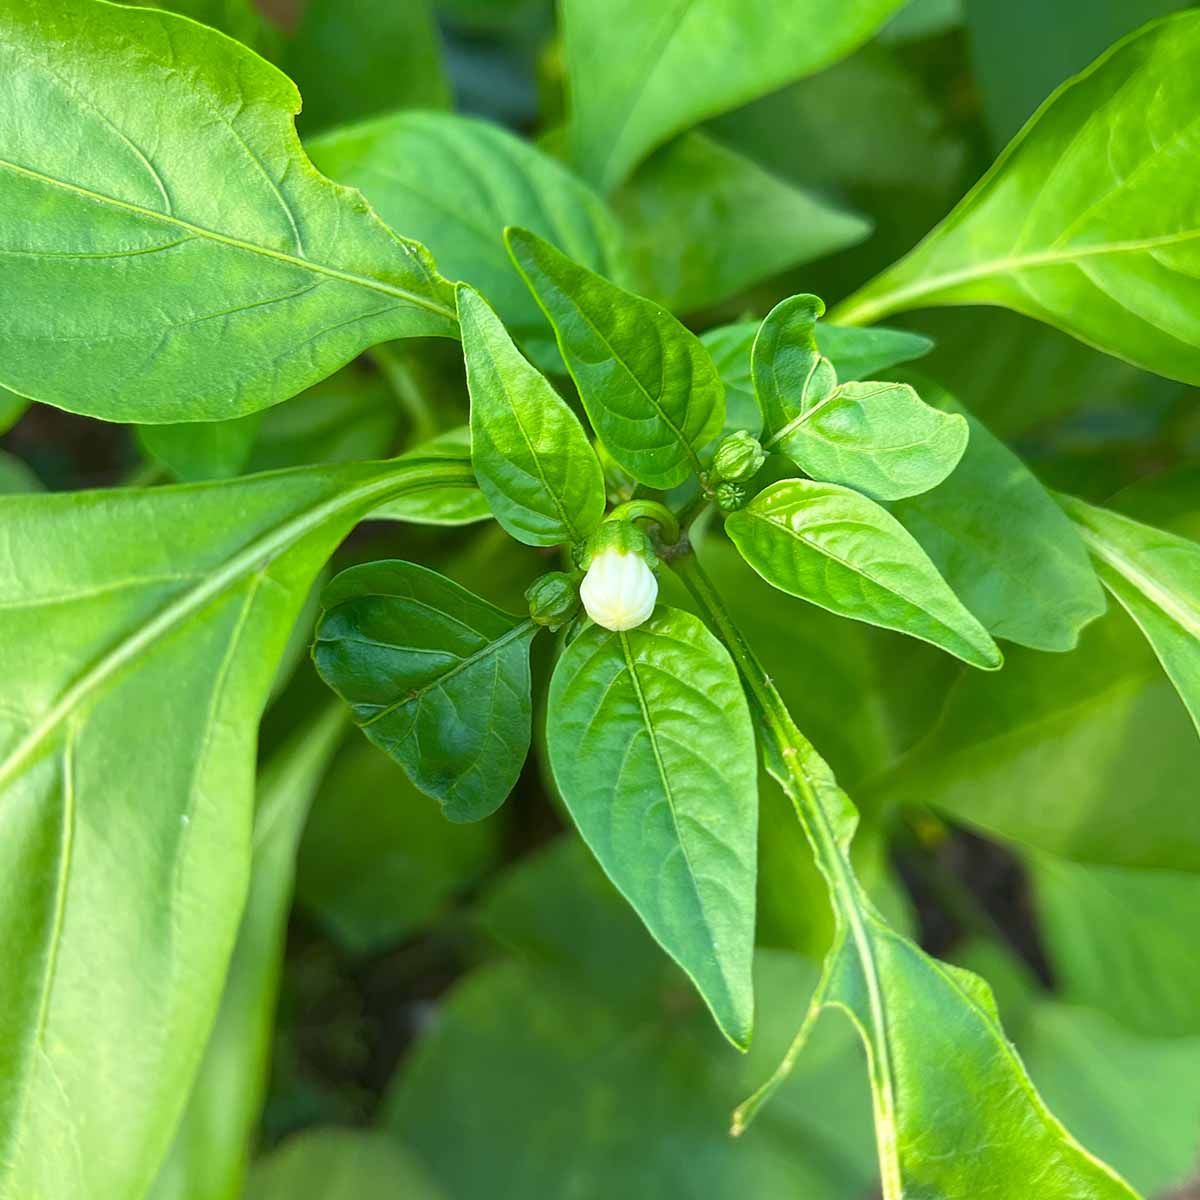
To keep your bell pepper plant in the vegetative growth stage, you'll need to remove flower buds for 4-6 weeks after transplant. In the photo above you can see one was about to open, as I hadn't checked on the plants for almost a week.
Once flowers are let to bloom and set, the plant shifts energy to the bell peppers. If you leave early flowers on, you'll end up with a smaller plant (and ultimately, less bell peppers).
Pinching back the plant
You can encourage even more leafy growth by pinching back the plant, also called 'topping' the plant. This forces the plant to branch and focus on growth more than flowers.
Although this is someone hotly debated in forums and garden groups, research shows that pinching back bell peppers can double the yield. The best results were from tests that pinched back twice, at 30 and 45 days.
I tested this on two different North Star plants. The one that I topped produced 15 peppers, and the one I didn't top only produced 6. I pinched the plant back at 3 and 4.5 weeks after transplant, which didn't follow the suggested 30 & 45 day timing, but close enough.
Flowering stage
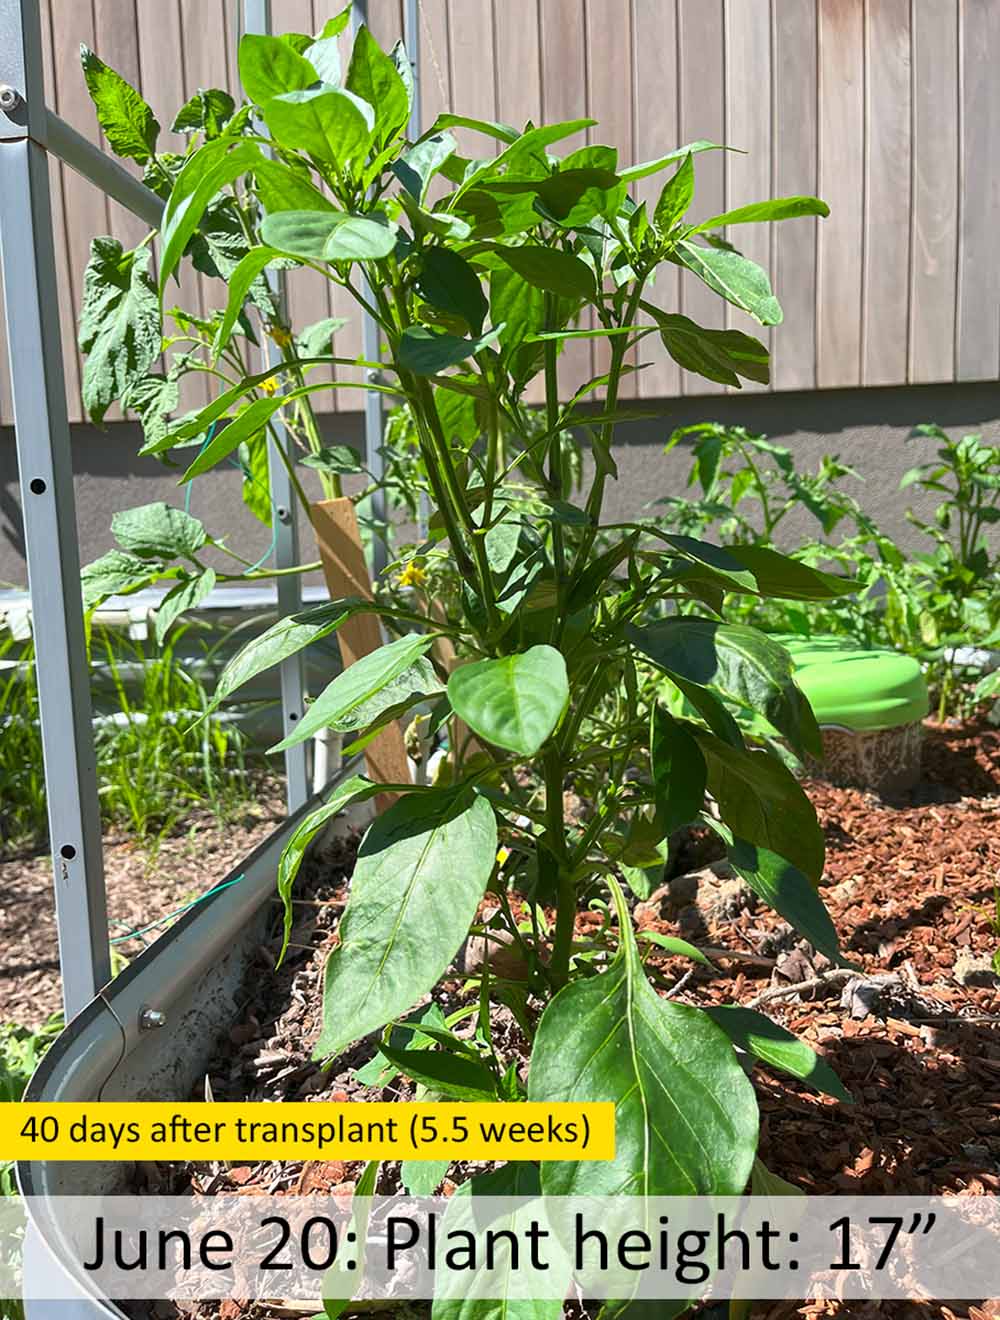
The plant grew pretty well after pinching it back. It reached a desirable height, near 18 inches. At this point, I let it enter its reproductive growth stage to set flowers and pollinate.
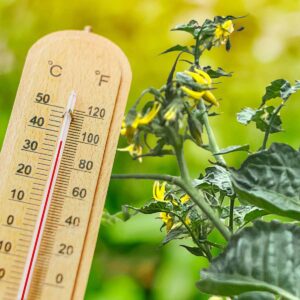
We had another incoming heat wave with 10 days above 90F, averaging closer to 97-99F. That's an extended, really hot period for my area.
Bell pepper plants don't pollinate well and can drop flowers when temperatures rise past 90-95F. This heat wave had several days near 100F, so I was a bit worried this was happening right when I let them flower.
This time, I took protective measures. I hung shade cloth, added mulch where it was thin, and misted the plants at the hottest part of the day. This dropped the temperature anywhere from 5-10F degrees, depending on the time of the day, the wind, etc.
First signs of peppers
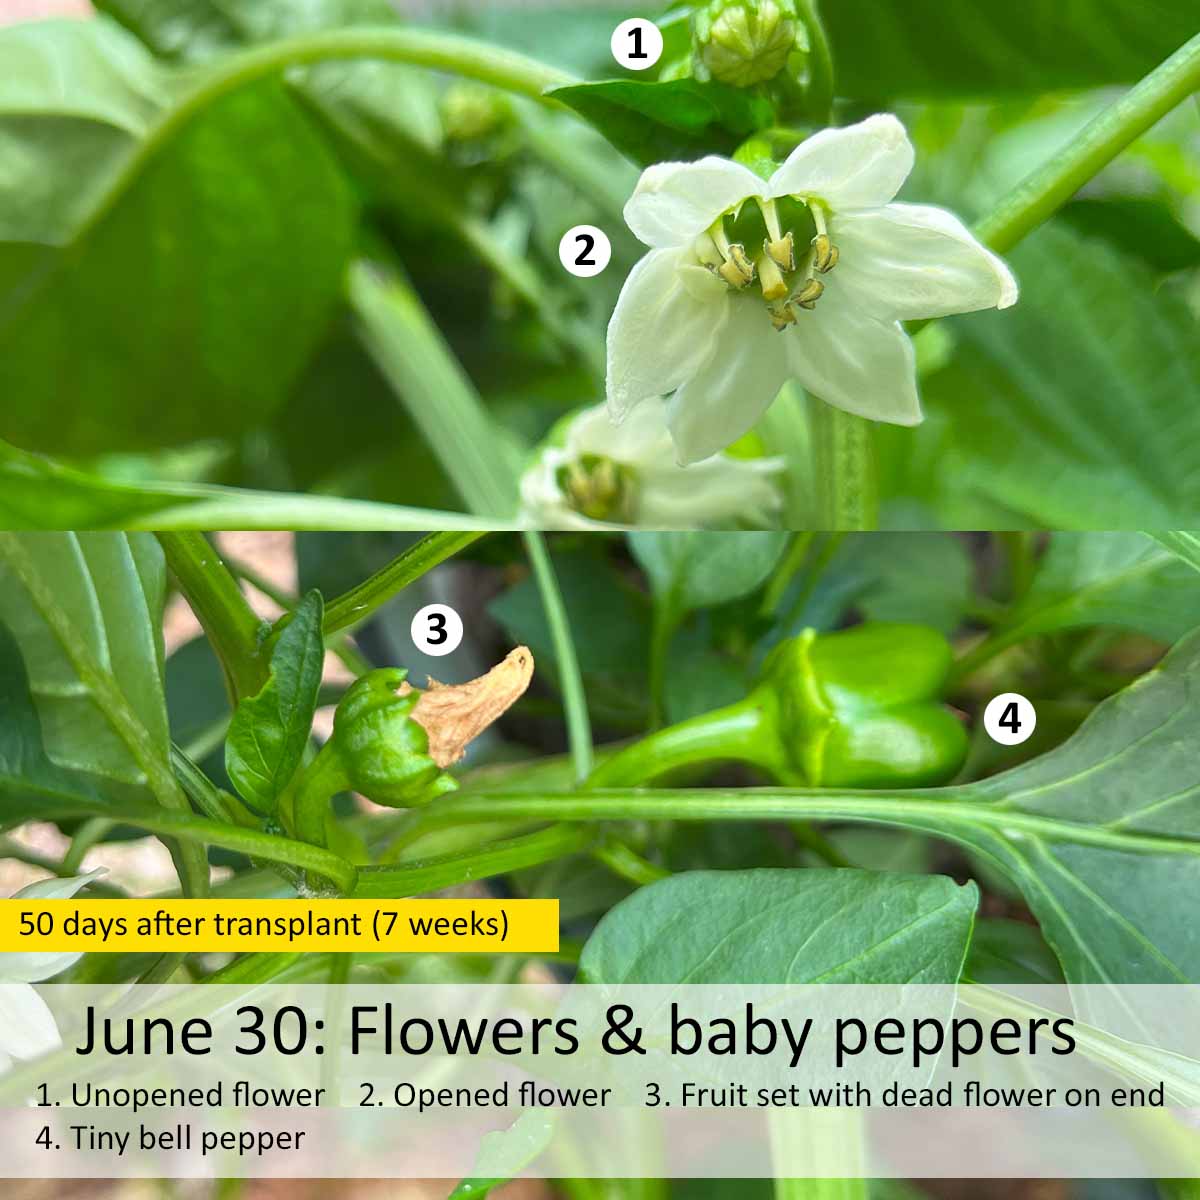
10 days after I last pinched back the plant, I had my first tiny bell peppers on June 30th. The photo above shows flowers in different growth stages.
Below are a series of photos that I took of the same spot on the same branch to show you progress. You can see an orange ribbon at the bottom of some of the pictures, which was my marker for tracking the photos.
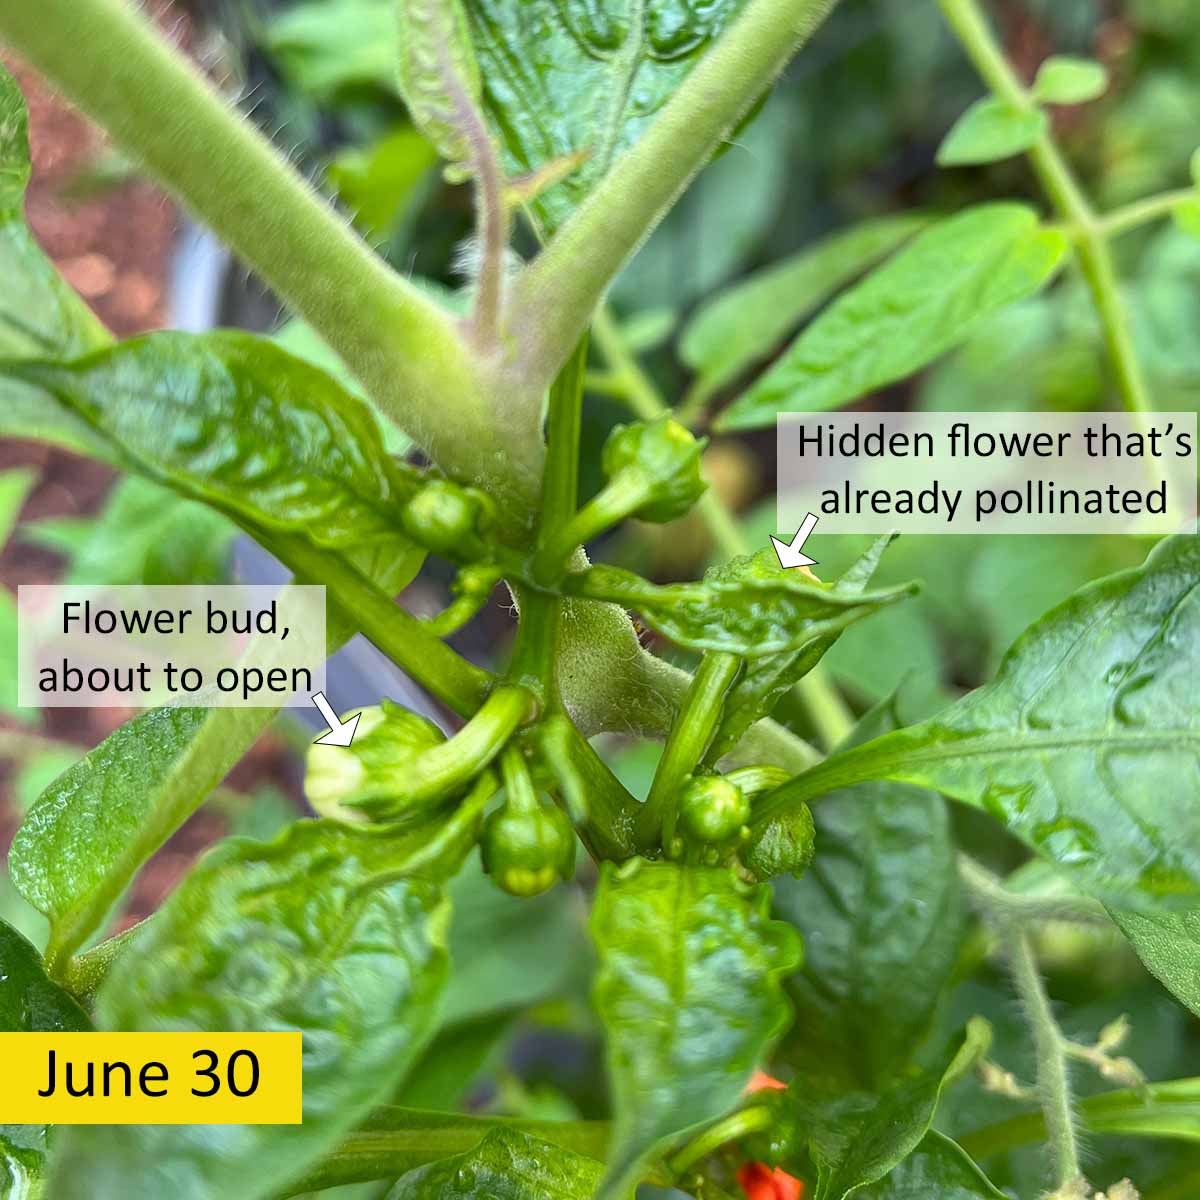
I took this photo on June 30th, showing a big cluster of flowers. At this stage, the plant is producing a ton of flowers. Not all of them will produce a bell pepper - the plant can't support that many all in a single spot (there's not enough room!). Some of the flowers will drop or abort fruit.
There's a flower that's pollinated in the back, and you'll see it show up in a couple more pictures as a baby pepper.
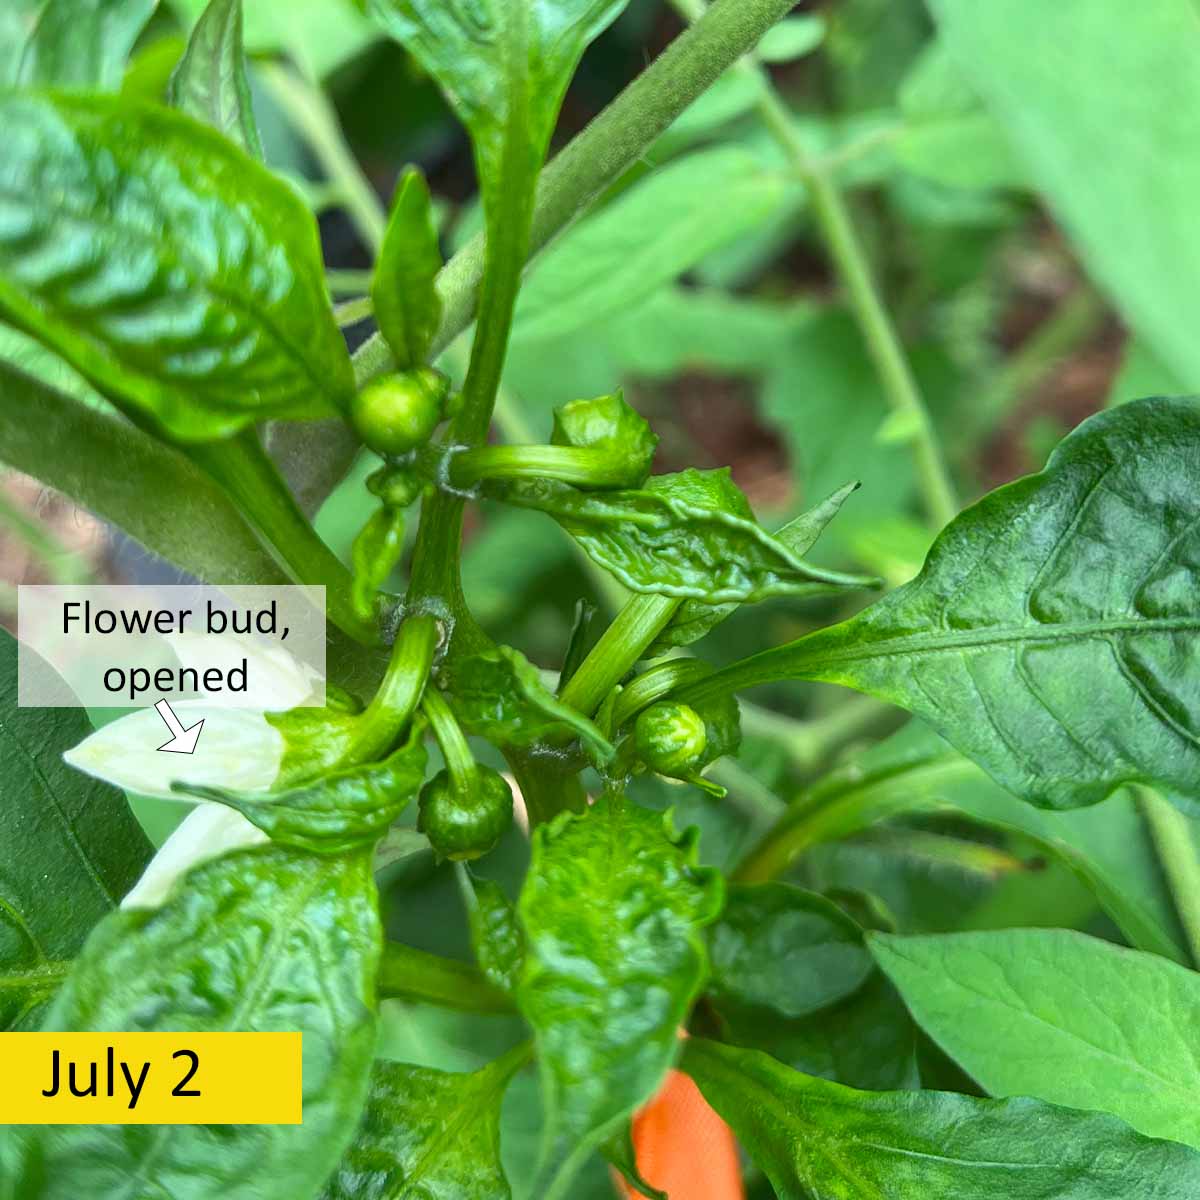
In the photo above, taken 2 days later, you can see the one flower opened. The rest appear relatively unchanged.
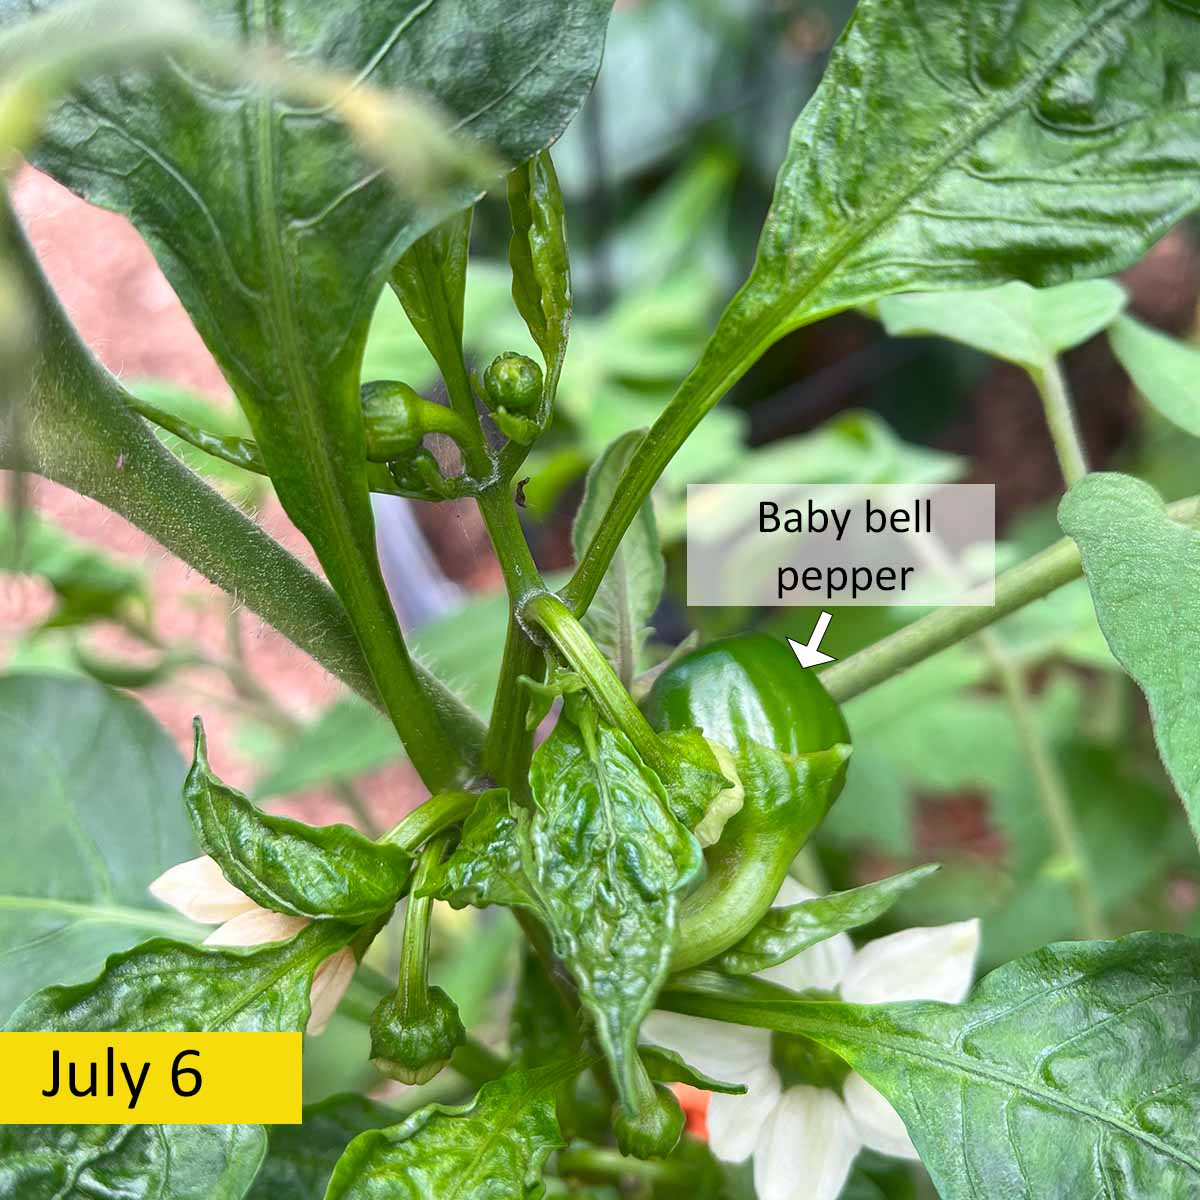
The flower that was hidden, but pollinated in the first picture now shows a baby bell pepper, 6 days later. The flower on the left that opened is now fading.
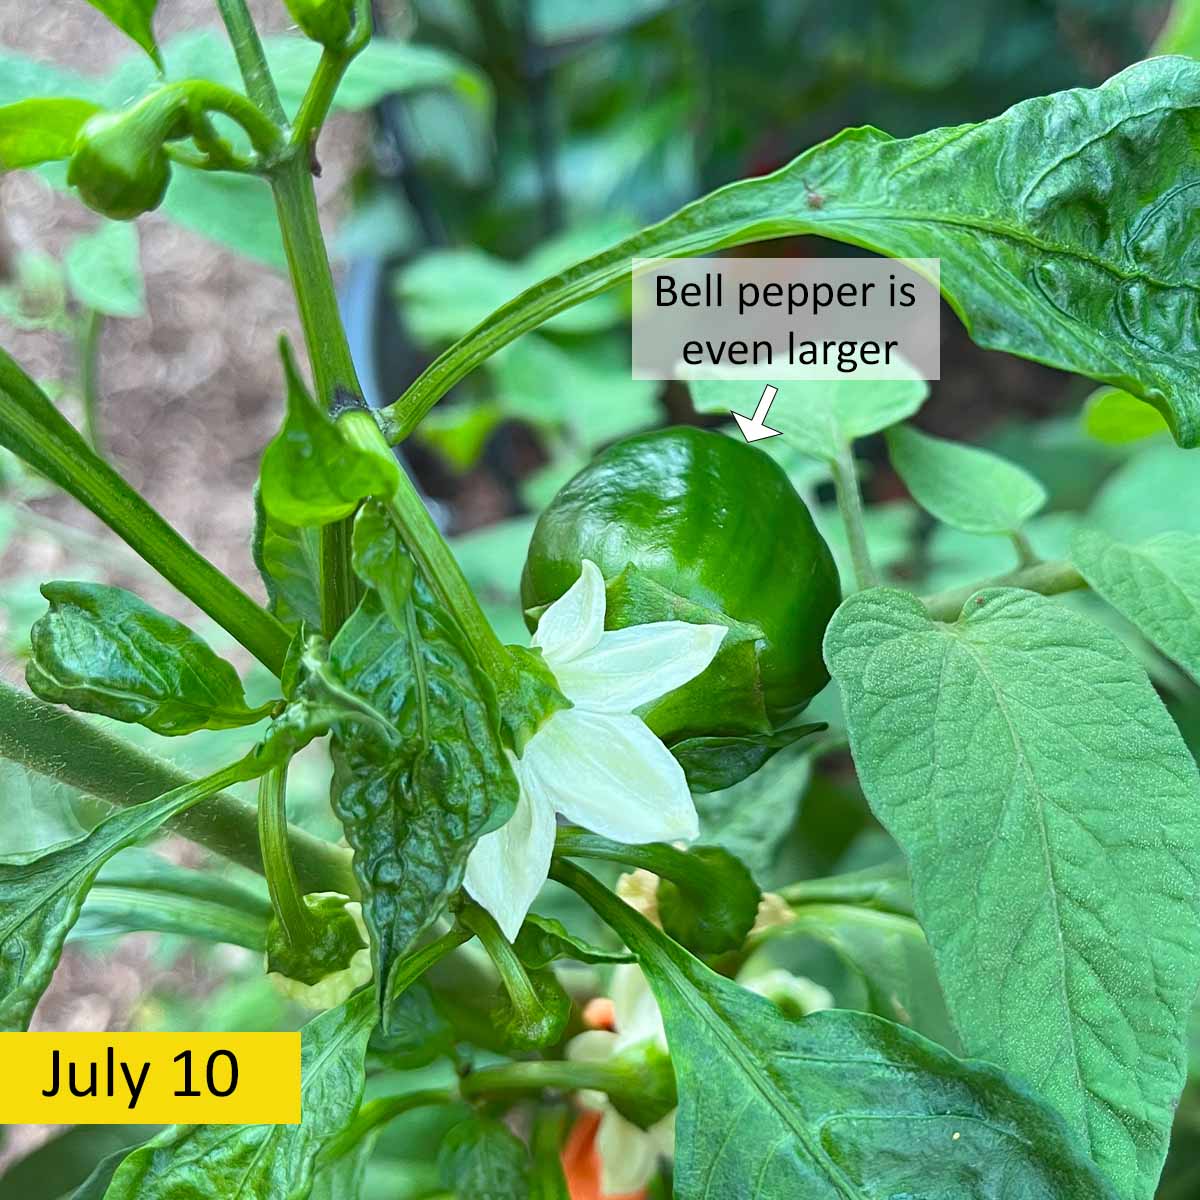
The baby bell pepper was smaller than the open flowers on July 6. But another 4 days later, it's larger than the flowers, growing fairly quickly.
The flower we were watching on the left dropped, but new flowers are opening. In the end, 4 of these flowers ended up producing bell peppers, and the entire plant produced 15 total.
Fruiting stage
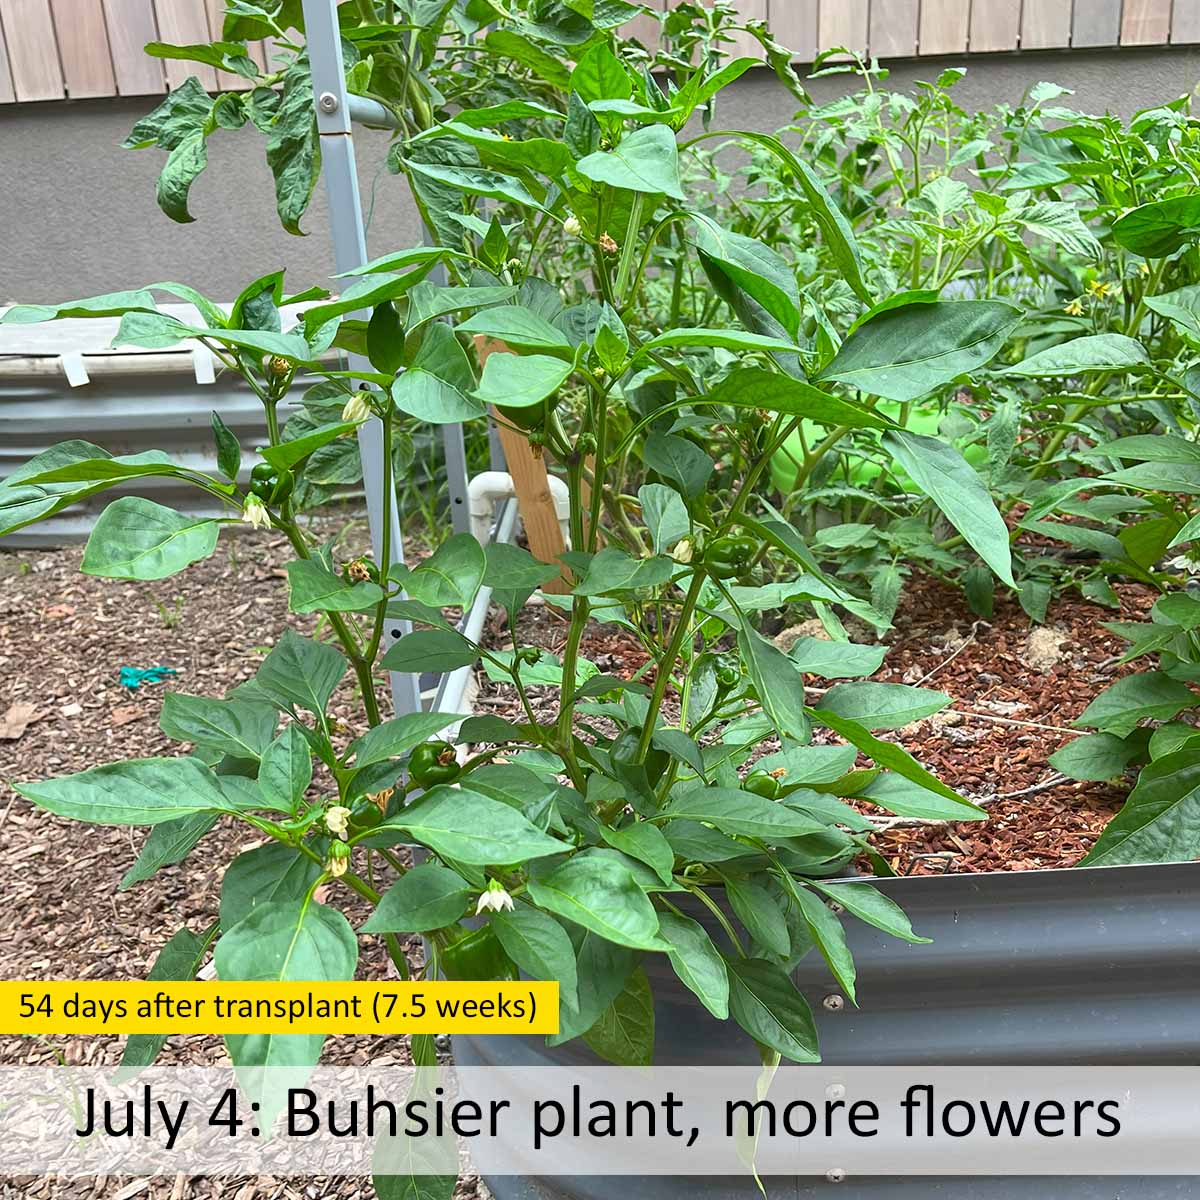
Stepping back a little bit, you can see that by early July the plant is noticeably bushier than it was just 2 weeks ago. The height hasn't changed much (if at all). It also has a lot more flowers - at least 2 dozen at this point.
The plant is now shifting into more of a fruiting growth stage. It will produce very few new flowers at this point and focus most of its energy on growing the bell peppers.

This branch broke off from the same plant from the previous picture on July 4th. The first thing to notice is how quickly the bell peppers grew. In just 2 weeks, it went from tiny bell peppers that you can't even see (in the July 4th picture), to the small-medium sized peppers here.
Sadly, this branch broke off from a mild windy event. This is why bell pepper plants really need to be caged or staked. The bell peppers weigh too much for the branches, even in a light wind event like I had one night. This is my fault for hoping I'd be lucky and not have to buy or setup more cages.
Even though the bell peppers were small, I still ate them. The walls were thinner than if they were fully mature, but they were still very crunchy with that classic green bell pepper flavor.
Before the branch broke off, I had 15 bell peppers on the plant. In the photo below you can't see any new flowers either, since the plant shifted to the fruiting stage.
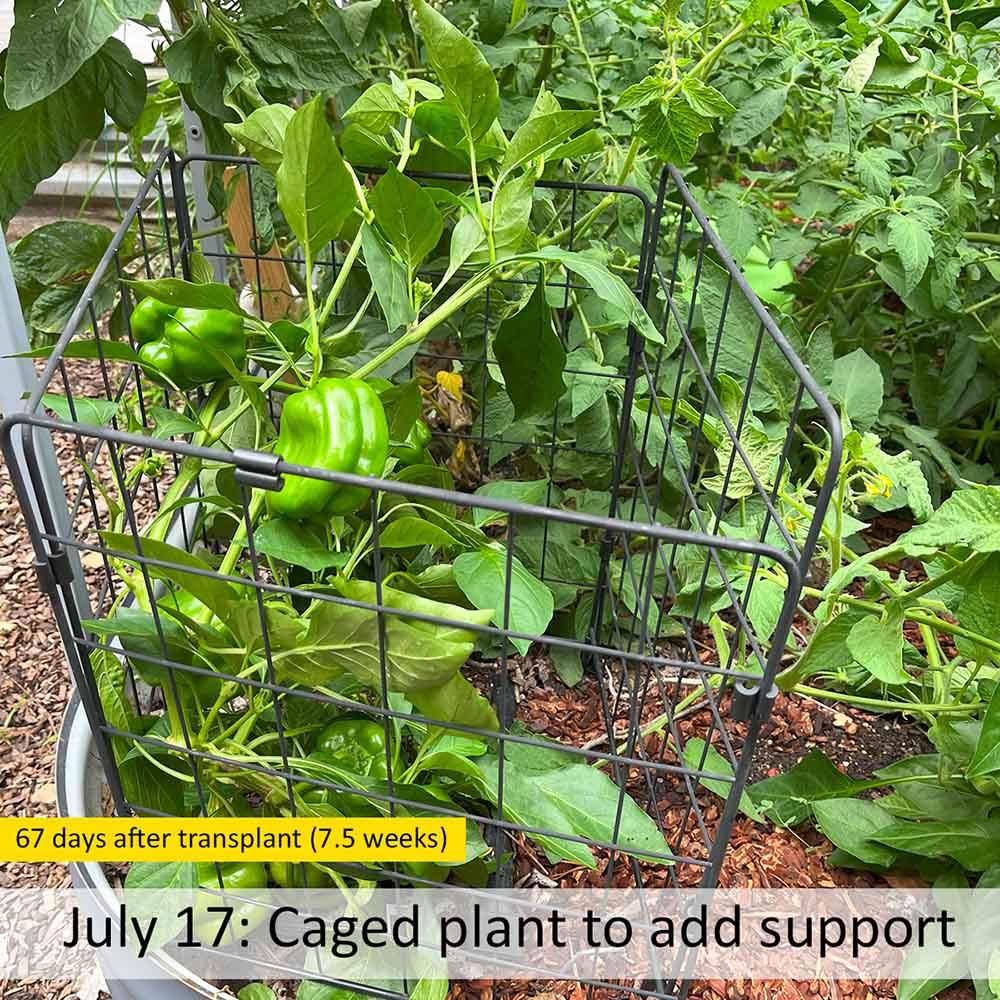
I repurposed a cage from another spot in my garden to support this bell pepper plant. You can stake or cage bell pepper plants, both work well. Small sized peppers, like jalapenos, I've found are fine without extra support.
Maturation stage
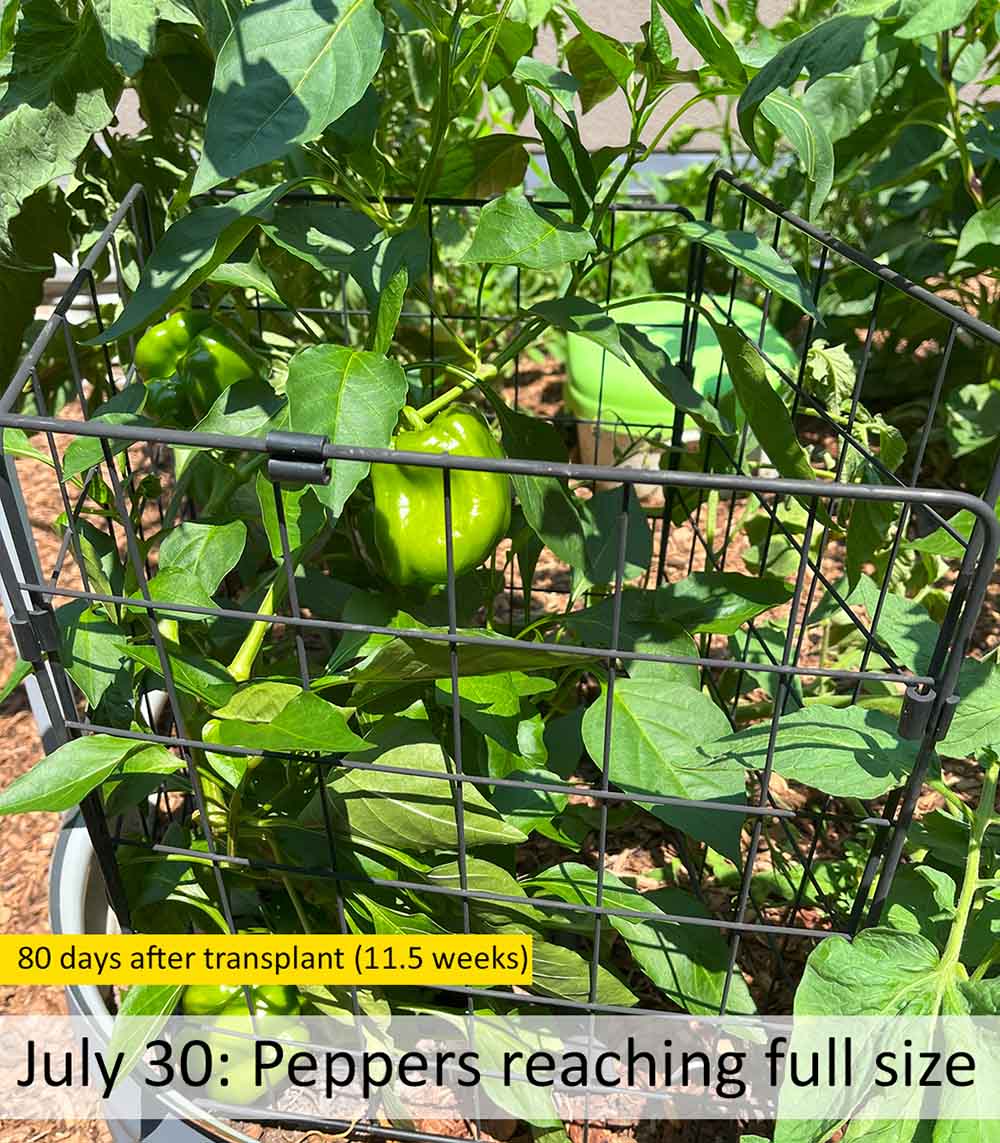
About a month after the flowers first set fruit, the bell peppers started reaching full size. The plant tag listed this variety as mature in 65-70 days. At this point, 80 days in, they are finally green-mature. In cooler climates, it can take 90 days (or more) to reach this point.
Our Chicago weather in June was well above average, clocking in with an average high of 87F. July's average high was 86F, providing a sweet spot of warm weather, but not too warm.
Ripening stage
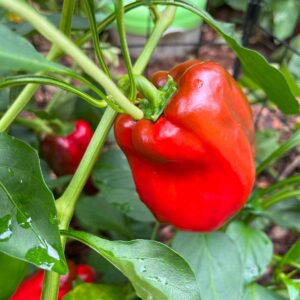
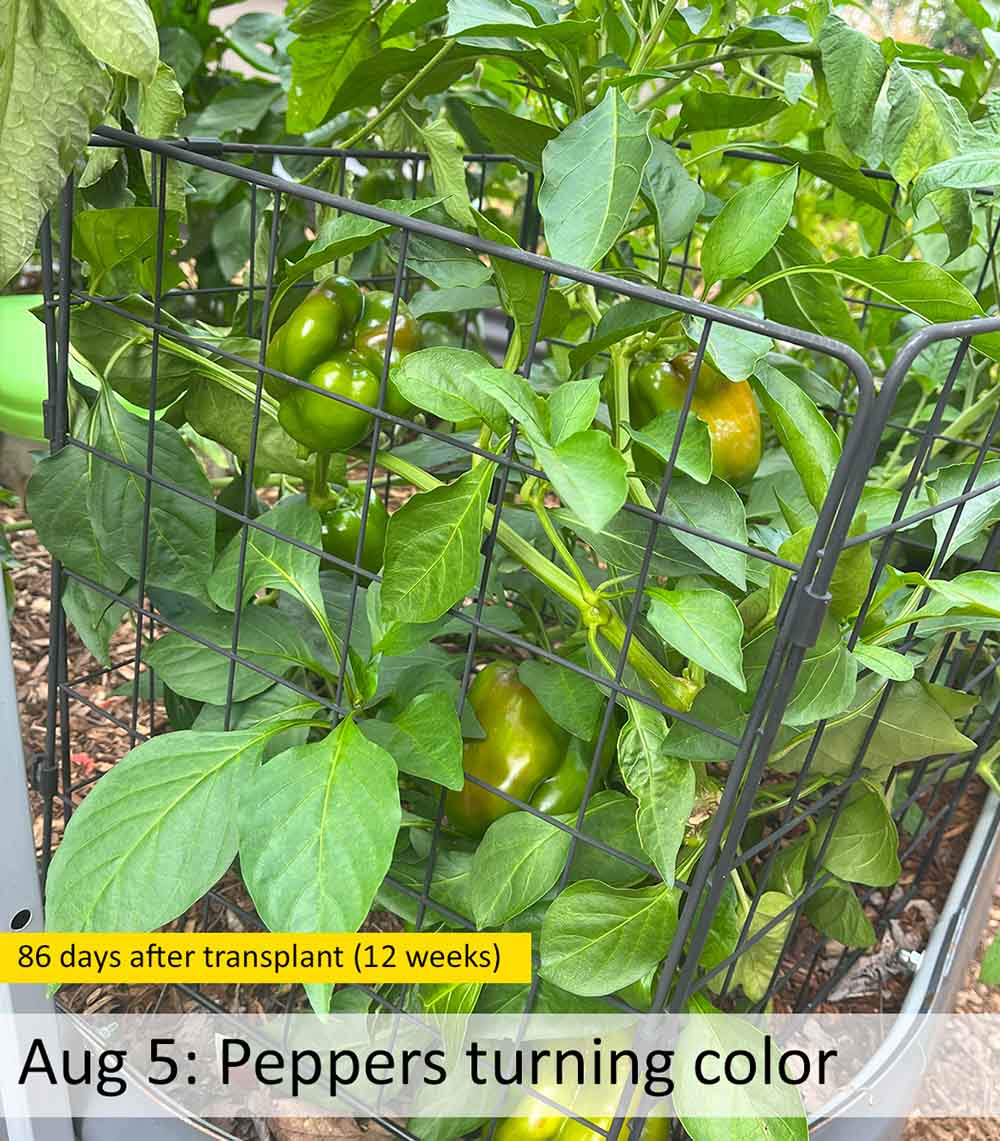
Once the bell peppers reach full size, the plant is in the ripening stage. It doesn't take long to notice hints of blushed red color. The areas facing the sun start to turn colors first and then it will take another 3-4 weeks to turn fully red. Keep in mind, they can be harvested at any point now!
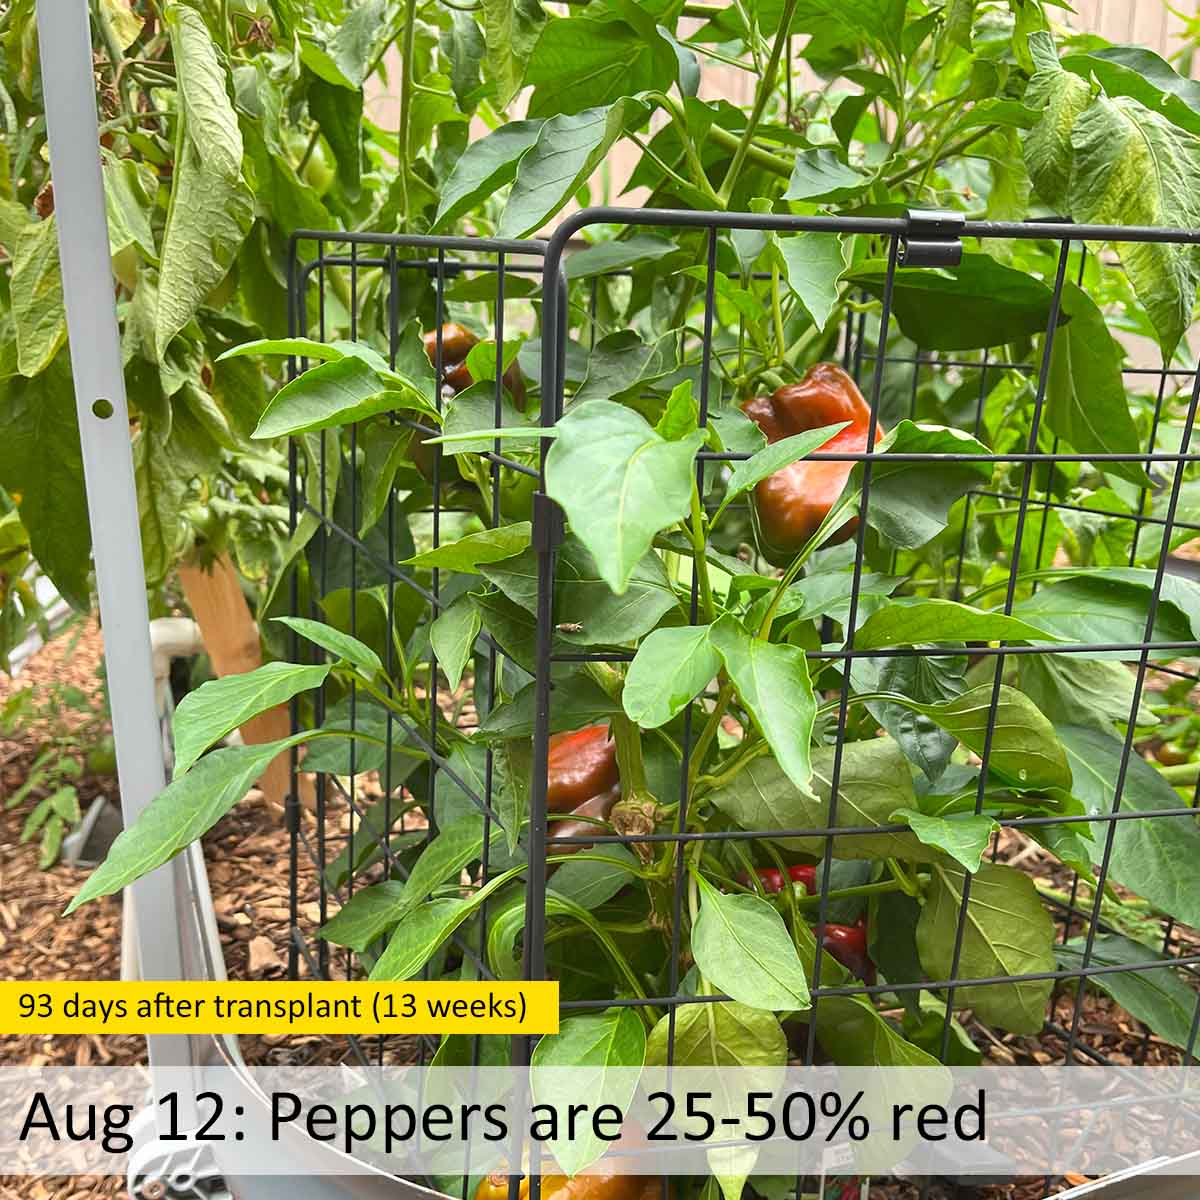
A week after the first signs of color, most of the full-green spots are gone on the front of the peppers. The parts facing the sun are showing first bright red spots. The backs are still green-ish, turning red.
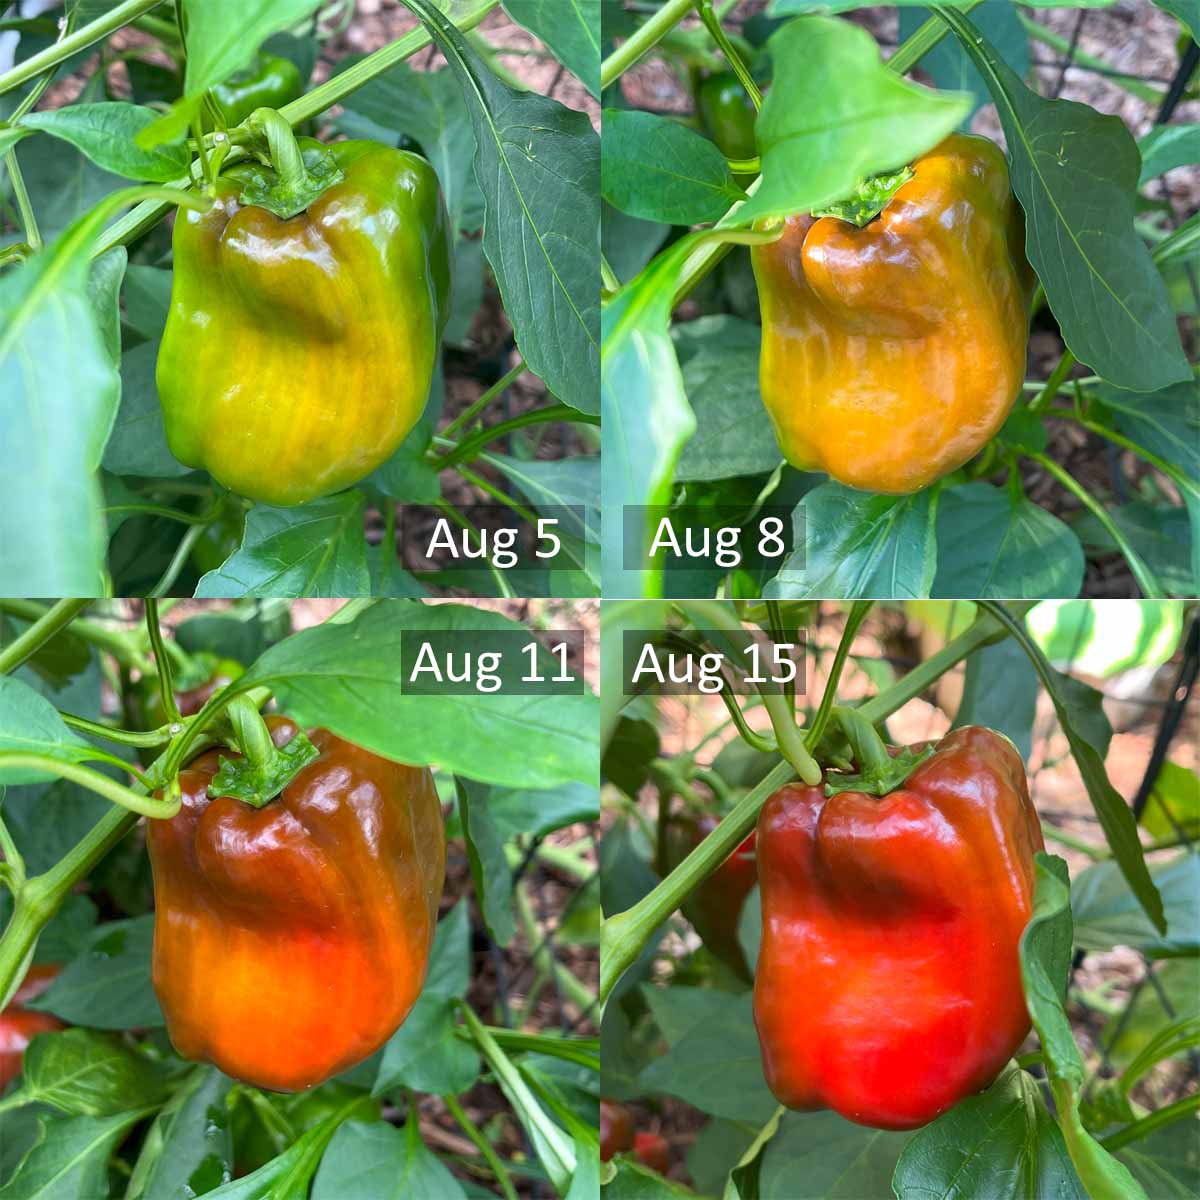
The front of the bell pepper - the side facing the sun, quickly turned from green to red. It took about 10 days for the pepper to be mostly (but not fully) bright red.
What you don't see in the above photo is the back of the pepper. Even by Aug 15th, the back of that pepper was still green-ish-red.
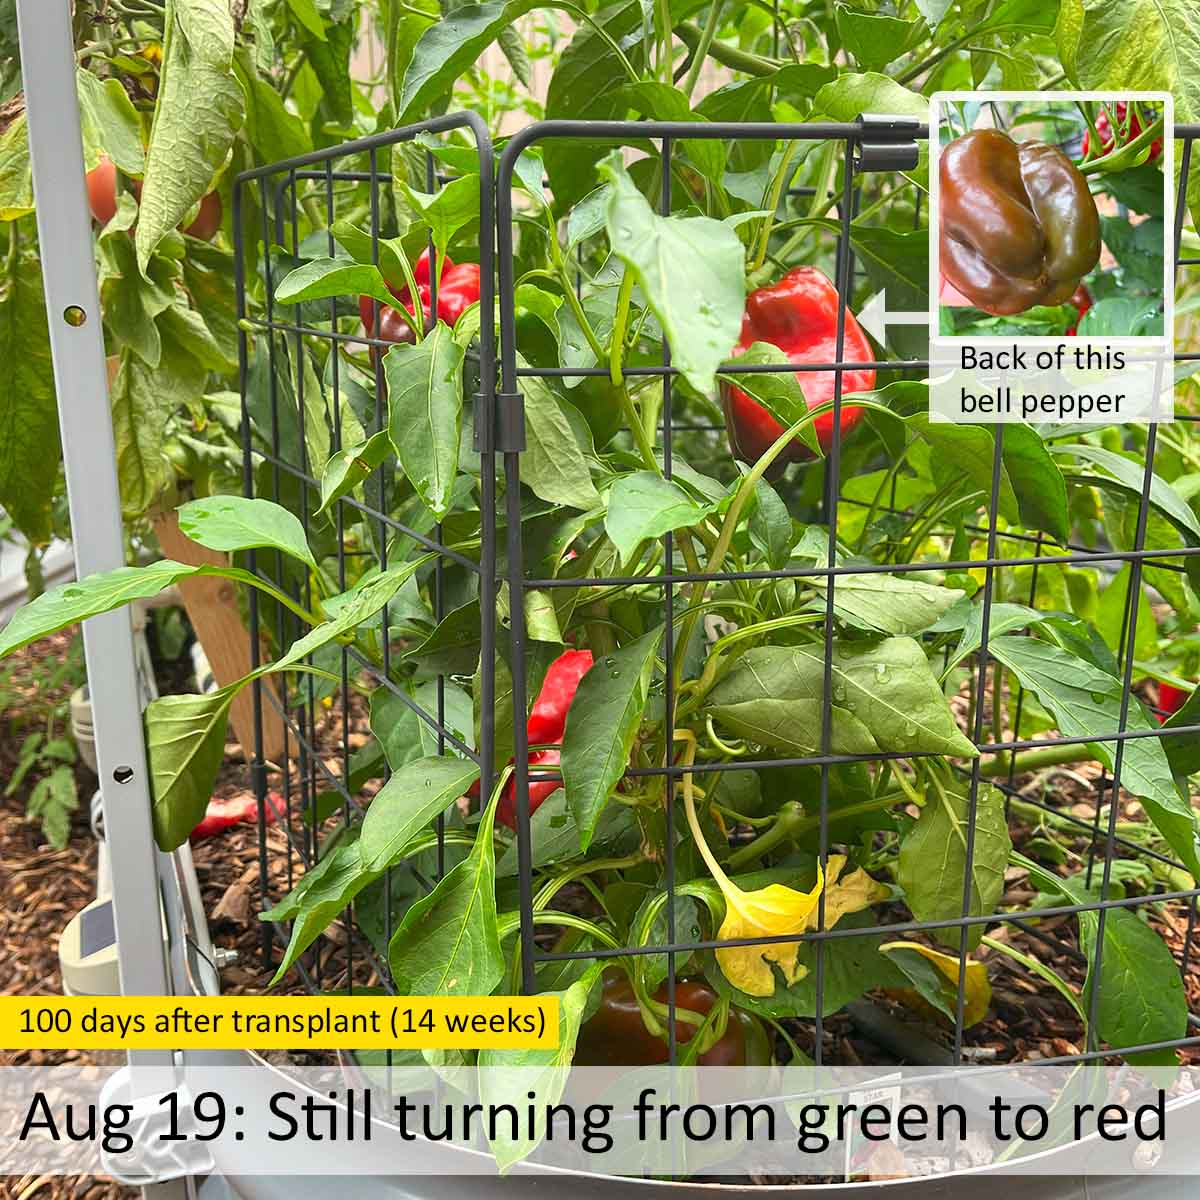
2 weeks after the bell peppers showed the first signs of a red blush, the fronts of most of the peppers are now fully red. The backs are still red-brown with the last hints of green. They will be fully red in another week, as it continues through it's ripening stage.
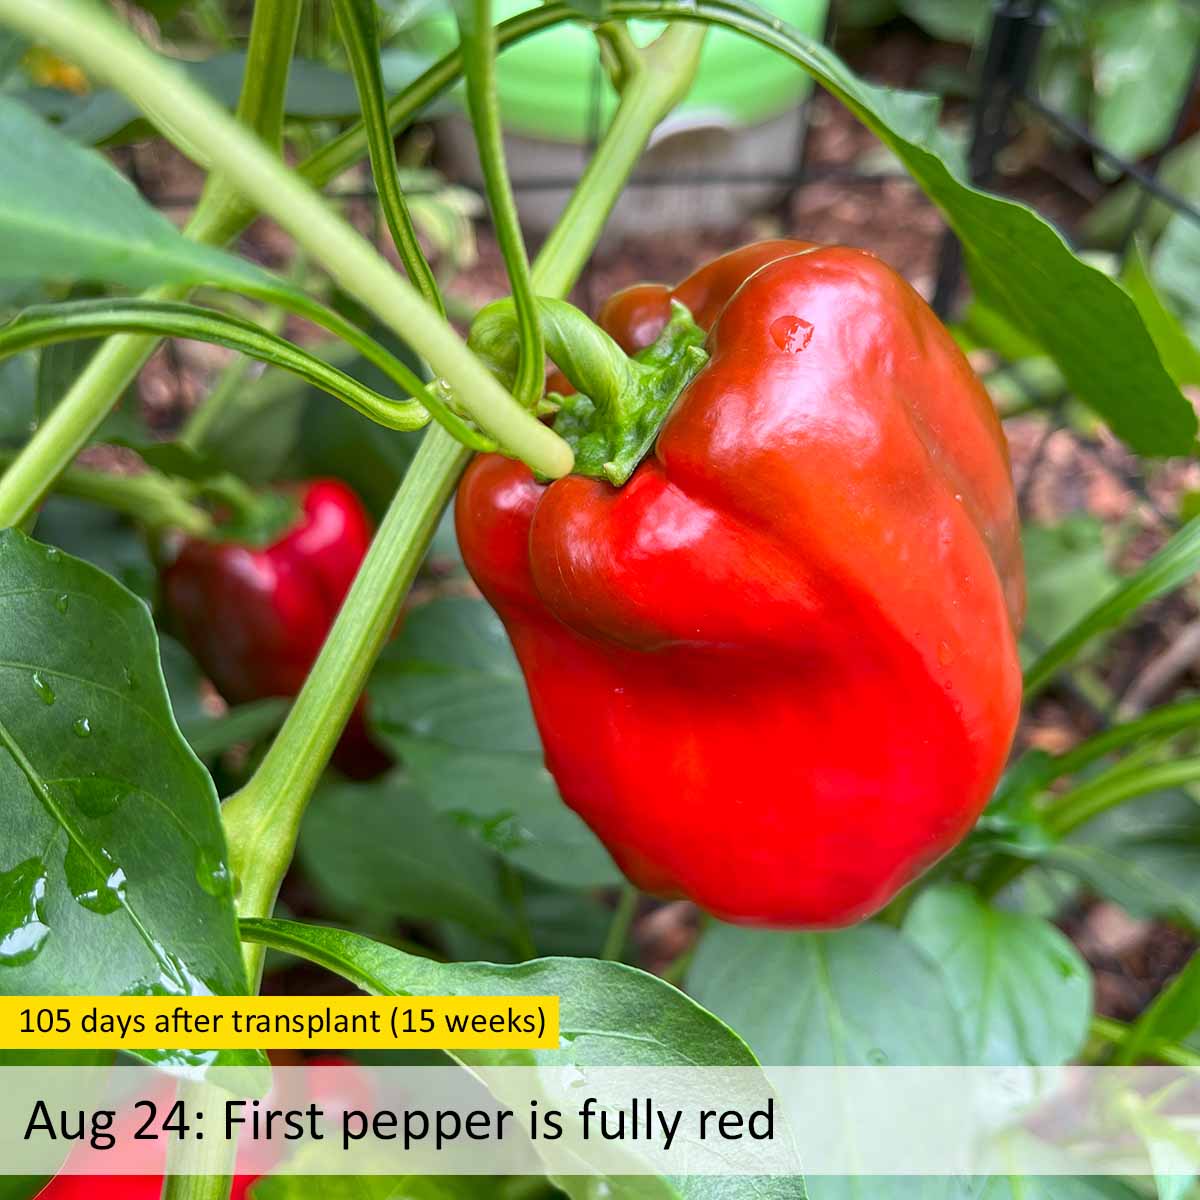
The first bell pepper turned fully red 3 weeks after it showed the first signs of color, and a total of 4 weeks after it reached full size. Most of the other peppers followed suit within 1-2 weeks.
I had a couple that grew from late flowers took longer to fully turn red.
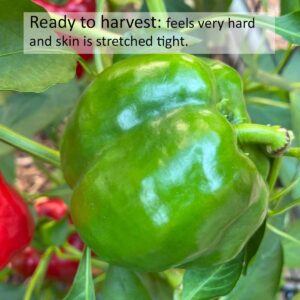
When to harvest bell peppers
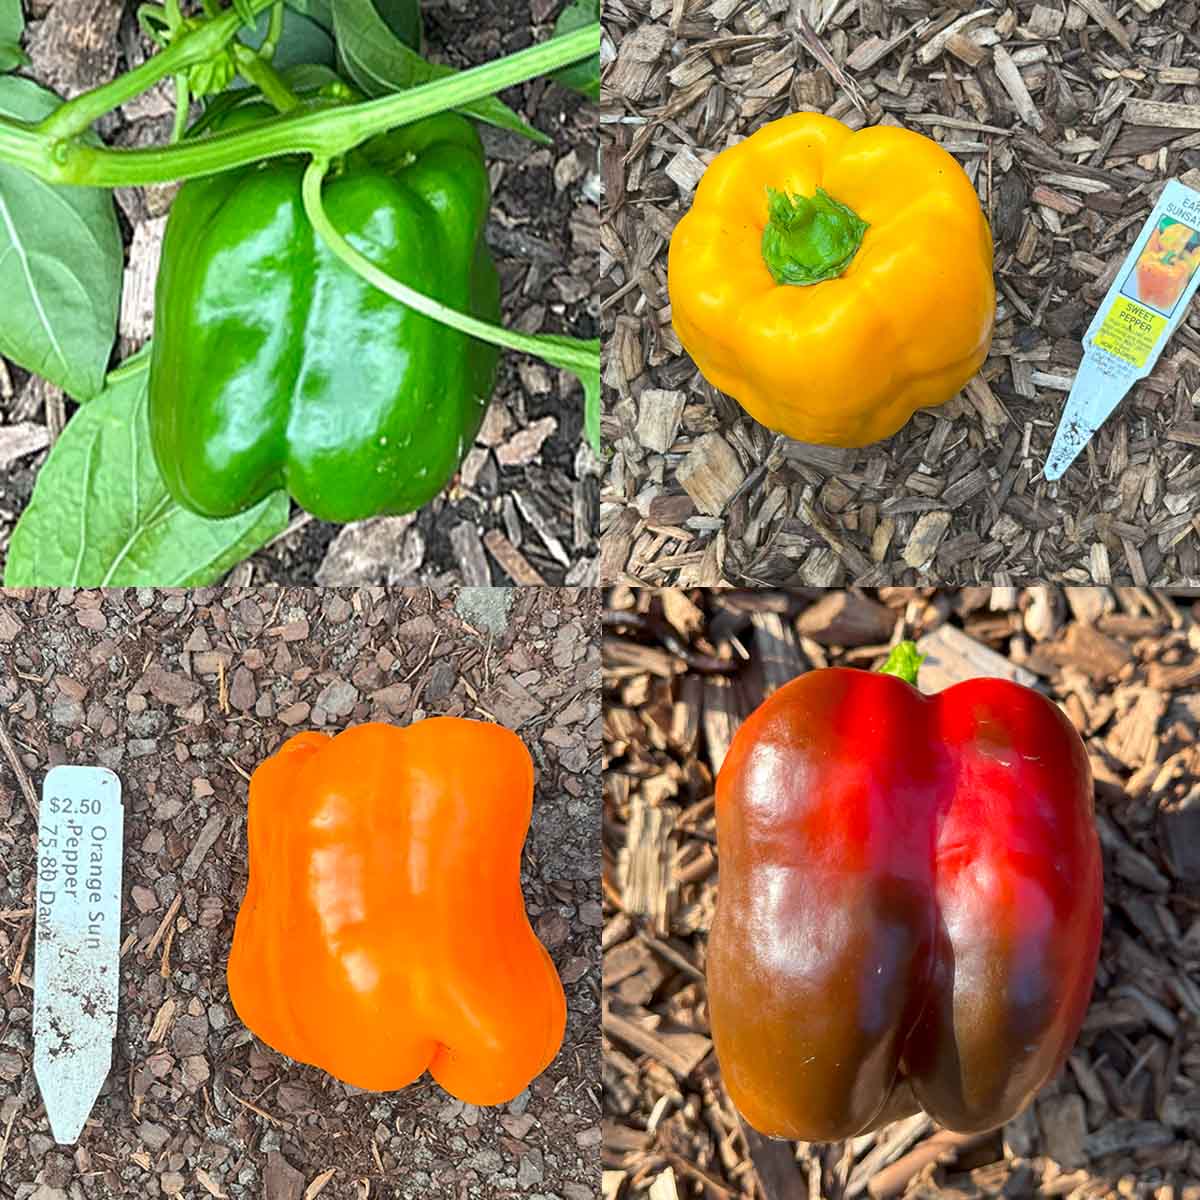
Harvest bell peppers any time they are full size, whether they are green or have finished turning red, orange, yellow, or purple. Once they reach full size, they will be thick-walled and crispy.
As the green bell peppers ripen to change colors, the flavor gets less bitter, sweeter, and a little citrusy.
You can harvest peppers before they are full size if you are trying to encourage larger ones to ripen or your season is coming to an end. They are still edible when small, just not as flavorful and likely more bitter.
More resources
Now that you have a feel for the growth stages of bell pepper plants, I think you'll enjoy this 3 minute time-lapse by Boxlapse. It shows the growth starting from seed, including flowers opening, closing, producing peppers, and changing colors. It's really fun to watch.
The plant in the video only has 2 peppers, which is typical if you aren't pulling flowers and pinching back the top of the plant.
More garden guides to check out


Logan Sorenson says
thanks a ton
Veronica T says
You're welcome - hope I helped for the upcoming season 🙂