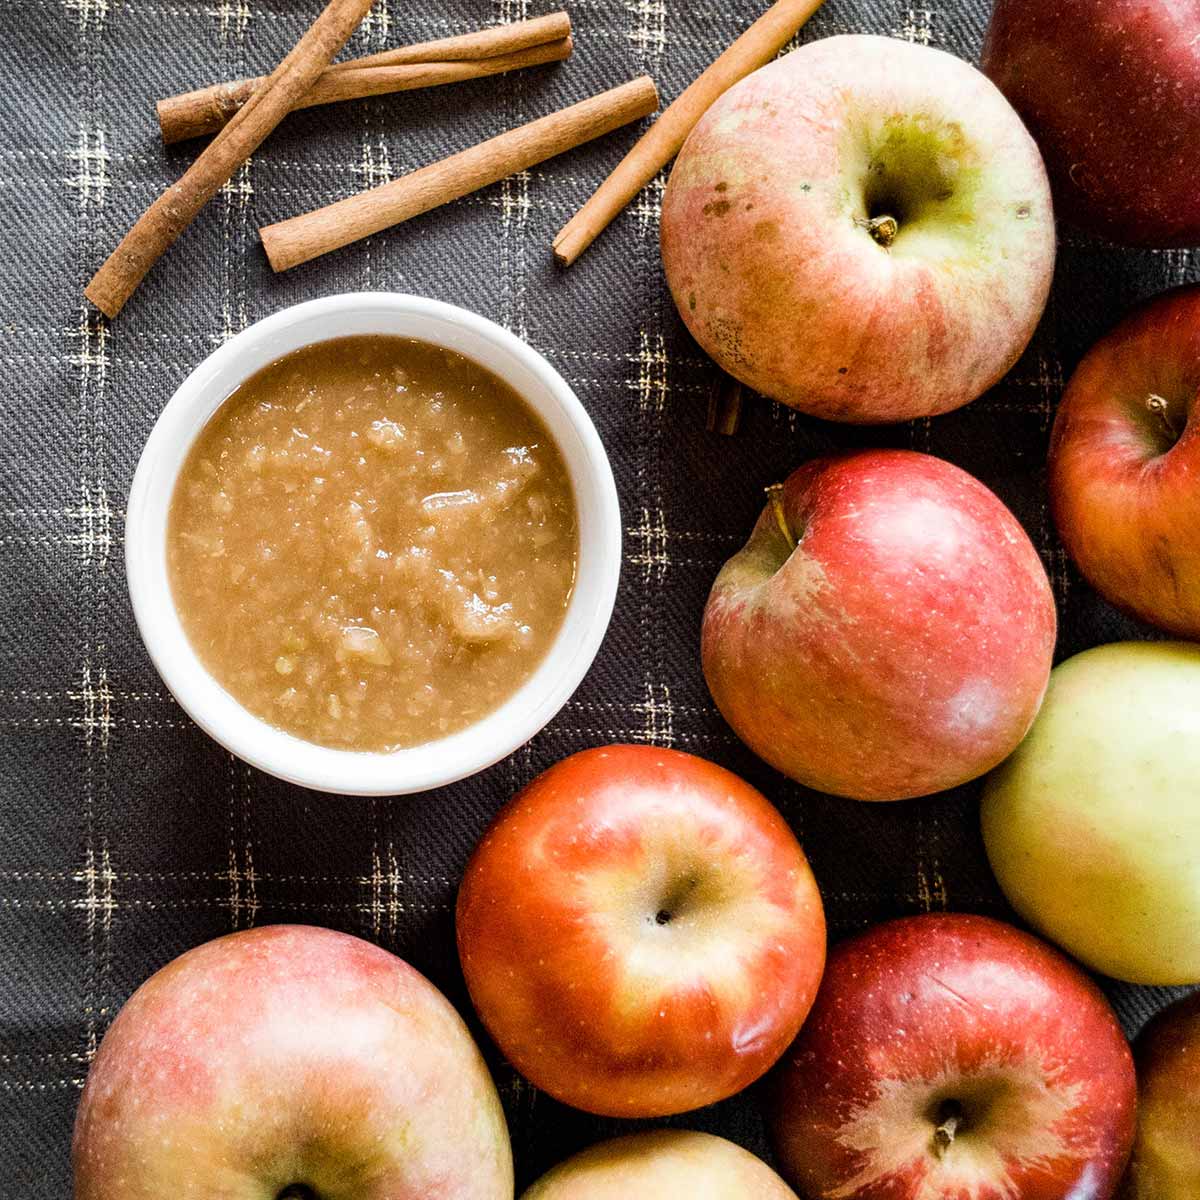
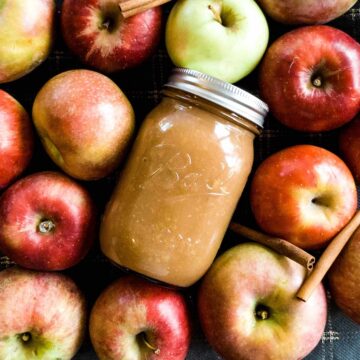
Apple butter is pretty easy to make. But after cooking through a hundred pounds of apples to test & can apple butter recipes, I realized even little things can affect the flavor. This guide details those difference to help you customize any recipe.
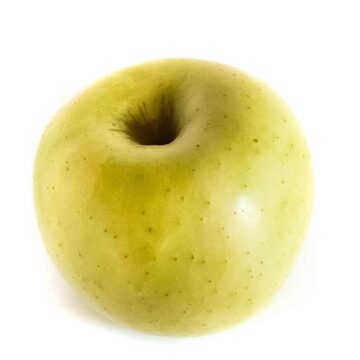
- Best apples: McIntosh for their cider-like flavor and smooth consistency with cooked. Fuji and Golden Delicious are also excellent choices.
- Best cooking method: pressure cooking for its ability to caramelize the sugars or slow cooker for a lighter flavor and hands-off approach
- Best flavor tip: keep the peels in when cooking and strain out later if desired
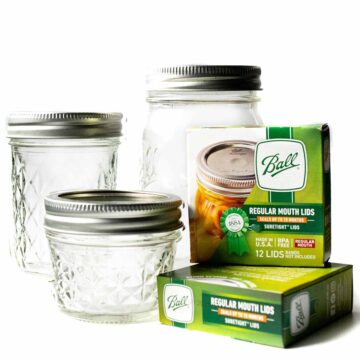
- Liquid & sugar options: there are a variety of choices that are all safe for canning (according to Ball and the USDA).
- Jump to recipe
Jump to:
Type of apples
Some apples are just more flavorful, and a smaller subset retains those flavors better when cooked. But even the best apples lose flavor when stored too long or not stored properly.
Tart apples lend balance to apple butter's sweetness. Without that acidic flavor, it feels like something is missing. It doesn't need to be tart-forward (like a lemon bar), but it needs a little for that balance.
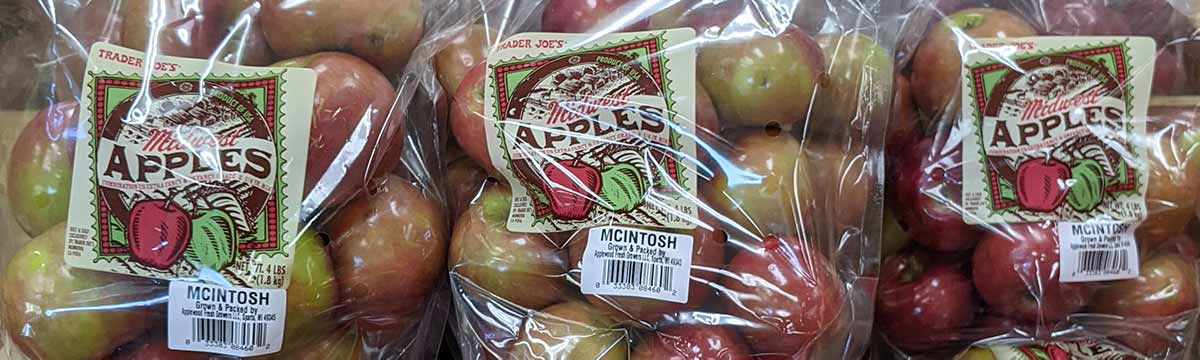
The best apples for apple butter are McIntosh. They have an excellent tart cider-like flavor and the flesh falls apart to create a smooth apple butter. The only downside is that the skin is thick and might need to be strained out at the end depending on your preferences.
McIntosh can often be found at farmers markets in cooler climates (like Northeastern and Midwestern US states), Trader Joe's, and other stores that carry specialty apples.
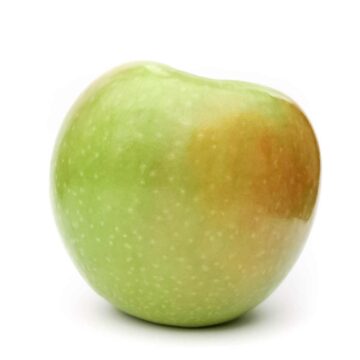
If you can't find specialty apples, try a mix of Fuji (for the sweetness), Golden Delicious (for a classic apple flavor), and Granny Smith (for tartness). While Granny Smiths are nice and tart, they don't have much actual flavor when cooked down, leaving a bland, one-dimensional apple butter - so it is best to mix them with other varieties.
The following types of apples are excellent candidates due to their flavor and texture when cooked down.
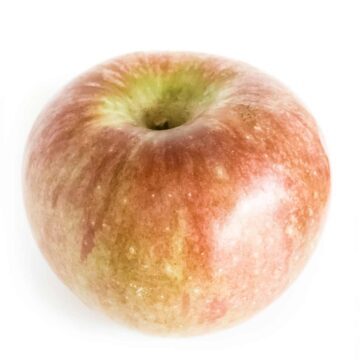
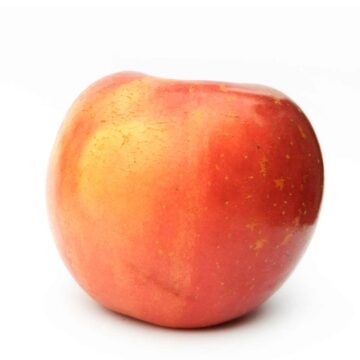
Stemlit apples also suggests Fuji, Golden Delicious, Cortland, and Idared for apple butter (though I haven't gotten ahold of Idareds to try personally).
Apple butter is also one of the best uses for old or flavorless apples if you don't want to waste them. You'll just need to add more sugar, spices, and acid.

Types of liquid
Water is often called for in recipes. If that's all you have on hand, then that's what you should use. However, apple juice and apple cider are much better options, especially the latter.
You can even use bourbon, rum, or other spirits. In the book, Foolproof Preserving by America's Test Kitchen, they add Calvados (or applejack) in combination with cider.
When using alcohol, my preference is to spend the extra time necessary to reduce the alcohol. This boils off the alcohol and leaves the delicious flavor without the alcoholic 'hot' note.
Be warned about using untested alcohol on a large batch though, as I don't want you to ruin it. I've used decent-enough bourbon that gave an off flavor, even with boiling it down beforehand. Test it on a small batch first, or stir it in to a small amount at the end before adding to the whole pot.
Jump to "How to safely can apple butter" for a list of approved liquids.
Types of sugar
For the record, you can make apple butter with no added sugar if the apples are fresh, sweet, and full of flavor. However, I still like to add a little bit, even to the best apples, like the scant ⅓ cup in my apple butter recipe below.
Sugar interacts with the pectin in apples, which aids in thickening (pectin is responsible for gelling properties).
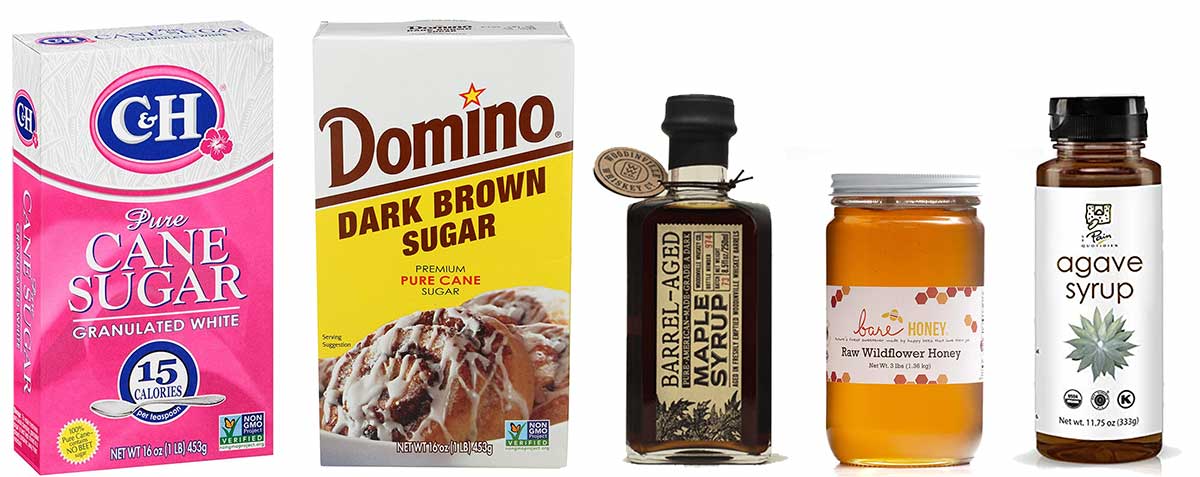
When using sugar, choose your favorite one for flavor. Recipes with only white granulated sugar can fall a bit flat unless your apples are a their peak and full of flavor. White sugar adds sweetness but no other depth of flavor. Instead, try substituting some or all of the granulated sugar with the following for more flavor:
- Brown sugar adds caramel flavors (my preferred option)
- Maple syrup flavors come through ever so slightly
- Honey adds a lighter, sometimes floral flavor
- Agave syrup adds more flavor than white granulated sugar, but not by much
Note that liquid sugars will increase the time needed to get a thick apple butter, as more evaporation is required.
Jump to 'How to safely can apple butter' for a full list of safe sugars and sugar substitutes.
Add sugar gradually
I start with ⅓ cup of sugar for a 6 pound batch of apples (about 1 tablespoon per pound of apples). More can be added toward the end of cooking as needed.
It's important to add at least a small amount like this at the start of the cooking process for flavor and consistency.
- The sugars caramelize throughout the cooking process, adding that depth of flavor you're looking for.
- The sugar also interacts with the apples' natural pectin (a compound responsible for gelling properties), creating a thicker apple butter.
As apple butter cooks down, the flavor concentrates and gets sweeter. So it is important to start with a small amount of sugar and add more only toward the end of the cooking process.
Amount of sugar
Traditional apple butter recipes call for 1 cup of sugar for each pound of apples. That's kind of insane.
Let me illustrate how much sugar that boils down to: a batch of apple butter with 6 pounds of apples would require 6 cups of sugar. That batch cooks down into just under 4 cups of apple butter.
That means each cup of your apple butter has 1.5 cups of sugar in it. If you use a tablespoon of it on your toast or in your oatmeal, you're putting 1.5 Tbs of added sugar on it as well. That much sugar just masks the natural apple flavor too, and it might as well be store-bought at that point.
Instead, I use about 1 tablespoon of (brown) sugar per pound of apples. For 6 lbs of apples, that would total about ⅓ of a cup. I find this to be the perfect balance that adds caramel notes and sweetness, while letting the apple flavor shine.
That recommendation is definitely on the low end, on purpose. Fresh farmers market apples don't need much added sugar. But ones that end up a little bland will need the help. Extra sugar can be added toward the end. I like to add it when the apple butter is thickening, but not quite done yet.
Sugar is not required for safe canning. Apple butter will still be thick when using minimal (or no added) sugar. It won't gel, but it isn't supposed to.
Spices
When I have good apples for apple butter, they need no added spices. In fact, they often taste so much like 'warm baking spices' that I swear I've lost my mind and must have just forgotten that I added spices.
But a bunch of bland or old apples? Those need some help. A good rule of thumb is to start with ½ teaspoon cinnamon and a pinch of nutmeg for 6lbs of apples. Another good starting option is to use a ½ teaspoon of Penzeys Pie Spice.
Start light on the spices and add more toward the end. The apple flavor and spices concentrate as water evaporates. If you add it 'to taste' too early, it will be over-seasoned in the final product.
Peels add flavor
Apple peels actually contain a good portion of an apple's flavor and aroma. Cooking with the peels creates a noticeably better tasting apple butter. It will have a stronger apple taste and more depth to the flavor.
I've tried several identical batches of apple butter, varying only inclusion (or exclusion) of peels. The ones with peels easily won taste tests every time. I highly recommend keeping them in.
That said, some apples have thin peels, others are thick or even chewy. Thin peels blend really well into the sauce and are barely noticeable after they are blended in.
Thick and chewy peels will still be chewy, even after blending. It's somewhat unpleasant. Some people don't mind them, but if you do, you can deal with this in a few ways:
- Strain them out at the end with a food mill or strainer
- Wrap the peels in cheesecloth when cooking in a slow cooker or on the stove top
- Boil peels (and cores!) with 1 cup of water, mashing as you go. Strain and use that liquid when cooking the actual apples (instead of apple cider or water). This method is courtesy of Cook's Illustrated.
Pectin in peels
Apple peels contain pectin, but it appears not enough to aid in thickening apple butter. Peels are made up of about 1.2% pectin, whereas the flesh has 16%.
Like many people, I originally assumed the apple peels would help thicken the apple butter. This confusion is likely caused from the fact that citrus peels are the best source of pectin, containing 20-30%. So it's easy to make the assumption that apple peels would be similar, but they are not.
On top of that, apples are the second best source of pectin, adding to the (incorrect) assumption that apple peels are a good source. It's actually the apple flesh (called pomace) that is the main source of pectin.
To be thorough, I wanted to verify that the numbers match reality, so I tested batches with and without peels for thickness. I saw no difference, verifying that the peels do not contain enough pectin to impact the thickness of the apple butter.
Pressure cooker vs slow cooker
Apple butter can be cooked a lot of different ways (see detailed tests and results). The recipe below includes instructions for using either a pressure cooker or a slow cooker (or both).
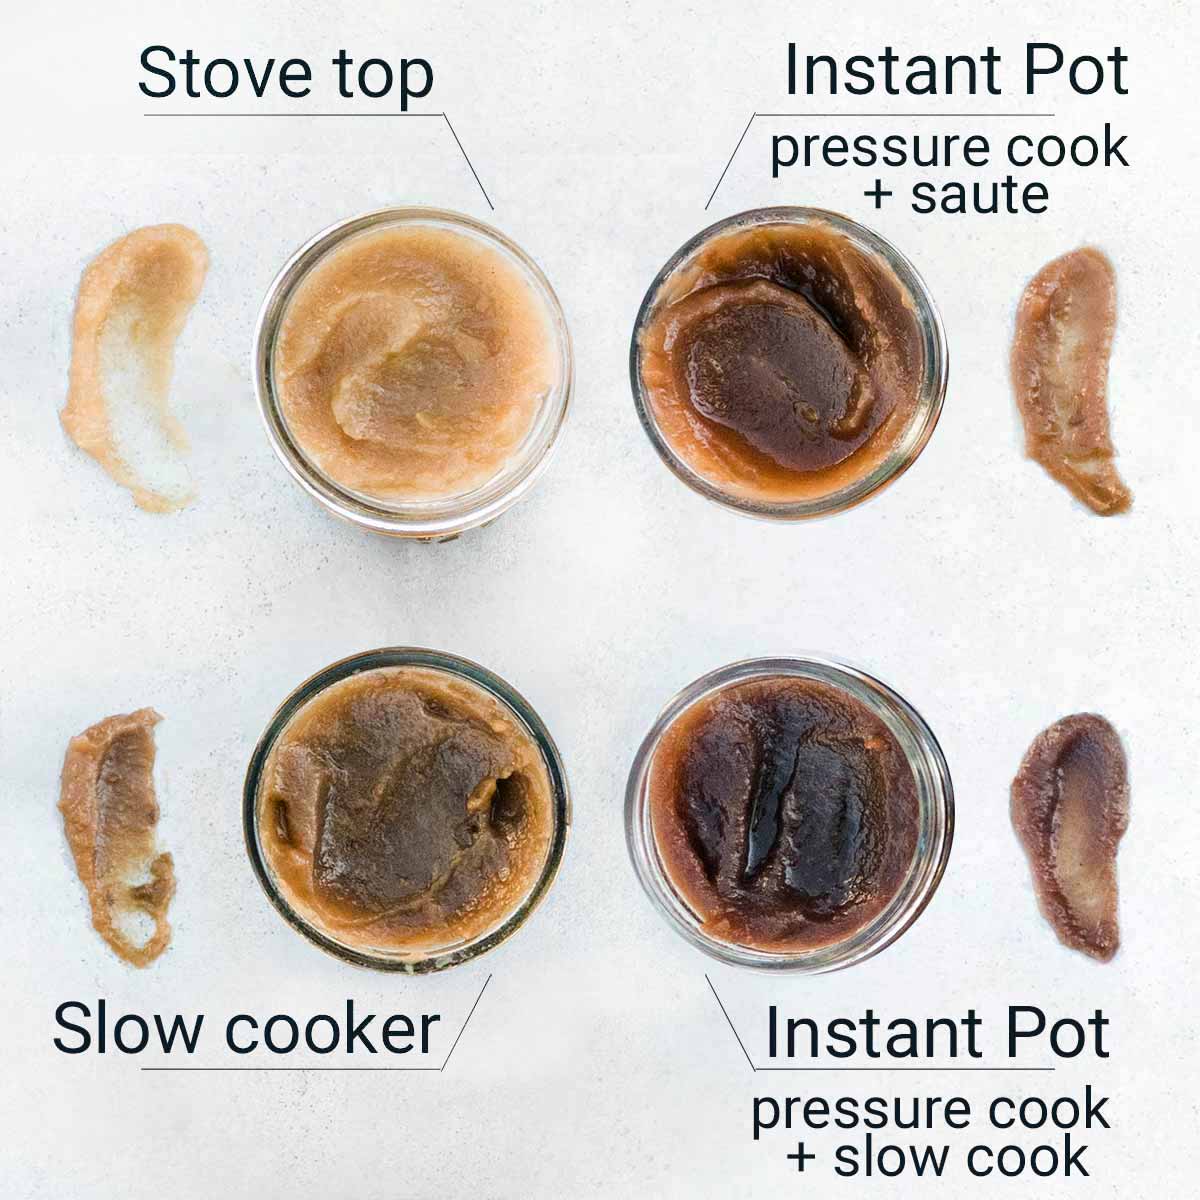
- Instant Pot / pressure cooker: rich flavor and color, needs to be followed up with a slow cooker or stove top for evaporation
- Stove top: fast, messy, lighter flavor and color
- Stove top to oven: medium amount of time and effort, rich flavor and dark color
- Slow cooker: slow, hands off, rich flavor and dark color
Pressure cooker
My preferred method is the Instant Pot (or a pressure cooker) followed by slow cooking. This results in the best flavor, deepest color, and smoothest consistency.
Pressure cooking the apples at the start cuts the cooking time down significantly. It also caramelizes the sugars for a deep flavor. That said, this is easily done in an Instant Pot that can both pressure cook and slow cook. If you don't have one, you'll need to use a separate pressure cooker and slow cooker, cleaning two different pots.
In that case, I suggest a slow cooker, which also produces a top notch apple butter.
Slow cooker
A slow cooker can be used for the entire process. It takes about 1-2 hours to soften the apples and another 6-12 to evaporate the liquid on high (or 8-16 hours on low).
Slow cookers are great for making apple butter. That said, the Instant Pot is known for being a mediocre slow cooker. That's because it doesn't have a ceramic pot and doesn't distribute heat as well. This is a very important distinction when slow cooking stews or meats, but it's totally acceptable for apple butter.
Apple butter just needs a good, slow cook to evaporate the water. It will take longer in an Instant Pot slow cooker than a standalone one (like Crock Pot). That's fine assuming you aren't worried about the time.
Cooking time
The amount of time for apple butter to thicken varies by cooking method. Below are average cooking times for a batch that uses 6 lbs of apples.
| Cooking Method | Cook time | Color | Flavor |
|---|---|---|---|
| Stove top | 1 - 2 hours | Golden | Light |
| Slow cooker | 6-12 hours | Dark | Great |
| Pressure cook (followed by slow cook) | 45 min (3-5 hours) | Very dark | Excellent |
| Pressure cook (follow by saute) | 45 min (30 min) | Dark | Great |
| Stove top (followed by oven) | 3-5 hours | Dark | Great |
Recipes that use the pressure cooker have vastly different cooking times, from 10 minutes to 90. I tested both ends of the spectrum and several in between.
Apples do soften in as little as 10 minutes, leaving a white mash behind that purees easily. Pressure cooking for 90 minutes, on the other hand, resulted in a very dark apple mixture with deeply caramelized sugars and excellent flavor.
Further investigation led me to a Kenji Lopez article about how the high heat reached in pressure cookers caramelizes sugars. More tests revealed that 45 minutes of pressure cooking seems to be enough to develop that rich flavor and deep color.
Batch size
I've tried a lot of different batch sizes and have some notes to share:
6 pounds
I've found that 6 pounds of apples ends up resulting in just over 4 pounds after they are cut and cores are discarded. (The recipe calls for 6 pounds of apples, that is before they are cut and cored).
The resulting 4-ish pounds of apple pieces fill just up to the max line in a 6-quart Instant Pot and most pressure cookers. You don't want to go over that line for function and safety reasons (apples can foam up, etc).
This sized batch will also take quite a bit longer during the slow cooking process. There's a lot more liquid in a larger batch because apple are full of water. It can take 8 hours to fully thicken. If you need to speed it along, use the saute function for 20 minutes (or saute on the stove top), followed by slow cooking for about 3-4 hours.
3-4 pounds
These batches cooked up much quicker, fully thickening in 3-4 hours. Note that you still need ½ a cup of liquid at the start (the same amount required in the 6 pound batch) because the Instant Pot (and all pressure cookers) need a minimum amount of liquid to create the steam necessary to pressurize.
Less than ½ a cup can also trigger a 'burn error' code on the Instant Pot. If you do see that, just add ¼ cup more liquid. That said, I didn't have problems in any of the batches with ½ cup in a 6-quart Instant Pot.
The smaller batches yielded 2.5-3 cups of apple butter.
How to tell when apple butter is done
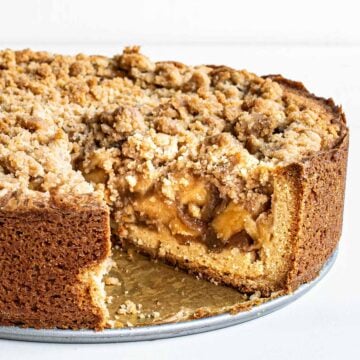
Apple butter should be a thick, spreadable consistency. It will be more like a paste than a jelly (it isn't meant to gel). It gets thicker the longer it cooks, as more water evaporates.
The apple butter's consistency is the main indicator to know when it is done, not color. Color will depend on the cooking method, how much sugar has caramelized, and even the color of your spices and sugars.
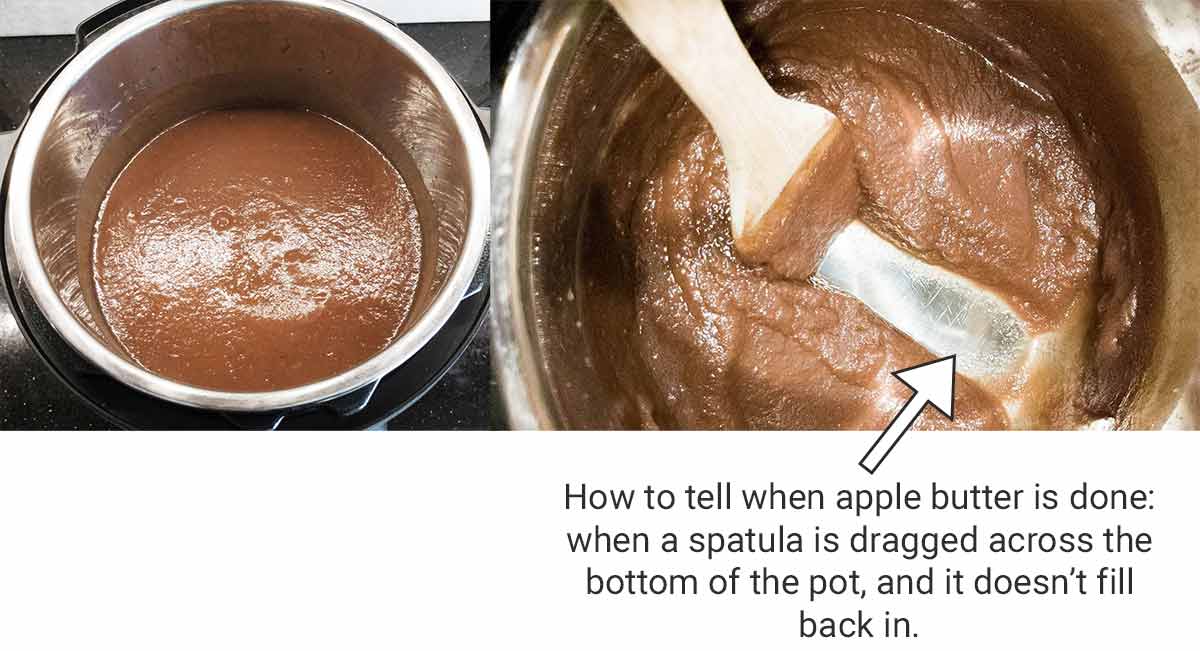
Scrape a spatula along the bottom of the pot and note the results:
- Very thin: If the apple butter immediately fills in the area you just scraped, keep cooking it.
- Somewhat thin: If the apple butter slowly fills in the area, completely filling it within 3 seconds, keep cooking it. It's close, but likely needs another hour in a slow cooker.
- Thick: If the apple butter leaves a trench and doesn't fill it in, and it isn't a jelly-like consistency, it's done!
- Too thick: if the apple butter thickens like a jelly where it is no longer spreadable, it is too thick. You can add more apple cider (or water) to thin it down. Check the consistency again.
If you add significantly more sugar than the recipe calls for, it can thicken faster or start to gel. That's because the sugar interacts with the natural pectin in apples that are responsible for the gelling of jams and jellies.
It's fine to add more sugar, just be sure to test the consistency sooner than the recipe calls for.
No thickening agents need to be added (no cornstarch, flour, or pectin). All you need is to continue to cook it to evaporate the water.
How to thicken apple butter
When you first puree the apple butter, chances are it will be runny. That's normal. It needs to be cooked down to thicken (by evaporating liquid). Keep cooking it and it will eventually thicken.
That said, not every batch will cook down in the same amount of time. Two variables affect this: amount of liquid and the rate of evaporation.
You should not add flour or cornstarch to thicken apple butter. All you need to do is keep cooking it until more liquid evaporates. You can put it in the fridge and reheat it the next day to continue the cooking process if necessary.
Amount of liquid
Several things can add (or reduce) the amount of liquid that needs to be evaporated: types of apples and their age, amount of liquid, the type of sugar, and the batch size.
- Some apples are much juicier than others, creating more moisture that needs to be evaporated.
- Older apples have less water content, because they lose moisture (and flavor) the longer they are stored.
- Some recipes call for more added liquid per pound of apples than others. It's fine to use more, just be ready for a longer cooking time.
- Maple syrup and other liquid sweeteners add more moisture that needs to eventually be cooked off.
Rate of evaporation
The rate of evaporation is dependent on the cooking temperature, surface area, cooking vessel, and the lid placement.
- Higher cooking temperatures evaporates the water faster
- The more surface area that is exposed, the faster the evaporation rate (a tall, narrow pot will evaporate slower than a wide, shallow pot)
- The type of cooking vessel matters because of the different heat distribution and cooking temperatures
- If the lid is fully on (in any cooking method), steam will condense on the lid and drip back into the apple butter. It's best to leave it cracked (but not totally off, which can cause the temperature to drop below safe levels)
Thicken it by just cooking it longer. If needed, you can put in the fridge overnight and heat again the next day.
Thickening as it cools
Apple butter does thicken as it cools, but not by much. If it is runny when you transfer it to jars, it will still be thin the next day. If this happens, you can heat it up again to evaporate more of the liquid.
How to safely can apple butter
Canning is meant to remove and prevent bacteria from growing in the jar. A hot mixture should be poured into sterilized jars, then boiled long enough in a hot water bath to kill anything harmful.
Acid / lemon juice
An acidic environment is what keeps the canned apple butter safe at room temperature. Some jams, jellies, and fruit butters need added lemon juice to ensure there is enough acid to keep it safe.
Most recipes in the past used to not require lemon juice, since apples were acidic enough. However, many old, reliable recipes have since been updated (sometime in 2024) to include bottled lemon juice or vinegar.
I've reached out to a few professionals for more information (on Aug 7, 2024) and will update as soon as I hear back.
The National Center for Home Food Preservation's recipe for apple butter used to have no added acid, but it does now (although their low-sugar version does not). Ball's website also had a canned apple butter without extra acid, which has also been updated.
I don't have a screenshot of their past recipes, but I personally recall it had no acid, as so does this recent Reddit thread.
Even Ball's apple butter recipe now includes lemon juice and most extension recipes do use lemon juice now. I did find an extension office with a recipe that didn't use acid, so I've reached out to them to triple check it is safe to use.
Sugar isn't necessary for preservation
Sugar is often cited as a preservative. But when it comes to canning fruit, it isn't necessary for safe canning. The amount used is not enough to prevent bacteria growth.
However, it does preserve the color and texture of fruits, especially when canned whole. That's technically preserving the fruit, which leads to the claims that sugar acts as a preservative - just not a preservative when it comes to bacteria growth in this case.
Safe sugars & substitutes
Ball's Book of Canning & Preserving list the following sugars as safe options for canning fruit butters:
- Granulated sugar
- Brown sugar
- Maple syrup
- Honey
- Agave nectar
- Molasses*
Molasses isn't listed in most canning books or sites. An article on the Colorado State University site said to avoid using molasses because the flavor is overpowering. Since they didn't address the safety issue, I reached out for clarification. They told me, "There are no known safety issues associated with the use of molasses in canning; however, if canned improperly, molasses can be prone to contribute to the formation of mold."
PennState Extension's article, "Canning with Less Sugar" also includes artificial sweeteners:
- Sucralose (Splenda)
- Stevia
Aspartame is not recommended as it is destroyed by long cooking methods and won't sweeten the product. Saccharine based sweeteners can turn bitter when cooked.
Safe liquids
The following are all safe to use:
- Water
- Apple juice
- Apple cider
- Cranberry juice
- Orange juice
- Pineapple juice
Source: Ball's Book of Canning & Preserving (review) and America's Test Kitchen Foolproof Preserving.
You might also like, How to safely can jams, jellies, and preserves.
Recipe
Equipment
- Pressure cooker or Instant Pot
- Slow cooker or Instant Pot
Ingredients
- 6 pounds apples, cut into 2" chunks, leave peels on McIntosh preferred
- ½ cup apple cider (do not reduce when scaling down)
- ⅓ cup brown sugar see substitution notes
- 1 teaspoon combination of cinnamon & nutmeg optional, add at end to taste
- 1 tablespoon lemon juice
Instructions
- Cut the apples into large pieces (2" in great), keep peels on, but discard cores.
Pressure cook
- Add apples, ⅓ cup sugar and ½ cup of apple cider to the Instant Pot or pressure cooker. Bring to pressure and cook for 45 minutes. (Apples will soften with just 10 minutes of pressure cooking, but a longer duration caramelizes the sugars to create an excellent flavor).
- Quick release the steam. (Slow release allows the water vapor to condense, which would then need to be cooked for evaporation. We want this steam gone to speed up the slow cooking process).
- Puree the apples with an immersion blender (or transfer to a blender and return to the Instant Pot). Continue to leave the peels in at this point.
- Return apple mash to the Instant Pot or to a slow cooker, set to high. Crack the lid to release the steam but to not remove it (this can lower the temperature to unsafe levels). Slow cook for 2-8 hours (depends on batch size).
- Jump to "Check for Consistency" section after 2 hours of slow cooking.
Slow cook
- Add apples, ⅓ cup sugar, lemon juice, and ½ cup of apple cider to the slow cooker. Turn to high and crack the lid (do not remove it or temperatures can drop to unsafe levels).
- Slow cook on high for 2 hours and then apples should be soft enough to mash or puree with an immersion blender (or transferred to a blender).
- After mashing the apples, continue to slow cook until it thickens (which will take an additional 4-10 hours). Check for consistency after 2 hours.
Check for consistency
- Check the apple butter after 2 hours for consistency, and continue to check until it is done. Scrape the bottom of the pot to see how quickly the apple butter fills in the trench you created. When the apple butter doesn't fill in the area for 1-2 seconds, it is time to add the spices (if necessary)
- Add optional spices + extra sugar if needed: Taste the apple butter when it is almost done. Add spices, a little at a time, continuing to taste. (If added earlier in the process, it can cook down too strongly).
- Test for doneness: Scrap a spatula along the bottom of the pot. Once the apple butter no longer fills in the space for 5+ seconds, it is done.
Canning
- Bring water to boil in a deep stock pot with a metal rack on the bottom to prevent the jars from touching the bottom of the pot. Make sure the water will cover the jars by 1-2 inches.
- Fill sterilized canning jars with the warm apple butter. Leave ¼" headspace and run a skewer along the inside to remove air bubbles. Secure lids and bands to finger-tight.
- Process jars in the hot water bath for 15 minutes (adjusting up for altitude). Remove and let cool. Leave jars undisturbed for 12 hours, then check for proper seals.
Notes
- Granulated sugar
- Brown sugar
- Maple syrup
- Honey
- Agave nectar
- Sucralose (Splenda)
- Stevia
- Water
- Apple juice
- Apple cide
- Cranberry juice
- Orange juice
- Pineapple juice
Nutrition
Storage
Apple butter can last a couple of years when canned and stored in a cool, dark place. Once opened, store in the fridge and it can last 3-6 months.
Recipes & resources
- Apple butter recipe for canning (above)
- Stove top apple butter (Baking a Moment)
- Oven apple butter (NY Times)
- Cranberry apple butter (Food in Jars)
- Slow cooker apple butter (My Baking Addiction)
Other ways to use up apples:
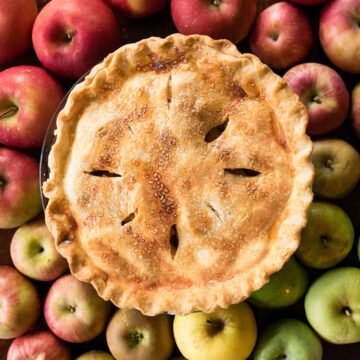
- Dutch apple pie (with a French cookie crust)
- Cinnamon & brown sugar applesauce
- Baked apple cider donuts (with apple sugar)
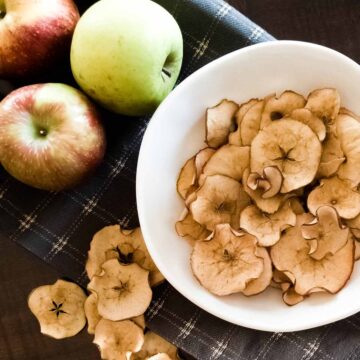
- How to make crisp apple chips
- The best (and worst) apples for pie
- Easy homemade caramel apples
- How much do canning jars cost & where to buy them
- How to safely can jams, jellies, and preserves


Questions?
Do you still have a question? Or did you run into a problem and need help solving it (or have a solution to share)? Leave a comment for me and the rest of the community!
D06 says
This recipe for apple butter sounds amazing! I love the idea of canning it to enjoy throughout the year. I can’t wait to try it out with the fresh apples from my local orchard. Thanks for sharing such a detailed guide!
Bridget says
This recipe is AMAZING!!! This is my second time making it. I a nerd when it comes down to cooking. I found your articles very interesting and extremely helpful. Thank you for doing all the research for me. I chose the Instant Pot and Slow Cooker method. It was
so good I’m making a
double batch tonight.Thanks again 🙏🏽♥️
Veronica T says
I'm so glad it worked out! And hello to a fellow cooking nerd 🙂
Tt789 says
This apple butter recipe looks amazing! I can't wait to try it out this weekend. Thanks for the detailed instructions on canning too—I’ve always wanted to learn how to preserve my own spreads. 🍏🥣
Veronica T says
I'm excited for you to try preserving for the first time! After you do it once or twice, it's not intimidating at all. Good luck!
7f777 login says
This apple butter recipe looks delicious! I can't wait to try it out, especially with canning instructions included. Perfect timing for apple season! Thank you for sharing!
Y89 Slots says
This apple butter recipe looks amazing! I can't wait to try it out this fall. The canning tips are super helpful too—I'm a novice at canning, so I appreciate the step-by-step instructions. Thank you for sharing!
Veronica T says
After this heatwave, I'm looking forward to a crisp autumn day and some apples 🙂 Hope you enjoy the apple butter later this year.
Jen V. says
Loved it!
Katie M. says
I had never considered pressure cooking. I used the instant pot and it worked perfectly!!
Kay says
Ball’s canning recipe for apple butter does list lemon juice (1/4 cup).
Veronica T says
Kay, thank you so much for leaving a comment. That Ball recipe, among other trusted sources, did not have added lemon juice or vinegar last year. It looks like those were all updated sometime this year (2024). I don't have a screenshot of them, but this reddit thread from 10 months ago linked to recipes that didn't have lemon juice either (but now do).
This sent me down a deep research path to find out 1) why they changed and 2) is lemon juice / acid required now, and why? I've reached out to several leading experts and will update the post accordingly. Until then, I have updated the article with this tentative information.
Jackson says
That all makes sense. Ha ha, yeah a few splatters on the apron and my hands. Honestly, the last time I made AB, I had about 45 min to an hour to make it and then head to a friend's party, so I just vigorously stirred. I was using a gas burner, so I think I was basically forcing convection cooling by stirring a bunch. I def couldn't have just left it there without some kind of splatter guard (though maybe if I filled it up with a ton of water and slowly reduced it, it could help with the gloopy bubble pops). Never tried an induction, but it sounds nice. I really want a bigger range, so that I can get high heat for wok cooking. Will let you know next time I make some!
jackson says
Hey! First, thanks for writing this. I appreciate the science and explanation. I’ve been actually scouting the internet for some apple butter (or generic fruit) science. Kenji didn’t have enough :(.
Anyway, I have a question. Is there a reason why people think slow cooking works? Is it just tradition? Like I’ve made some pretty nice, dark, thick apple butter on the stovetop by just really reducing and letting low-medium heat darken it. I remember reading something about glucose and fructose breaking down at different times so I’m wondering if by cooking quickly on the stovetop, I’m not extracting as much natural sugar. Maybe I’ll just rest this myself one day, but that’s a lot of apple butter to make
Vee says
Hello to a fellow Kenji Lopez-Alt fan! As for your question: You remember correctly that glucose and fructose break down at different temperatures. They begin to caramelize at the following temperatures:
In addition to that, sugars break down due to thermal decomposition (rather than melting). At high heat, thermal decomposition and melting appear to be the same thing. At low heat, you can see and taste the slower changes of the sugar, resulting in a more complex flavor. If you wanted to try to experiment yourself, here's a rather easy one to try from our shared trusted source, Serious Eats.
I imagine apple butter's flavor is more complex as it cooks longer, similar to caramelizing onions (people have tried tricks to make caramelized onions faster, but it always seems to lack the depth of flavor).
And you're right about a lot of apples - almost 100 lbs of apples when into testing this (and a lot of super nice friends to take the resulting product off my hands!)
Jackson says
Ah ha. Sounds very interesting. For the temperature chart you listed, what I'm wondering is, how does this relate to time? I don't think my AB ever hit above 320 (probs hit 230 at various points). Is it just that the bottom of the pan is hot enough to caramelize the small bits that are touching it?
As I understood the article, the caramelization and decomposition are the same thing? So why does time matter so much? Is it just because we don't fully understand caramelization and something is going on while stuff is bubbling away?
Maybe I just need to do a side by side test (I suppose it won't take too too long). If I do, I'll post here!
Thanks for the link and the response. It's very interesting stuff.
Vee says
Edit for clarity): Based on that Kenji Lopez-Alt article, caramelization of sugars is a type of decomposition. However, is regular everyday use of the two terms, we use caramelization to refer to sugars changing structure and decomposition to refer to cells breaking down. You can turn an apple into mush (decomposition) with little to no caramelization. Alternatively, you could sear apple slices on high heat and caramelize the oustide with very little decomposition of the flesh.
That said, caramelization is also a form of decomposition - instead of referring to a breakdown of the flesh, it's a breakdown specifically of the sugars.
Time matters when it comes to caramelization because different sugars break down at different rates. This article at Serious Eats explains it pretty well, using caramelized onions as the example. I like to think of it like fat: if you cook a fatty piece of meat a high heat, there will still be a lot of noticeable (and probably chewy) fat. But if you cook it low and slow, the different structures of the fat render into goo.
If you do a side-by-side test, definitely stop by to let us know how it turns out. I honestly was surprised how much time matters in the Instant Pot - pressure cooking is a fast cooking method but I hadn't considered the caramelization that occurs inside. Because it was so unexpected (at least to me), I kept doing tests to make sure I wasn't getting one-off results!
Jackson Min says
Interesting stuff. So definitely getting decomposition. Re caramelization... the article you linked still seems to be saying that you *can* caramelize fast, but that it's hard because it can burn. My method was basically just mix fast and don't let stuff stick. This, combined with probably a slightly higher heat than you used is probably, why mine didn't end up super light or burnt. I ended up with a pretty dark brown that slowly developed during my vigorous stirring (It still probs took 30 min - 1 hour). What I mainly was doing was akin to "...In order to get maximum caramelized flavor, we want to now reduce what's left of the water in the mixture while continuously stirring, so that we can get those last bits of caramelization that occur above 250°F."
Anyway, still haven't had the time or energy to do the slow cooker method (I also don't have a crock pot and my stove doesn't get low enough, so I'll have to rely on my instantpot running in slow cook mode without pressure). In terms of instant pots, I've basically heard that they are able to do most of what a crock pot can do better and faster. The reason I started down this rabbit hole is because I originally started my AB journey on a crock pot, went to an instant pot and realized it was faster, and then decided "heck, I bet I can do this on the stove."
Vee says
If you are willing to stir the apple butter constantly on a stove top, it really is a fast method. Did you have any explode and burn you, or did you stand there for the whole hour stirring? (Good for you!!! If I stepped away for 10 seconds I had so much splatter!). What kind of cooktop are you using? I temporarily have a gas cooktop until I get an induction one again (which I LOVE for easy temperature control).
As for the slow cooker, it is technically "better" because it heats the bottom and sides. The instant pot only heats the bottom. But honestly, I feel like that is splitting hairs and the only difference it makes is that cooking times tend to be a little longer in the Instant Pot. I'm 100% behind having a few hard-working appliances that can do it all, and do it all well enough. I think the different between the Instant Pot and a slow cooker are minimal enough that it doesn't matter - unless we're trying to win some blue ribbons at a fair or something 😉
Also, please share any future tests you do!
Vee says
By the way, I updated my previous comment re: caramelization vs decomposition for clarity. I didn't realize you were referring to my previous comment (and not the article). Sorry about that. Please re-read the comment and ask if you have any more questions.