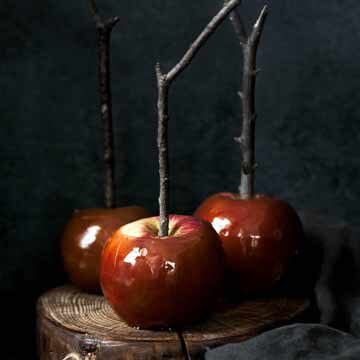
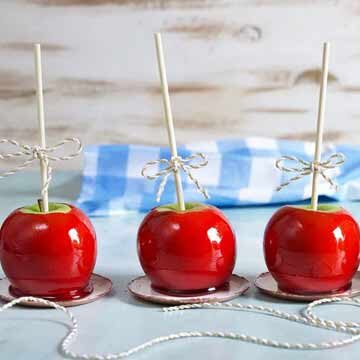
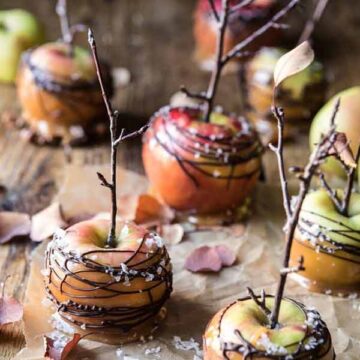
Nothing brings out autumn vibes like a caramel apple. Homemade caramel apples have a rich, gooey caramel coating, unlike store-bought options that are hard and taste waxy.

Caramel is notoriously fussy, so I wanted to make an easy caramel apple recipe. I spent countless hours testing recipes at home, making caramel apples alongside a pastry chef, and noting all the mistakes I've made along the way (there's a lot!).
This article shares my experiences, the wisdom from the pastry chef, and a caramel apple recipe that is tasty, easy and reliable. This recipe uses corn syrup to ensure a smooth consistency and brown sugar for a richer flavor.
The article is admittedly quite long, but I included everything I could think of to help you could enjoy homemade caramel apples this fall.
Jump to:
How to make caramel apples
If you're wondering how to make caramel apples, the concept is easy:
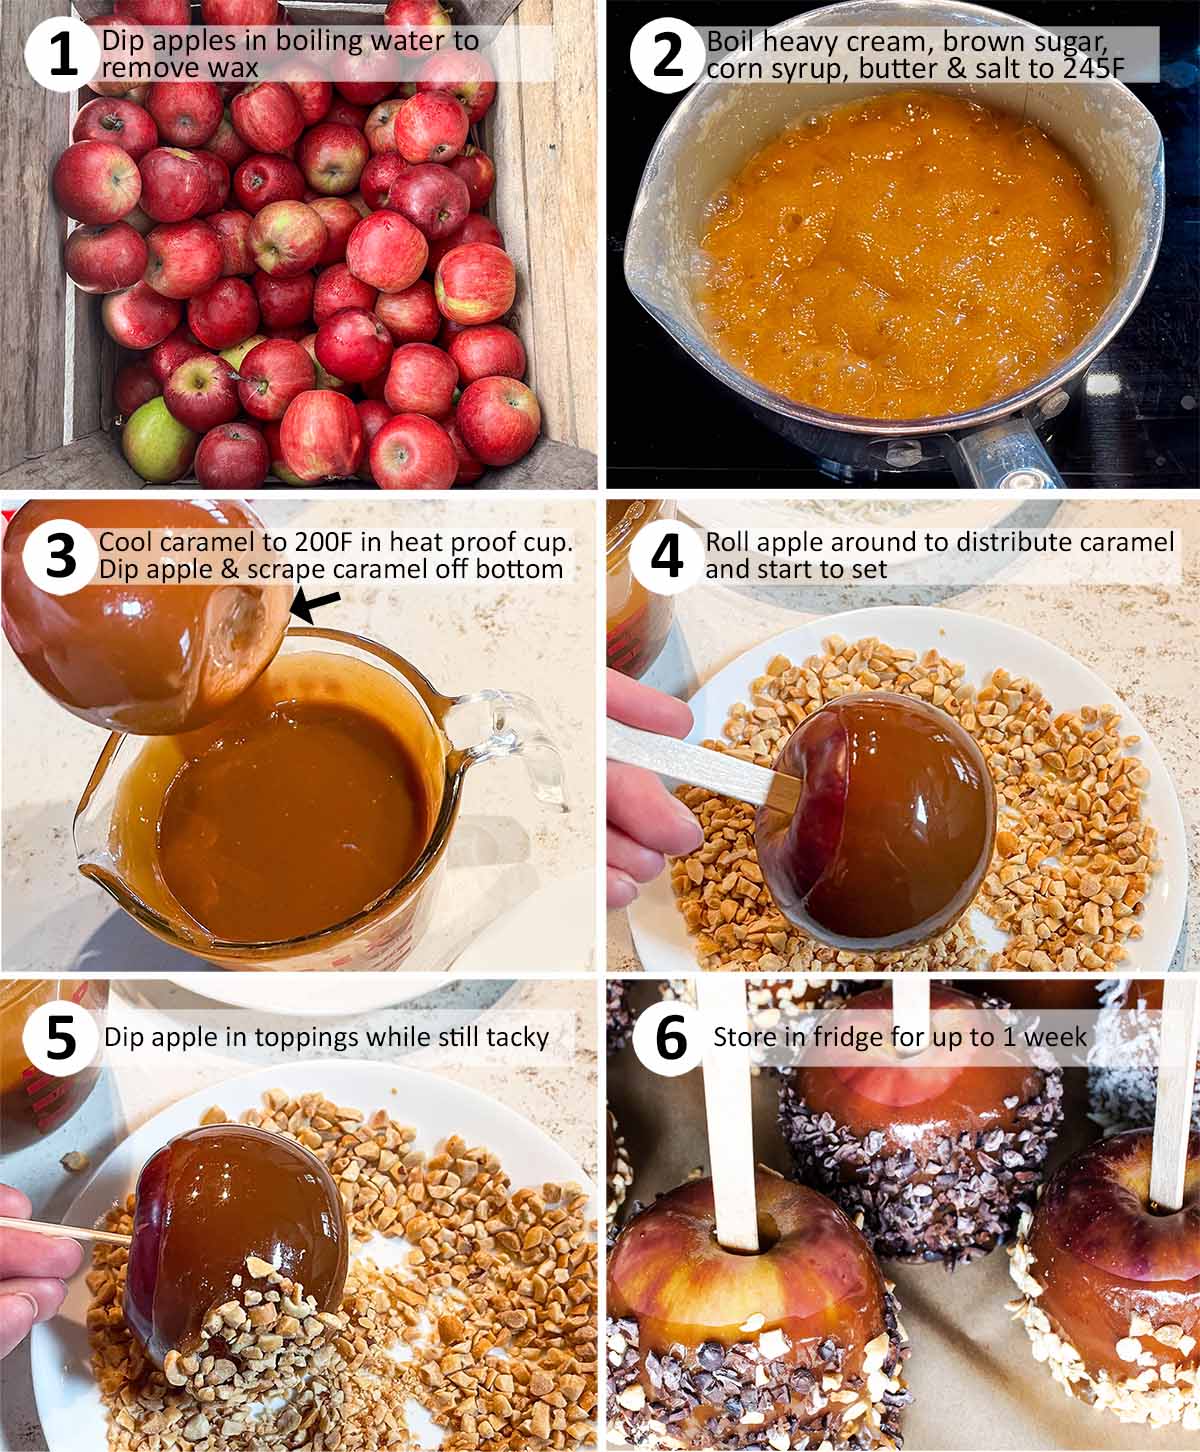
- Dip apples in boiling water for 5 seconds to remove wax. This is still required for farmers market and home grown apples, since apples naturally have a waxy finish.
- Make the caramel dipping sauce, which requires precise temperature monitoring. Boil until it reaches 245°F.
- Let the caramel cool to 200°F (or 185°F if it's too thin). Dip cold apples in the caramel, and then toppings.
It's the execution that's a bit challenging. A lot can go wrong when making the caramel - it might not caramelize enough (causing a bland flavor), burn, turn grainy, fully crystallize, not be stiff enough, be too stiff, not stick to the apple, fall off the apple, or totally harden on the apple.
After a lot of testing, I've encountered most of those problems. (A bit embarrassing for someone who works with food for a living!). But this has helped me figure out how to make caramel apples reliably, without problems.
It comes down to using an easier recipe, knowing what to do and what not to do. Let's look at the hardest part first, how to make the caramel sauce.
Types of caramel
There are 3 types of homemade caramel apple recipes:
- Caramel without corn syrup (like pastry chefs make)
- Caramel with corn syrup (best for home cooks)
- Melted caramel candies (I didn't test this method)
Without corn syrup
This is considered the best way to make caramel as the flavor comes from actually caramelizing the sugar. The flavor is pure and rich, but it is also tricky to master.
This is the type of caramel I made alongside Sweet Bee's Jessica Ellington in her caramel apple cooking class. I took extensive notes and will share that in another article.
It seems simple enough, but making caramel this way is incredibly difficult to get right - unless you're a professional. A lot can go wrong. I know this from making it three times in a row, in my own at home. I managed to mess each one up a different way:
- The first batch completely crystallized without turning into caramel
- The second batch didn't caramelize enough and had very little flavor. It looked light golden in the finished product but after drying on the apples it was cloudy-off white.
- The third batch turned grainy.
I thought I was doing all of the right things: I didn't stir the sugar as it cooked (which causes graininess), I cooked it on the right heat levels (so it didn't burn), and I was checking the temperature with both a candy thermometer and instant read thermometer.
But each time, I must have done one little thing wrong. For example, I did turn the heat up on the one that fully crystallized because after 20 minutes it wasn't turning golden, at all!
Since the 3rd time wasn't a charm, I decided to try a more foolproof method: use corn syrup.
With corn syrup
A caramel apple recipe with corn syrup is easy, even for beginners. I don't use corn syrup very often, but in this case, it's definitely worth it. This method is a compromise between the pastry-chef version and melting caramel candies.
Corn syrup helps keep the caramel consistency smooth, instead of grainy. The specific formation of corn syrup's sugar molecules make it resistant to crystallization, whereas granulated sugar really wants to crystallize. If the sugar crystallized, the caramel turns grainy.
Basically, corn syrup makes the caramel cooking process much more forgiving. While I don't use corn syrup often, I highly recommend it in this case.
I've made this type of caramel 3 times and it worked every single time. This is the recipe I'm sharing for making easy caramel apples. Keep reading after the recipe for the best apples to use and other helpful tips.
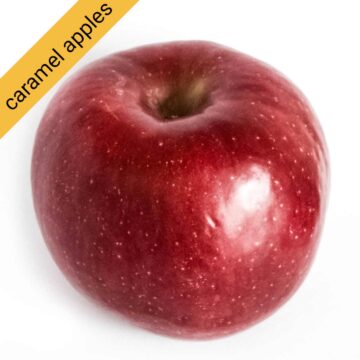
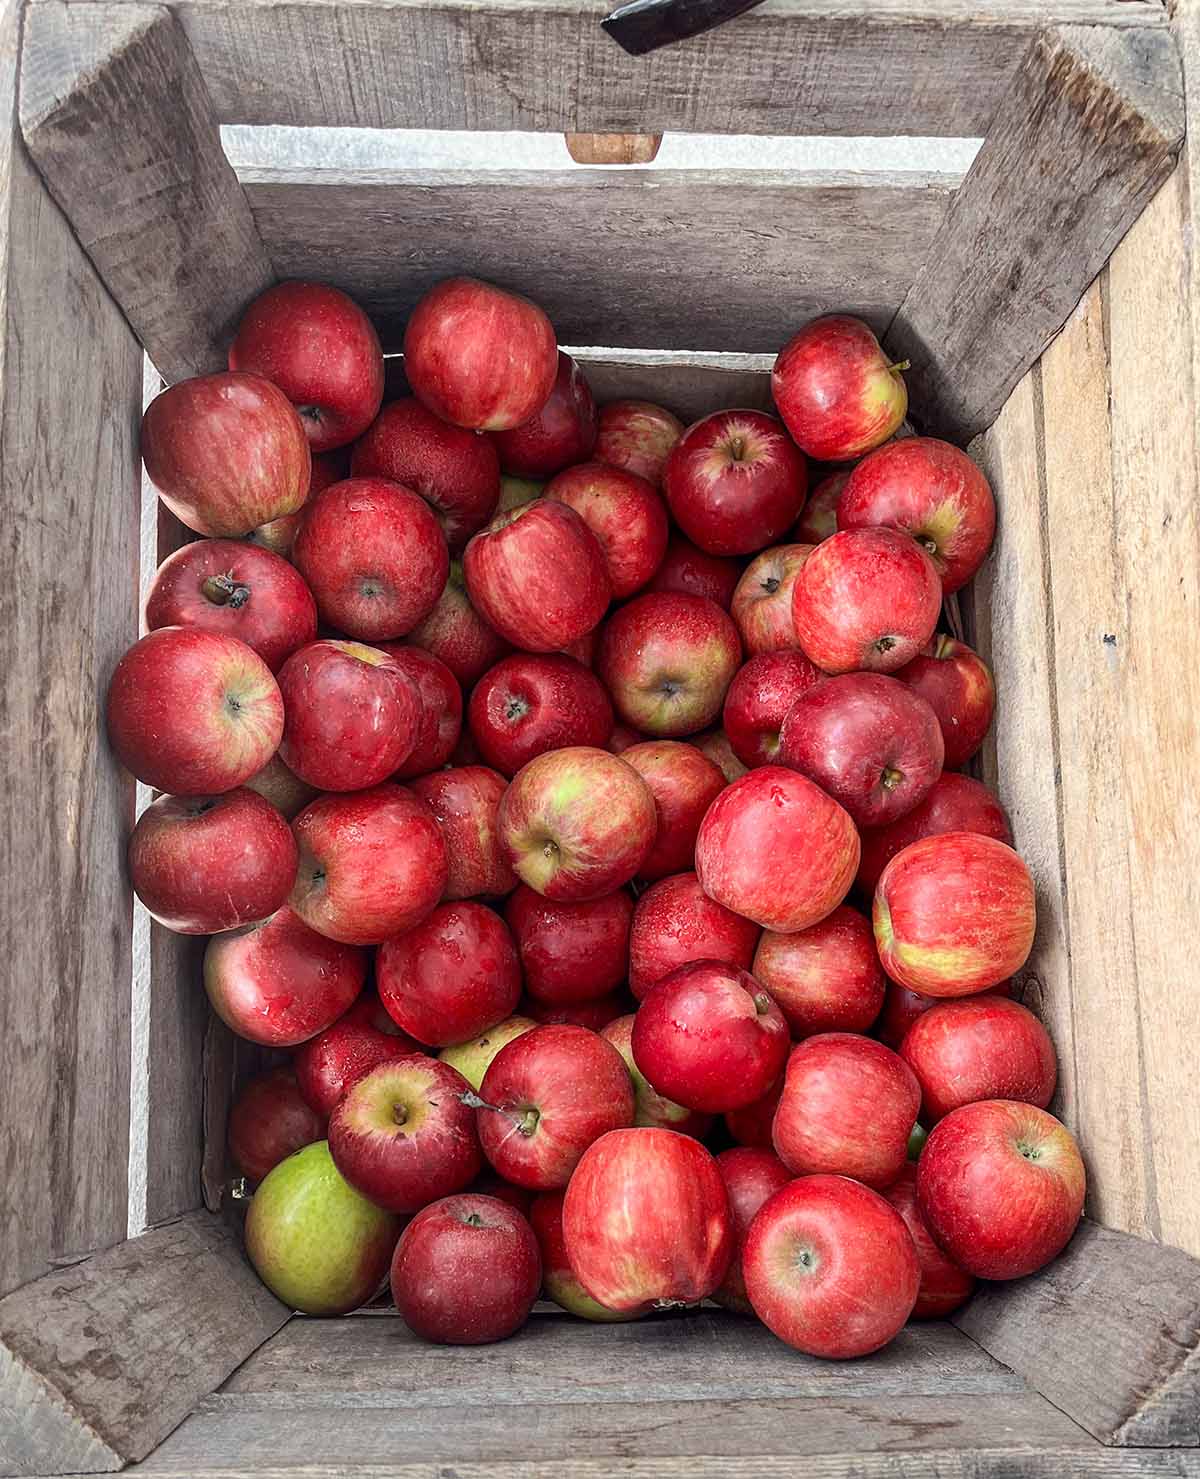
Best apples to use
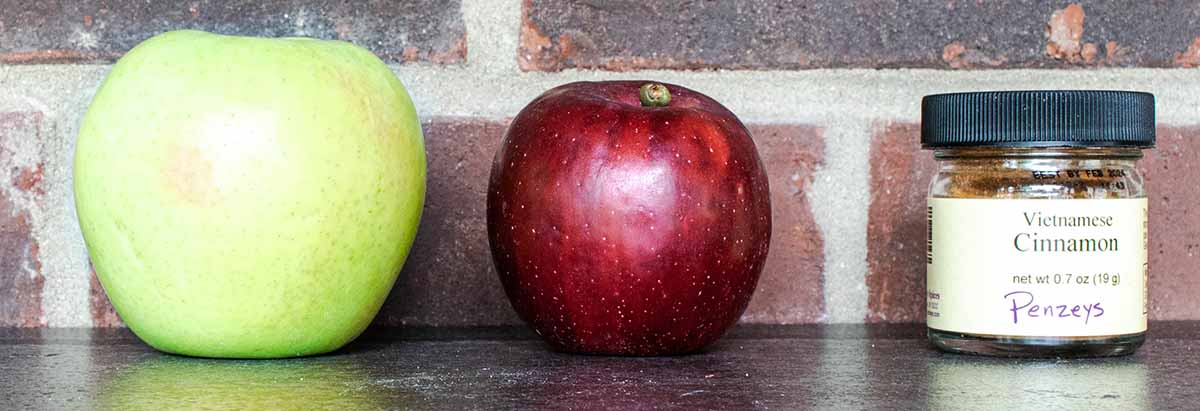
The absolute best apples for caramel apples are Jonathan. They are small, crisp, and more tart than sweet. If you can't find them, the next best varieties are Jonagold, Pink Lady, and Granny Smith.


When choosing apples, consider their size, texture, and tartness.
- Size: small apples are easier to eat and have a better caramel-to-apple ratio
- Texture: any crisp eating apple will have a good texture for making caramel apples. Avoid soft apples like Mcintosh.
- Sweet vs tart: I highly recommend buying tart apples to balance out the super sweet caramel coating.
Granny smith apples are often large, but their extremely tart flavor and crisp flesh make them a great variety for caramel apples. The green apple color is also fun when the top peaks out from the caramel coating.
This apple variety guide lists out sweet vs tart apples, and then don't forget to check out when each apple variety is in season.
Once you chose the variety of apple you want to use, look for individual apples with flat bottoms. You'll want them to sit upright on their own after dipping them in caramel.
Removing wax from apples
Apples from the grocery store are almost always coated in an extra wax to give them a longer shelf life. This wax needs to be removed or the caramel will slide off and puddle at the bottom.
Surprisingly, all apples have a natural waxy coating, even from the farmers market or your own back yard. Each variety of apple will differ in how waxy their skin is - Swiss apples, for example, actually feel like someone spilled grease on them!
Dip each apple in boiling water for 5 seconds, then wipe it well with a kitchen towel. Don't use a nice towel, as some apples will bleed a little bit of red dye. Also be careful where you set them down, and the clothes you wear, for the same reason.
After you remove the waxy coating, put the apples in the fridge. Caramel sticks to cold apples better while also helping it set faster.
Dipping the apples
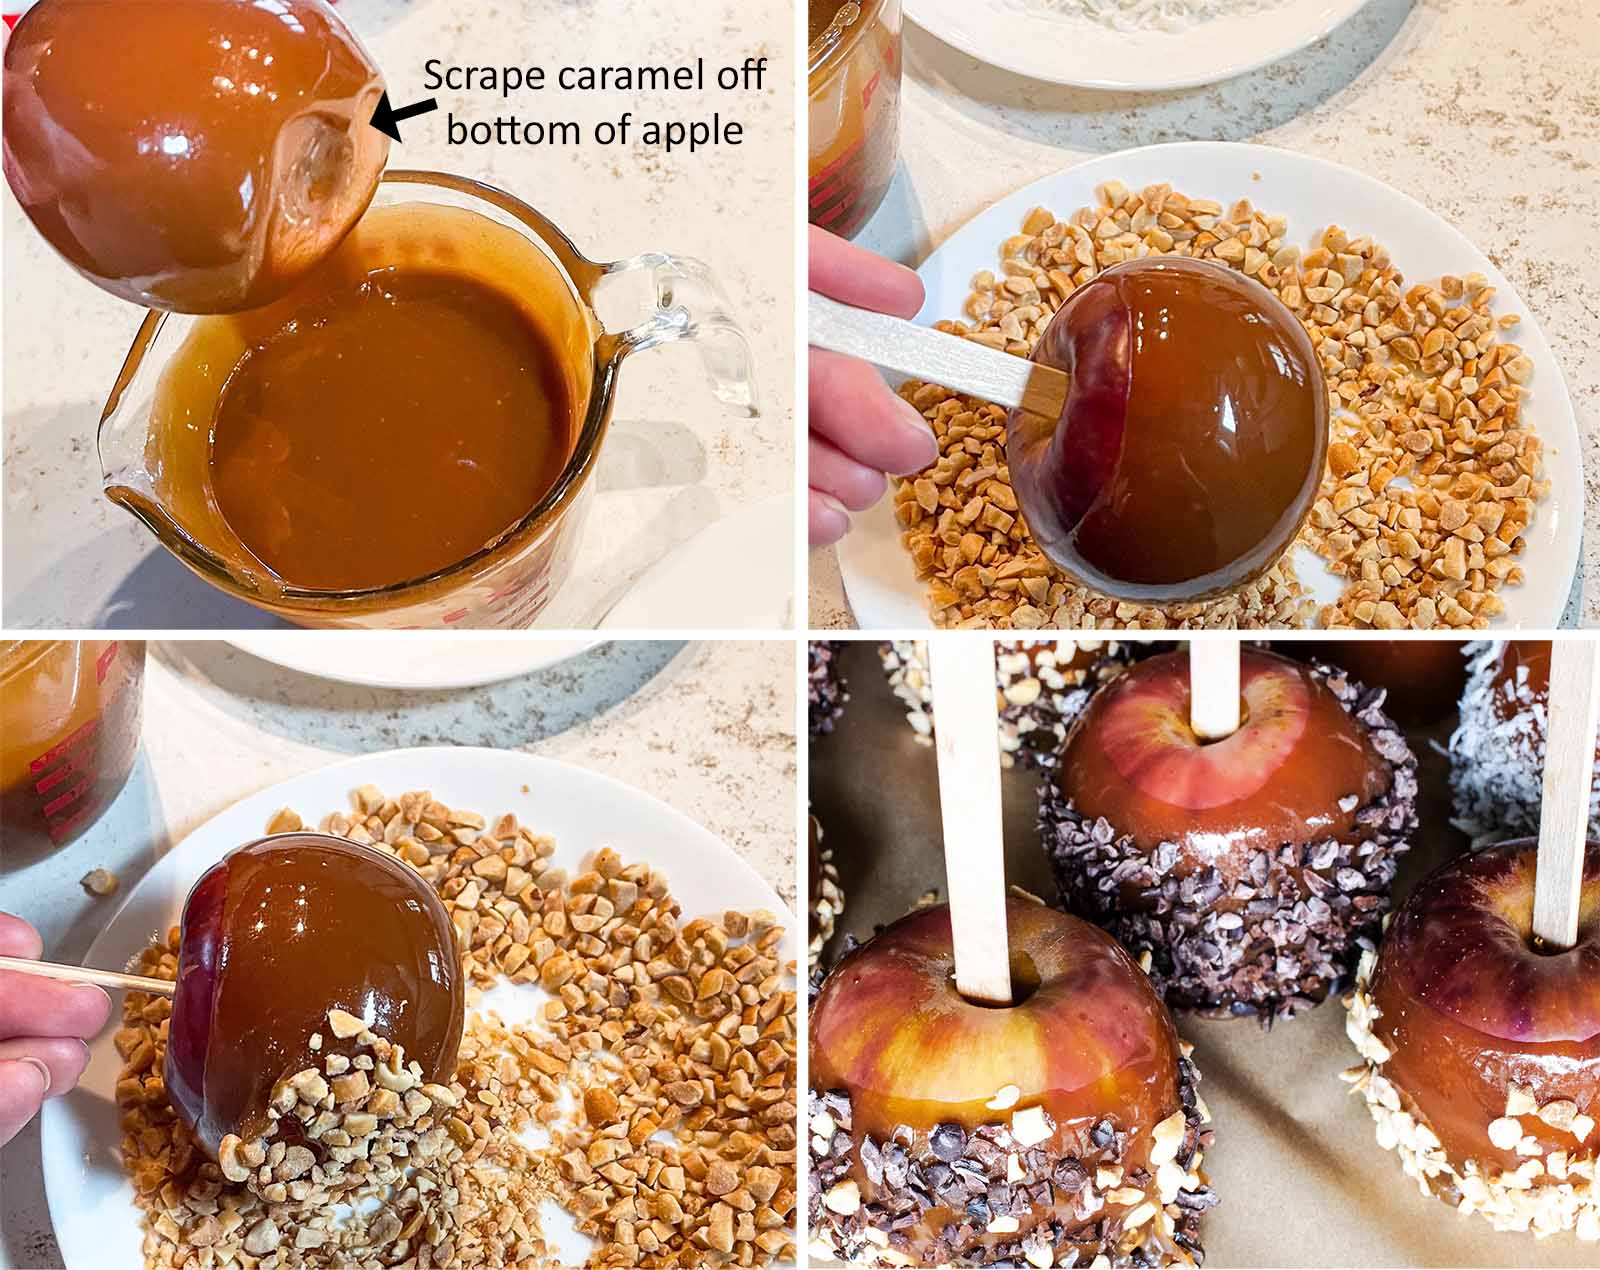
After you make the caramel, pour it into a heat resistant glass measuring cup or shallow bowl. Ideally the container is deep and a little wider than the apples. This allows you to easily coat the entire apple in one easy dip.
Next, dip the apples:
- Dip the apple into the caramel, removing it a second later.
- Run the bottom of the apple over the edge of the container to remove excess caramel (otherwise there will be a large puddle on the bottom).
- Turn the apple upside down for 5 seconds, rolling it around if needed. This helps the caramel set evenly and not immediately pool at the bottom.
- Quickly dip into the toppings while the caramel is still sticky.
- Set the apple on a wax or parchment lined baking sheet or tray.
- Place in the fridge for 15 minutes to continue to help set the caramel.
- Serve within 2 hours at room temperature or store in the fridge for up to a week.
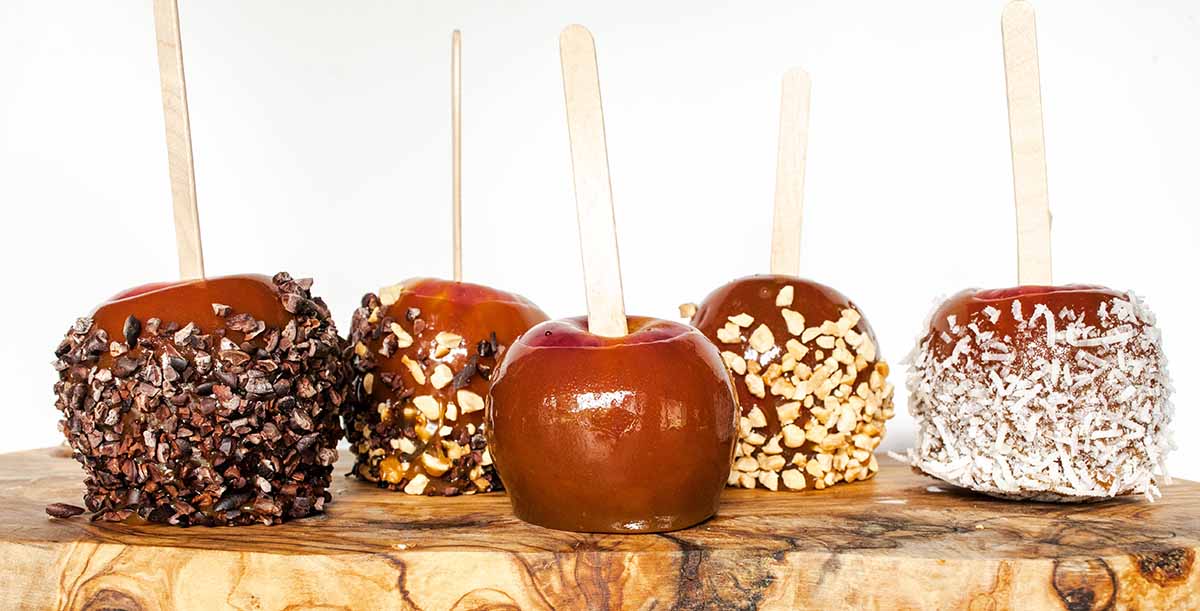
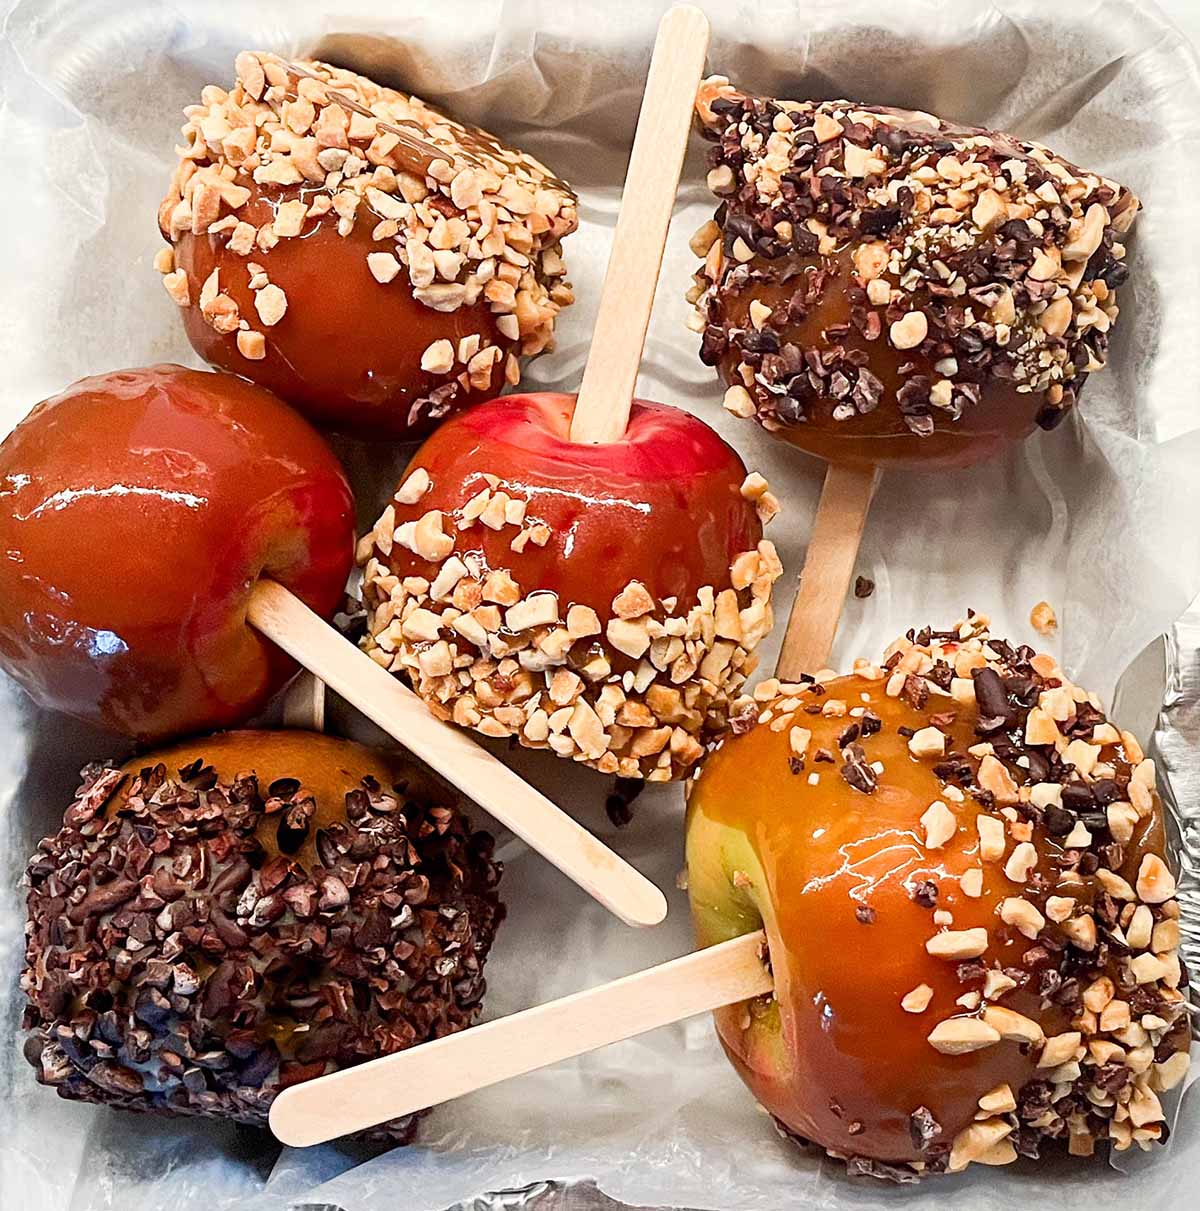
Caramel apple toppings
Toppings are not only tasty, they make the caramel apple process even easier. They hide flaws, and make them sit on wax paper without sticking since they cover the bottom of the apple too.
The toppings need to be ready before you dip the apples into the caramel. After dipping, you'll hold the apples upside down for 5-10 seconds and then immediately dip them into the toppings. Waiting much longer and the caramel won't be sticky anymore!
Try any of the following toppings, or combine 2-3 for apples with mixed coatings.
- Toasted nuts (chopped) - even better if they are salted, to provide a salted caramel apple flavor
- Pretzels (chopped) - these also add a nice salted caramel flavor
- Granola - use your favorite granola brand for a unique twist
- Chocolate (chopped) - try dark chocolate, which isn't as sweet, to balance out the sweet caramel topping. You can also use mini chocolate chips without chopping.
- Cacao nibs - these are often bitter, but depending on your palate, might be the perfect balance to an otherwise sweet treat
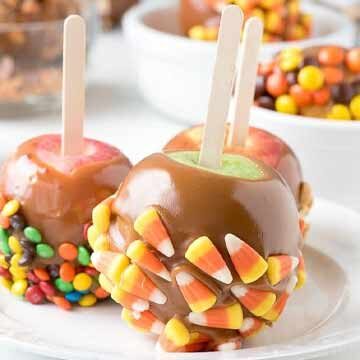
- Candy - try M&Ms, chopped candy corn, or chopped heath bars (for sweet-on-sweet!)
- Cereal - crushed cornflakes, captain crunch, or even fruity pebbles
- Raw or toasted coconut - try mixing this with chocolate or nuts as well
- Oreos - use chopped or pulverized (like an oreo pie crust)
- S'mores - mix crushed graham crackers with chopped chocolate and mini marshmallows
- Popcorn - crush popcorn (salted or unsalted)
- Sprinkles - use orange and chocolate sprinkles for a halloween twist
- Sea salt - simply sprinkle with a little sea salt or vanilla sea salt (don't roll the apple in the salt!)
Ingredient & equipment notes
There aren't many ingredients, but since making caramel is a science (and a lot can go wrong), an overview seemed like a good idea. For some ingredients (like salt), the brand actually matters, and for others it's just worth knowing what role they play.
Salt
Diamond Crystal salt is known to work well. Other brands might also be just fine. But avoid Morton's salt as it can cause graininess.
Stella Parks from Serious Eats was troubleshooting caramel apple problems in the comment section, advising: "Do take care with Morton's if continue your candy making adventures; it contains an anti-caking agent that interferes with the structure of candies like fudge and toffee."
Butter
I use unsalted butter to control the salt in the mixture (but I have made a batch with salted butter and it still turned out).
Butter makes this recipe even more foolproof, as it helps maintain a smooth consistency. Martin Earl from ThermoBlog explains, "Fats and proteins that are added to the caramels get between the sugar molecules, preventing them from clumping and crystallizing."
Heavy Cream
I use Horizon heavy cream, which Stella Parks from Serious Eats also approves of. The pastry chef, Jessica Ellington, mentioned in her class that heavy whipping cream is ok to use, even though it has stabilizers in it.
It's also worth noting that changing the amount of heavy cream will effect the final thickness of the caramel (along with the temperature you cook it to). My recipe should produce a thick, but pliable caramel. If you want it a little softer, you can add up to ¼ cup more heavy cream at the start.
Sugar & corn syrup
I found the sugar to be very forgiving. I use generic brand white sugar, organic white sugar, light brown sugar, and dark brown sugar. I didn't notice consistency differences, although the dark brown sugar had the best flavor in my opinion.
I used light Karo corn syrup with great success. I didn't try other brands, but I wouldn't use dark corn syrup as it would change the flavor too much.
Heat resistant utensils & cup/bowl
The pot of caramel sauce gets much hotter than anything you boil (water boils at 212°F). Don't use plastic spoons or spatulas. Instead, use wooden, metal, or silicon spoon.
Professionals don't agree on which type of heat proof utensil to use. Some swear by metal because it is least likely to introduce impurities, while others note that metal will pull heat away, potentially causing localized crystallization.
You will also need a heat resistant glass measuring cup or deep, narrow bowl to pour the caramel into. You will dip your apples in that cup or bowl. I use a 2-cup pyrex measuring cup, filling it with half of the caramel at a time.
Some people use a metal bowl, but that has one major drawback in my opinion. If you have leftover caramel, you can reheat it to pour over ice cream or drizzle on spare apple slices. The best way to reheat it is in the microwave, which you can do if it's in a metal bowl.
How to clean your pan & utensils
Caramel makes a sticky mess, and the hotter it gets, the harder it dries. But there's an easy solution: boil water in the pan on the stovetop.
Once the water starts to boil, most of the caramel will be dissolved. Add in your heat-proof utensils and those should be cleaned quickly as well.
Pour out the water and clean everything like your normally would to remove to the oils. Just take note that any gooey caramel will stick to your scrubber and be a pain to get out.
Making caramel: temperature and thermometers
Making caramel can be frustrating. There are two main things to set you up for success: don't stir the caramel while it boils, and keep a vigilant eye on the temperature.
Thermometer:
The best thermometer to use is a clip-on candy thermometer. It allows you to continually monitor the temperature without taking it in and out.
An instant read thermometer that you dip in the pot, then remove it causes two problems. First, you will be wiping hot caramel off it each time, something you can't do simply with a paper towel as it will burn your fingers. Second, putting it back into the pot introduces sugar crystals that can turn the caramel grainy.
Stella Parks from Serious Eats addressed this issue in the comments section of her caramel apple recipe, "For candy making, it's best to use a clip-on digital thermometer that can continually monitor the syrup in real time because the candy's temperature will rise faster than the 3-4 second lag of a pocket thermometer. The lag is longer the higher the temp, so pocket thermometers do great when it comes to spot checking meat (it's a short jump from room temp at 70ish to, say, 140F) but they take ages to climb from up to 230."
Temperature
Caramel gets thicker the hotter it is heated to. While it might still seem fairly thin while warm, it will thicken as it cools depending on how high you got its temperatures.
- Caramel sauce (for ice cream, etc): 220-235°F
- Caramel for apples and soft candies: 240-249°F
- Firm caramel (like this milk dud recipe): 250-267°F
Cooking caramel falls under general candy making temperature stages, like "thread," "soft ball," and "hard ball." They describe what happens to the sugar mixture at different temperatures.
I found that cooking the caramel to 245°F is just right. The caramel on the apples is chewy without being gooey or so hard it sticks to your teeth.
Do caramel apples need to be refrigerated?
Yes, they should be refrigerated to prevent bacteria growth, specifically listeria.
Separately, both caramel and apples are safe at room temperature: caramel has enough sugar and apples have enough acid to inhibit bacteria growth.
However, a problem arises when moisture gets trapped under the caramel - this creates a hotbed for bacterial growth. Two things cause this to happen: natural moisture loss from the apple and juice that escapes from pushing in the sticks.
A listeria outbreak from commercially produced caramel apples (stored at room temperature) hospitalized 35 people and caused 3 deaths, as reported in the study by Kathleen A. Glass, et al. The study continues to say, "The outbreak took producers, public health officials, and food safety experts by surprise: caramel-coated apples are not a food on which Listeria monocytogenes should grow."
The study's findings are summarized nicely on TIME Magazine, "The temperatures-and sticks-seemed to play a role in listeria growth." Room temperature caramel apples with sticks grew exponentially, whereas refrigerated caramel apples without sticks had no listeria growth.
Based on the results of the study, caramel apples with sticks should be stored in the fridge and are good for 2-3 weeks. However, caramel apples without sticks can be stored at room temperature for up to a week. In fact, the Cottage Food law in Minnesota provides guidance that says people can sell homemade caramel apples without sticks because they don't require refrigeration.
I'm not sure how you make caramel apples without inserting a stick, especially since you don't want your hands near the ultra hot caramel. But if you figure it out, let me know!
Recipe
Equipment
- a 3-quart saucepan
- heat-resistant glass measuring cup or metal bowl for caramel apple dipping
- heat resistant spoon or spatula
- silicon baking mat or greased baking sheet
- candy thermometer
Ingredients
- 12-18 apples
- 1 ½ cups heavy cream
- 1 cup corn syrup
- 2 cups brown sugar (light or dark, your flavor preference)
- ¼ cup unsalted butter room temperature
- ½ teaspoon salt (not Morton's brand, see note)
- ½ teaspoon vanilla extract
- 5 cups toppings crushed nuts, chocolate, etc (your choice)
Instructions
PREPARE APPLES & TOPPINGS
- Get all of your toppings ready. Chop nuts, chocolate, and other toppings into small pieces.5 cups toppings
- Bring water to a boil in your pot. Drop apples in one at a time for 5 seconds. Remove with a large spoon or strainer, then wipe them with a kitchen towel to remove any wax. Every apple, even ones you grow, need to have waxed removed (apples naturally have a waxy coating, some more than others).12-18 apples
- Place apples in the fridge to cool, which will help the caramel stick to them and harden.
- Wear long sleeves or oven mitts, when you start making the caramel. While it doesn't happen often, it can spatter and it really burns! (Thick caramel that sticks to your skin is bad!)
MAKE THE CARAMEL
- In a 3-quart sauce pan, combine the heavy cream, corn syrup, brown sugar, butter, and salt.1 ½ cups heavy cream, 1 cup corn syrup, 2 cups brown sugar, ¼ cup unsalted butter, ½ tsp salt
- Cook over medium heat, stirring constantly until the butter is melted and everything is mixed. If using a gas cooktop, the flame should cover the bottom of the pan but not go up the sides (which can burn the sugar). Attach your candy thermometer to the pan and make sure it doesn't touch the bottom of the pan (it won't get in the way of stirring now).
- IMPORTANT: Do not stir after this point (which can cause it to turn grainy), and do not touch the caramel as it will be hotter than boiling water.
- Let the mixture boil over medium heat until it reaches 245℉. This will take around 20 minutes. Lower heat will take longer and higher heat will be faster (but be careful not to burn the caramel). The temperature will quickly reach 215-225, then seems to stall out. If this happens, bump the heat up a tiny bit and it will continue to rise. Once it gets past 225 it seems to go up fairly quickly.
- Once the caramel reaches 245℉, remove it from the heat. Stir in vanilla (adding it earlier will cook off the flavor). Pour the caramel into your heat-proof cup or bowl.½ tsp vanilla extract
- Let the caramel cool down to 200℉, which should take 5-10 minutes. If it seems too thin, let it cool down a little more to 185℉.
DIP THE APPLES
- Bring apples out of the fridge and wipe any condensation off if needed.
- Dip apples in the caramel, remove a second later. Wipe the bottom of the apple off on the edge of your cup/bowl (this prevents a puddle from forming on the bottom). Hold the apple upside down for 5 seconds to let the caramel set, swirling the apple around as needed.
- Roll the apple around in the toppings while it is still gooey. Place apple on the silicon mat or a grease baking sheet (it sticks to parchment and wax paper, tearing little bits off when removed, that get stuck in between the toppings).5 cups toppings
- Caramel apples will take about 45 minutes to set at room temperature (and should be eaten within 2 hours). Alternatively, place them in the fridge for a more fool-proof way to set the caramel, and leave there until ready to eat.
- Store in the fridge for up to 1 week. Remove from fridge 30 minutes before serving to come back to room temperature.
Notes
Nutrition
Other recipes & resources
If you're looking for a caramel apple recipe without corn syrup, I recommend the one from Serious Eats. If this all seems like too much, I recommend making a caramel sauce and dipping apple slices in it (the caramel sauce can be stored in the fridge and softened back up in the microwave).
For the adventerous (and brave!) cook, check out the caramel apple recipes below for something different. I might be trying the brown butter bourbon or cider caramel apple recipes soon!
Caramel apple recipes

More apple recipes
- Baked apple cider donuts (with apple sugar)
- The best (and worst) apples for pie
- How to make apple butter & recipe for canning
- Dutch apple pie (with a French cookie crust)
- How to make crisp apple chips
- Cinnamon & brown sugar applesauce
- Apple recipes & the best varieties to use
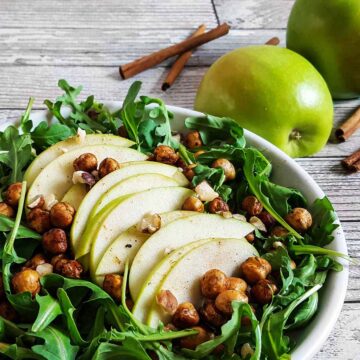
- Fall arugula salad with apples, walnuts & cinnamon roasted chickpeas

Laura says
I loved this recipe! The caramel turned out so perfectly smooth, and the step-by-step instructions made it super easy to follow. Can't wait to impress my friends with these homemade treats! 🍏🍬
Ian says
These caramel apples look amazing! I love how you made the process seem so easy. Can’t wait to try this recipe with my kids - it'll be a fun fall activity! Do you have any tips for ensuring the caramel sticks perfectly?
Veronica T says
The best bet is to make sure you dip the apples in boiling water to remove any wax. Even if they are organic or you grew them yourselves, apples have a natural waxy coating. Some much more than others too.
Audrey says
I absolutely love the idea of making caramel apples at home! Your step-by-step instructions make it seem so easy.
Matt says
These caramel apples look amazing! I can’t wait to try making them at home. Thanks for sharing such an easy recipe! 🍏🍬
Tiran says
These caramel apples look amazing! I love how simple the recipe is. Can't wait to try making them with my kids this weekend. Thanks for sharing! 🍏🍬
AC says
These caramel apples look amazing! I can’t wait to try this easy recipe at home and add my favorite toppings. Thanks for sharing!
daman says
These caramel apples look absolutely delicious! I love how easy your recipe is, and I can't wait to try adding some toppings like nuts and sprinkles. Thanks for sharing such a fun fall treat!
Tiff says
I love how simple this caramel apple recipe is! Can't wait to try it out with different toppings. Thanks for sharing such a fun fall treat idea! 🍏🍬
Lotty says
These caramel apples look amazing! I'm excited to try making them at home, especially with the tips you shared. Do you have any suggestions for different toppings?
Veronica T says
For halloween you can try different crushed up candies, like candy corn or butterfingers. Marshmallows and graham crackers can be fun. What kind of flavors are you looking for?
Alph S says
These caramel apples look absolutely delicious! I love how easy you’ve made the recipe to follow. Can’t wait to try this out for the fall! 🍏🍬
Capcut says
These homemade caramel apples look absolutely delicious! I can’t wait to try making them for Halloween this year. Any tips for getting the caramel to stick better? Thanks for the great recipe!
Veronica T says
If you've had trouble with the caramel sticking in the past, let me ask this: did you plunge them in boiling water and rub any waxy coating off? If you haven't - try that first. Even if you grew the apples yourself, you should do this, since the peels have a natural waxy coating (some varieties more than others). If you've already tried that, let me know and we'll go from there 🙂
Kathleen says
Hi! Do you not worry about the milk solids burning cooking it all together? I want to try this but that makes me hesitant. Thanks!
Veronica T says
I have not had any trouble with the milk solids burning with this method. (And I've screwed up a LOT, ha!)
Ashley says
The caramel set perfectly and I loved the idea of using cacao nibs, so I bought those just for this recipe!
Kim says
These were sooo good. I used mini chocolate chips and Trader Joe’s salted caramel chips that I chopped. The caramel chips were not the best idea bc the flavors are too similar.
Veronica T says
Those caramel chips make amazing cookies though! Glad you enjoyed the caramel apples.
Diane says
The caramel turned out perfect. I used the smallest apples I could find because I don’t have Jonathan in my area.
Veronica T says
I hope you enjoy them as much as I do