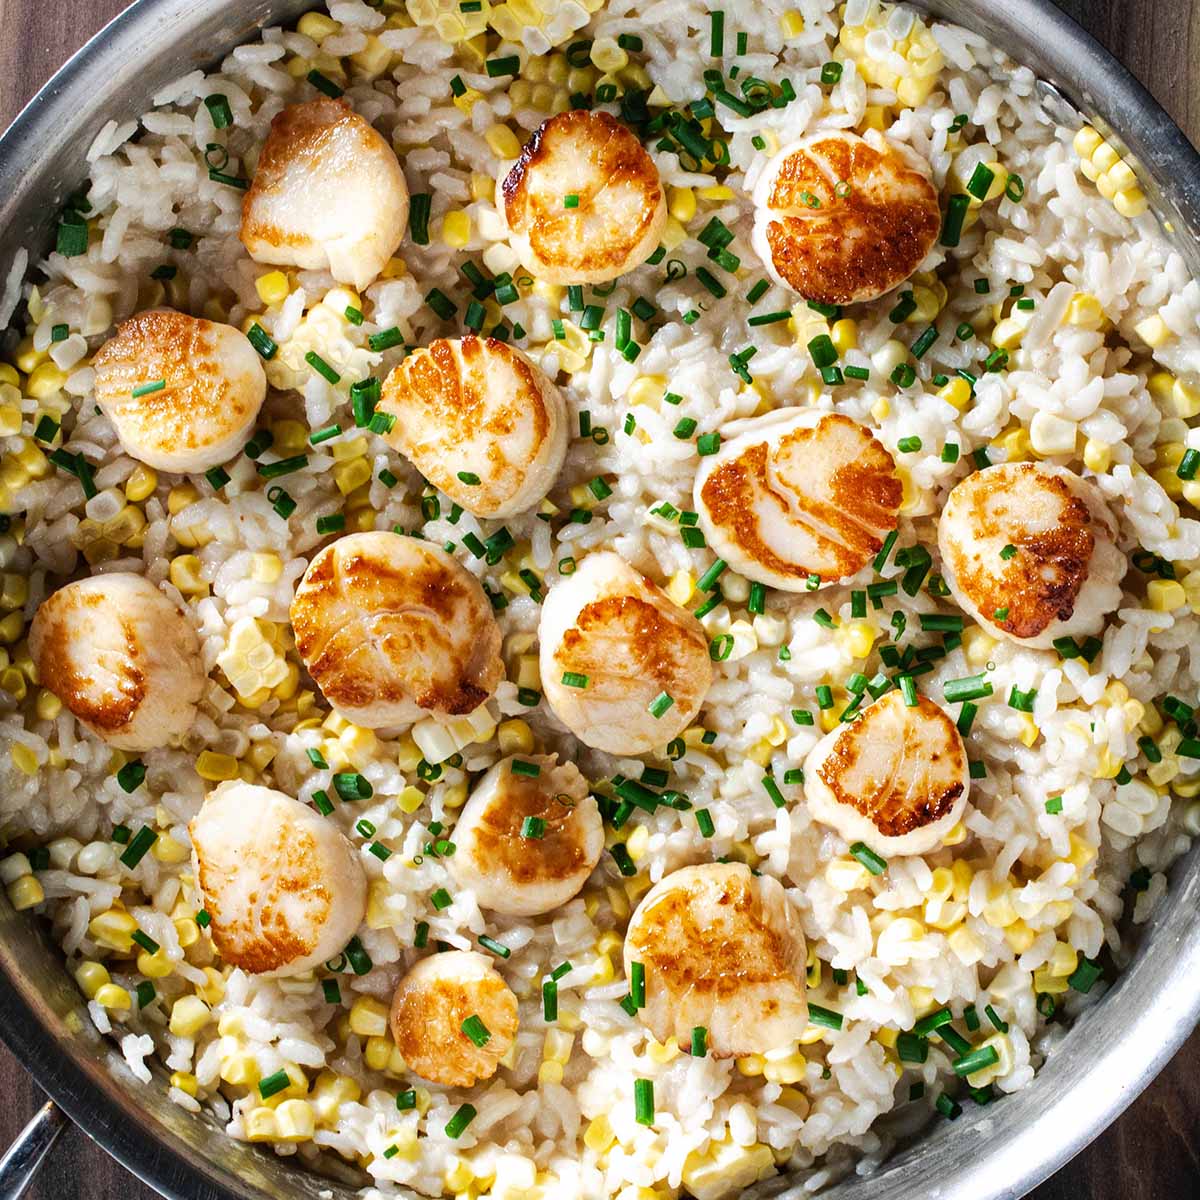
Scallops and risotto are a great combination, and any type of risotto is suitable. I chose corn risotto for this recipe because of its natural buttery flavor.
I kept this recipe as simple as possible and timed everything up to make it an easy weeknight meal in the middle of summer.

Most corn risotto recipes call for making corn broth, which I was very excited about since I routinely add corn cobs to the pot when making stock for soup. However, I found that the subtle corn stock flavor was overpowered by the flavor of the risotto. So I removed that step to save you time.
If you're new to cooking scallops (or risotto), I cover several techniques in detail after the recipe. I specifically include tips for cooking the perfect scallops, like salting them ahead of time, and how to get a good sear.
Jump to:
Recipe
Ingredients
Scallops
- 12 ounces scallops
- ¼-1/2 teaspoon salt
- 1 tablespoon vegetable oil
Risotto
- 6 cups broth vegetable or chicken
- 2 T olive oil
- 1 shallot (or sub ½ a small yellow onion or half a leek)
- 1 clove garlic
- 1 cup arborio rice
- ¼ cup white wine optional
- ½ teaspoon salt
- ¼ teaspoon black or red pepper
- ½ cup asiago or parmesan cheese fresh (not from a can)
- chives optional topping
Instructions
Prepare ingredients
- Get all of the ingredients ready so you can time up cooking the scallops and risotto. Chop the shallot and garlic, cut corn off the cobs, shred the cheese, salt the scallops on a paper towel lined plat.
Make the risotto
- Cook shallot & garlic: Heat olive oil in a metal skillet on medium heat, then add shallot and garlic. Cook until soft and fragrant, about 5 minutes. Watch the garlic so it doesn't burn.
- Add arborio rice to the pan. Stir to coat it with the oil and "toast" it for 1-2 minutes.
- Deglaze the pan with white wine (or broth if omitting the wine) and stir with a spatula to unstick anything stuck to the pan.
- Cook risotto: Add 1 cup of broth, salt and pepper to the pan, stirring occasionally. Let the risotto soak up the broth. As it starts to dry out, add another cup of broth.PAUSE and start pre-heating a cast iron or stainless steel skillet with some oil (for the scallops). RETURN to continue to cook the risotto, adding broth until it is almost cooked through (it will still by chewy). Keep broth on the side in case it gets too thick while you cook the scallops in the next step.
Pan-sear scallops
- Dry the scallops one last time and sprinkle with just a tiny bit of extra salt. Add to the hot pan. Cook for 2-4 minutes, checking the bottom for a good sear. Do not flip until it has a good sear.
- Flip the scallops and cook until the internal temperature is 115℉-120℉. This should only take 1-2 more minutes. Remove them from the pan and their internal temperature should continue to rise to about 130℉-135℉.
Finish risotto & serve with scallops
- Add cheese + corn to the risotto: Stir until the cheese is melted and combined. If the risotto is too thick, add more broth. Then top with scallops, chives, and serve.
Notes
Nutrition
How to time up the cooking
Cooking risotto is relatively easy, but requires a lot of hands-on time. After initially cooking shallots and toasting the arborio rice, you add broth a little at a time, stirring often. You continue this until the risotto is creamy and ready to eat.
Meanwhile, you'll cook the scallops in a separate pan once the risotto is almost ready. The scallops take less than 5 minutes to cook, and can be added to the risotto while still warm.
Now let's talk more about this timing in detail.
How to time up scallops & risotto
First, start by preparing everything.
- Get your rice and broth measured for the risotto, shallots chopped, and corn cut from the cobs.
- Set your scallops on a paper towel-lined plate and salt them to draw out excess moisture
- Get two pans ready on the cook top: a skillet for risotto and a cast iron (or stainless steel) skillet for the scallops

Start the risotto
Start making the risotto by sauteing the shallots and toasting the arborio rice. Then add the first cup of broth.
Start heating your scallop pan over medium-high or high-heat with a tablespoon or two of oil. Then return to making the risotto. Follow all of the steps until it's almost ready. Don't add the cheese yet, and have some spare broth set aside.

Cook the scallops
When you think the risotto is almost ready, make sure it has enough liquid to not burn or dry out. Then you're ready to cook the scallops - because you have to pay attention to them and not get distracted by the risotto at this point.
Make sure the scallops are dried again after salting. Sprinkle with another pinch of salt and then add to the hot pan. Cook the first side until they are nicely seared (without moving them). This should take 2-3 minutes.
Once seared, flip them and cook for another 1-2 minutes. Keep an eye on their internal temperature and do not get distracted by the risotto. You can always add a little more broth to the risotto.

Finish risotto with cheese & corn
Once the scallops are done, set them aside on a plate. Go back to the risotto, adding your cheese and corn. (You didn't want to add this earlier because it can be harder to monitor once the cheese is added and you don't want to over cook and burn that).
Once you stir all of that into the risotto, add the scallops to the top and serve.
How to cook the scallops
If you're new to cooking scallops, I'm here to help. When they are perfectly cooked, they have a tender texture. Overcooked scallops are rubbery, and undercooked ones have a soft, unpleasant texture.
So how do you get them to the perfect temperature? An instant-read thermometer is essential. Second, proper cooking technique.

Searing the scallops
Pan cooking scallops is pretty easy, as long as you follow a few key steps.
- Pre-salt and dry the scallops
- Use a very hot pan with a high heat oil
- Don't flip until the bottom has a nice golden sear
All of these techniques will help you get a good sear on your scallops, a defining characteristic for this type of seafood. But several things can prevent that perfect sear.
The drier the scallop, the better it sears. That's because excess water will need to evaporate before it can brown. You can start by simply drying them off with a paper towel, but scallops can still have a fair amount of moisture. If you salt them 15 minutes before you cook them, it draws some of the surface moisture out, which you can blot away with a paper towel.
A hot pan is essential to develop a golden crust on your scallops. They are small and cook very quickly, so if you don't have a hot enough pan, they'll cook through before they have a chance to brown.
Flip the scallops only after the bottom is nicely seared. This guarantees you'll have a nicely browned top that looks (and tastes) delicious. If you flip before they brown, the scallops might cook through before the underside has a chance to brown. If this happens, you'll have pale scallops with no browning or crust on either side.
J. Kenji Lopez-Alt gives some good advice about this on a Serious Eats guide to searing scallops (it's worth a read!). He says, "It's better to cook the scallops all the way through on the first side and just let the second side kiss the heat if that's what it takes to get a crust on that first side."

Internal temperature
You want the final temperature to be 130°F for perfectly cooked scallops. But in order to not overcook them, you want to take them out of the pan once the internal temperature reaches 115°F to 120°F. They will continue cooking after removed from the pan, reaching the desired internal temperature.
The scallops cook really fast, so you want to keep an eye on them. I like to add them to the pan in a clockwise pattern so I know which ones have been cooking for the longest amount of time. I use the first one to gauge the final temperature.
Once the first scallop reaches 115°F, I remove it from the pan and check the next scallop. As long as they are between 115°F and 120°F, they should be perfectly cooked once removed from the pan.
Most sources claim the best final internal temperature for scallops is 125°F to 130°F, including Thermoworks and Chowhound. The USDA doesn't list a specific temperature, instead saying to "cook until flesh is pearly or white, and opaque).
Don't have a thermometer yet?
It's changed my cooking - obviously meat is easier to cook to the best temperature. But what might surprising is that I use it even more for baking. Never again do I have under-cooked banana bread or dried out cakes, and it helps me make sure my brownies are always fudgy (180F is the magic number).
I have had my Thermapen for almost 15 years now and I love it. It's one of the priciest options on the market, but it's been reliable. After going through 3 cheap thermometers that ended up on the fritz after just a year or two of use, I finally treated myself to the gold standard Thermapen.
You can find it here on Amazon, or check out less expensive thermometers to get started and see how often you use it. (These are affiliate links so I get a small commission if you buy something. I try to be open and honest about what I own and what I like using, while also keeping your budget in mind).
Types of scallops
There are two types of sea scallops you'll find: dry and wet scallops. You want to buy dry scallops for better flavor, texture, and ease of cooking.
Both wet and dry scallops are the same species, the difference is how they are treated once caught on the boat. Wet scallops stored in sea water with artificial preservatives (sodium triphosphate). This is designed to preserve them and to absorb and retain moisture. They gain about 14% extra moisture from this treatment, according to tests from America's Test Kitchen.
The extra water makes them nearly impossible to sear because the surface of the scallops are wet and they release a lot of moisture into the pan. In fact, they released 25% more water during cooking than dry scallops, according to tests.
The chemical treatment also changes the flavor and texture. The wet scallops often develop off flavors that can be soapy or bitter. The texture is also off, either spongy or rubbery.
Dry scallops, on the other hand, are not treated. When caught on the fishing boat, they are shucked, cleaned, and then flash frozen within a few hours. This is more labor intensive, so they cost more.
But the price is worth it if you can afford it. The flavor is sweeter, the texture succulent, and they get get a really good sear in a hot pan.

Corn risotto tips
Fresh corn is in season throughout most of summer and has a rich, buttery flavor that makes a delicious addition to a creamy, cheesy risotto.
If you can find fresh corn at the farmers market, it will likely taste best. Most corn I buy at the grocery store is fairly bland, although I occasionally get lucky with a good batch. However, I'm rarely disappointed by the flavor of corn at the farmers market.
Corn flavor
Corn has a delicate sweet, buttery flavor that can be easily overpowered by other ingredients. So I've kept this risotto recipe pretty simple with other subtle flavors, like using the mild-tasting shallot over a stronger onion variety.
Most corn risotto recipes use a corn stock instead of a chicken or vegetable broth. I do love adding corn cobs into soup stock, so I expected that to make a big difference in risotto too.
Spoiler: it doesn't!

I made a corn stock with just corn and water. I tasted it to confirm there was a corn flavor. It was subtle, but definitely noticeable. However, once I added it to the risotto, all of that flavor was lost. The arborio rice has it's own distinct flavor and that took over the subtle notes in the corn broth.
I tasted it several more times after adding more broth and could not tell that I used corn broth instead of a regular vegetable broth. So, I've decided it's not worth the effort and didn't add that into the instructions, saving you time.
If you want to give it a try, however, here's a recipe from NYTimes cooking.
Adding hot broth is unnecessary
Nearly every risotto recipe requires you to add hot broth to the pan (a little at at time). The argument is that cold broth slows down the cooking time and absorption rates too much.
It appears that advice might have carried over from 'the olden days' when using narrow, deep pots. However, most modern recipes use a metal large frying or sauteing pan. When adding a small amount of liquid to a hot, large surface area, it heats up - fast!
I've tried both and haven't noticed a difference, honestly. So to keep things easy, I just use room temperature broth (which is often water mixed with Better than Bouillon paste).
Flexible cooking time
Professional chefs might get mad at me for saying this, but risotto can hold in a pan pretty well while you finish cooking the scallops.
Risotto cooks to an 'al dente' texture, which is soft but with a chewy center. Risotto seems to hold that texture for quite a while. If it overcooks, it's a little softer, but it's not rubbery and doesn't fall apart like overcooked pasta does.
My reason for pointing this out is that you can make sure your risotto is almost ready and then cook your scallops without worrying. You can always add more broth if the risotto gets too thick.
More recipes & resources
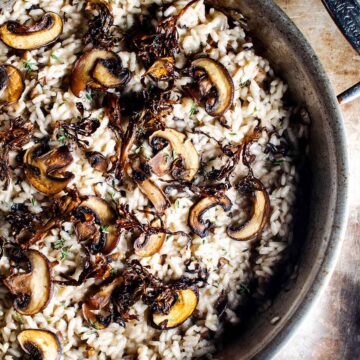
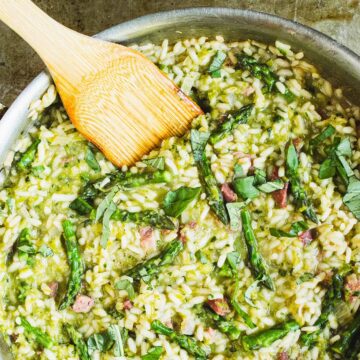
You can add these scallops on top of any risotto. Try my wild mushroom or asparagus risottos. If you have a homemade infused vinegar, like this chive blossom vinegar, you can add a splash on top right before serving.
Try adding hints of other flavor to the scallops or risotto too:
- Lemon and thyme scallops from Coley Cooks
- Cajun-spiced scallops from Table for Two
- Brown butter scallops with risotto and sauteed spinach by Pinch of Yum
- Pairing scallops with a lemon Parmesan risotto from Cooking with Books
- Scallops with a champagne risotto (how fancy!) by How Sweet Eats

If you're wondering what else is currently in season, check out my calendars to see what produce is in season each month (and coming up soon).


Leave a Reply