Green bean casseroles made from scratch are time consuming - sometimes requiring too much time for Thanksgiving day.
That's where a make-ahead green bean casserole recipe comes in handy. This version includes make-ahead instructions for each component of the casserole:
- Homemade mushroom sauce: make 3 days ahead or months ahead and freeze it
- Fried onions from scratch: make 1-3 months ahead and they still stay crispy stored in an airtight container on the counter
- Green beans: trim & blanch 1 day ahead
- Green bean casserole: assemble 1 day ahead, cover with foil, bake Thanksgiving day
Jump to:

Recipe

Ingredients
Green beans
- 2 lbs fresh green beans
Mushroom sauce
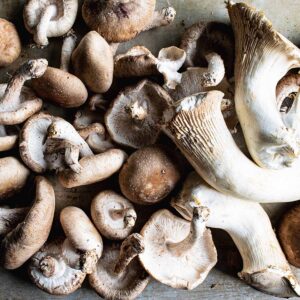
- 1.5 lbs cremini mushrooms see note about adding shiitake
- 2 cloves fresh garlic
- 2 tablespoon olive oil or shallot oil from frying
- 2 tablespoon butter
- ¼ cup flour 30 grams
- 1.5 cups chicken stock or vegetarian stock
- 1.5 cups half & half see note for using milk or heavy cream
- 1 tablespoon lemon juice
- 2 teaspoon worchestershire sauce or sub in soy sauce
- ½ teaspoon pepper or more to taste
Fried shallots
- 2 lb shallots
- 2 cups oil for frying like vegetable oil
- salt to taste
Instructions
FRIED ONIONS: make ahead 1-3 months, store on counter
- Slice the shallots thin - about 1/16th inch thick (the thickness of a wheat thin or 2 credit cards). Use a mandolin if possible so they are the same thickness and cook in the same amount of time.2 lb shallots
- Place shallots in a saucepan & cover with oil. You may need to do this in 2 batches depending on your pot size & the amount of oil you want to use. If you do it in 2 batches, you can reuse the oil. I use a medium sized stainless steel pan. Use a high-heat oil like vegetable or avocado oil. The shallots should just float so they aren't touching the bottom of the pan (which can burn them).
- Cook over high heat - the oil should be anywhere between 250℉ and 325℉. Stir occasionally and check on the color of the shallots.
- Prepare drying area. You will need a metal strainer and a heat proof bowl so you can quickly drain the shallots. Line a baking sheet with several layers of paper towel to absorb oil once you remove them.The strainer needs to be dry (water and oil don't mix). If you used the strainer for rinsing green beans, make sure to thoroughly dry it.
- Remove when light-to-medium golden (not golden brown). They will continue to darken after removed as the oil and their internal heat continue cooking. To remove, pour into a metal strainer over a heat-proof bowl. Transfer to paper towel lined baking tray and pat dry with paper towels. Salt to taste. Remove to clean paper towels to finish drying. (Extra oil makes them soggy). You can fish them out instead of straining, but you have to do it in 1-2 passes. Even an extra 30 seconds can over cook them (see post for timeline photos).
- Store in an airtight container lined with paper towel, room temperature but out of direct sunlight. Mine were still crispy 3 months later!
MUSHROOM SAUCE: make ahead 3 days (fridge) or 3 months (freezer)
- Prepare vegetables & milk-mixture. Chop mushrooms into small pieces or give them a few pulses in a food processor. Dice garlic. Mix together the half & half, broth, lemon juice, worchestershire sauce, and pepper.1.5 lbs cremini mushrooms, 2 cloves fresh garlic, 1.5 cups chicken stock, 1.5 cups half & half, 1 Tbsp lemon juice, 2 tsp worchestershire sauce
- Add olive oil in a skillet (or use leftover oil from frying the shallots or even butter). Cook mushrooms until they release their water, then continue cooking until the mushrooms start to dry out a little.2 Tbsp olive oil
- Add garlic and continue to cook mushrooms & garlic until golden and fragrant. Season with salt.
- Melt the butter in the pan with the mushrooms. Then add flour and stir to combine. Cook until it smells toasty - about 5-7 minutes. (See post for a white vs golden roux).2 Tbsp butter, ¼ cup flour
- Add ¼ cup of the milk mixture to the hot pan. DO NOT ADD MORE! Whisk to combine. The mixture will ball up and turn into a blob.
- And another ¼ cup of the liquid. Whisk to combine. Continue adding liquid in SMALL increments (adding too much at once will create lumps). Continue until the mushroom sauce is your desired thickness. You may not use all of the liquid.
- Taste & adjust. Add more salt or pepper if desired. If the sauce is too thick, add more liquid (run out of your mixture? Just add more dairy or broth, no need to mix more). If it's too runny, simmer until it thickens.
- Store in the fridge for up to 3 days (note that leftovers might not last as long). Or transfer to a freezer-safe container and freeze for 3 months. Thaw overnight. Sometimes dairy products can separate when frozen, but this hasn't happened to me with this mushroom sauce. If it does, reheat in a pan and whisk until recombined.
TRIM & BLANCH GREEN BEANS: make ahead 1 day
- These are only made 1 day ahead because otherwise the cut ends can dry out too much. If you're using fresh green beans, you want them to be fresh!2 lbs fresh green beans
- Trim the ends off the green beans.
- Heat a pot of water to boiling with about 1 tablespoon of salt per quart of water. Meanwhile, prepare a bowl with ice water (ice water IS better than cold tap water).
- Add your fresh green beans to boiling water and cook for 5 minutes. They will start to soften and still be bright green. Strain and then immediate transfer to ice water for 5 minutes. Then strain and dry on paper towels.
- To store: roll them up in paper towels and store in an open bag or container in the fridge.
GREEN BEAN CASSEROLE - make ahead 1 day
- After you blanch the green beans, you can assemble the casserole or do it Thanksgiving morning - both seem to turn out the same.
- To make ahead: mix blanched green beans with mushroom sauce and ¼ cup of fried shallots (for a little extra flavor) in your 9x13 casserole dish. Cover with foil (or a casserole dish cover, which helps for stacking pans in the already-crowded fridge).
BAKE THE GREEN BEAN CASSEROLE @ 350℉ covered in foil for 30+10 min
- Bake the green bean casserole, covered with foil, for 30 minutes. Uncover it, then bake for another 10 minutes.
- Remove from the oven and top with remaining fried onions.
Notes
- Heavy cream: For Thanksgiving, if you will already have heavy cream around, you can use that instead of buying half & half. Leave the amount the same for a really rich casserole, or reduce it by a half-cup (per batch) and replace that with extra broth.
- Milk: if you run out of half & half or heavy cream, don't worry. You can use milk. Use an extra half-cup (per batch), add 2-4 tablespoon of butter (per batch, for richness), and reduce broth by a half-cup.
- If you make a half-batch, use an 8x8 pan
- You can add up to 50% more in a regular 9x13 pan
- You can double the recipe and still use a 9x13 pan if it's a really deep, deep dish.
-
- 300-325F: might need 45 minutes covered in foil, 15 uncovered
-
- 350F: 30 minutes covered, 10 uncovered
-
- 375-400F oven: about 20 minutes covered, 5-10 uncovered
Nutrition
Make-ahead timeline for Thanksgiving
First, decide how much you need to make (don't forget to include leftovers).

The best part of this green bean casserole is that everything (except the green beans) can be made so far in advance. And the final casserole tastes like it was made that day!
| Recipe | Make-ahead |
|---|---|
| Mushroom sauce | 3 days (fridge) or 3 months (freezer) |
| Fried onions | 1-3 months ahead (stored on counter) |
| Fresh green beans | 1 day (trimmed & blanched) |
| Casserole | 1 day ahead, cover with foil to bake |

Make-ahead mushroom sauce
Make ahead: fridge for 3 days / freezer for 3 months
This mushrooms sauce is basically a béchemel sauce - a white sauce thickened with roux (flour + butter) and made with milk, half & half, or heavy cream.
Béchemel sauces are pretty freezer-friendly, which is a huge win for a make-ahead green bean casserole. Where other dairy-based soups and sauces can separate when frozen, this one doesn't.
Dairy products, especially heavy cream, have a bad reputation for freezing. It happens in soups and sauces, which can sometimes be reheated and whisked back into their desired consistency.
But this mushroom sauce handles the freezer well, like other béchemel sauces do. That's because the roux binds the dairy together, preventing it from separating. Higher fat dairy products also hold up better - so heavy cream will be better than milk.
Fridge or freezer?
I tested this making this mushroom sauce ahead of time for both the fridge and freezer.
I stored it 2 days ahead in the fridge, then mixed it into the casserole the night before. Then I froze another batch of sauce for 2 months, thawed it overnight, and then mixed it into the casserole the night before.
Both make-ahead green bean casserole versions turned out perfectly, like they were made that day!
For a step-by-step walk through of how to make the mushroom sauce, view the instructions on my article for making green bean casserole with fresh green beans. The recipe is the same, but without the make-ahead directions.

Make-ahead fried onions
Make ahead: up to 3 months
French's fried onions have nothing on these homemade fried shallots. They are actually pretty simple - they don't need a batter, breadcrumbs, or anything other than shallots and oil. They fry up perfectly crispy!
The trick to keeping them crispy when you make them ahead is to remove excess oil after they are fried. Once removed from the oil, transfer them to a a stack of paper towels (3 thick) and then blot the top with more paper towel.
Do this right away! Then move them to a fresh set of paper towels and let them air-dry and cool for at least an hour. I let mine sit for a couple of hours.
Then transfer the cooled fried onions to an airtight container, lined with 1-2 layers of fresh paper towels. Store covered, at room temperature, out of direct sunlight.
I made a double batch of fried onions a week before Thanksgiving. I kept half of them in an airtight container in my pantry until February, using them a little bit here and there, on sandwiches, salads, etc. They were still delicious and crunchy all the way to February.

For a step-by-step walk through of making the fried onions, and their color before removing them, check out the other version of this green bean casserole recipe. It's the same ingredients, but without the make-ahead instructions.

Blanching green beans a day early
Make ahead: 1 day
If you're going through the effort to make a homemade mushroom sauce and fried onions from scratch, you don't want to short cut the green beans.
Fresh green beans have more flavor and a better texture. But once trimmed, the ends start to dry out. That's why these really are best made only 1 day ahead of time.
Once the green beans are blanched, they need to dry and completely cool. Then roll them in some paper towel or a clean kitchen towel and store in an open bag or container in the fridge.
Alternatively, after you blanch the green beans, you can mix them with the mushroom soup right into your casserole dish. Then store it in the fridge.
Finding fresh green beans
For nearly all of us in the U.S., fresh green bean season ends around September, maybe October in some warmer or more mild areas. I normally wouldn't recommend a green bean recipe this late in the year, but some rules are meant to be broken.
Our green beans for Thanksgiving are shipped in from Florida (where the season starts when everyone else's ends). Some are also imported from Mexico.
Look for fresh green beans that are bright and firm. They should snap when bent. If they are limp and can be bent without snapping, they aren't very fresh.
If you have trouble finding fresh green beans, you can try using frozen ones and simmering them in stock for 20 minutes. I haven't tried this, but it works, according to Eric Kim of the NYT. People on Reddit also say it worked after trying Eric Kim's method.
1 day ahead: assemble the green bean casserole
Make ahead: 1 day
The green bean casserole can be assembled in your 9x13 baking dish the day before Thanksgiving. Or the morning of.
This task is the easiest and takes less than 5 minutes. Simply mix the green beans, mushroom sauce, and about ¼ cup of the onions (optional for flavor) together in your casserole dish. Cover, and store in the fridge.

Thanksgiving day: baking the green bean casserole
Bake time: 40 minutes at 350F (with wiggle room on temperature)
As your Thanksgiving side dishes are going in and out of the oven, your green bean casserole needs just 40 minutes, straight from the fridge.
Bake for 30 minutes, covered in tin foil (so the exposed green beans don't dry out and the mushroom sauce doesn't evaporate too much). After 30 minutes, it should be pretty warm.
Uncover and bake for another 10 minutes until hot and bubbly. Remove from oven and immediately top with remaining fried shallots.
Adjusting the oven temperature
I mentioned that you have some wiggle room on the over temperature. This casserole doesn't need a specific temperature to turn out perfect. All it needs is to be heated until hot, which also allows the green beans to soften just a little bit more. It's also pretty forgiving because it's covered with foil.
If your oven needs to be at a different temperature than 350F, just adjust the baking time.
- 300-325F: might need 45 minutes covered in foil, 15 uncovered
- 350F: 30 minutes covered, 10 uncovered
- 375-400F oven: about 20 minutes covered, 5-10 uncovered

More recipes & resources
This make-ahead green bean casserole is the same as my green bean casserole with fresh green beans recipe. The only difference is that this version includes make-ahead directions.
However, the other version has detailed instructions on making the homemade mushroom sauce and the fried onions. If you're new to either of these types of recipes, it's worth a read.

You can use this recipe as your base, and get inspiration for some other green bean casserole variations.

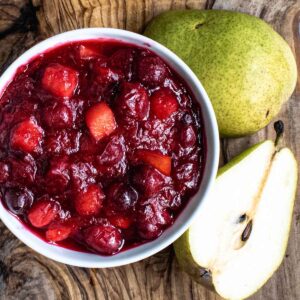
Another great make-ahead recipe is my cranberry sauce with pears. It can be made 5+ days in advance and stored in the fridge. It can also be made months in advance and frozen. Thaw it overnight and it's perfect! (I do it alllll the time).
Take a peak at my Thanksgiving menu, which includes recipes from some of my favorite sources (including more make-ahead options). You can also check out some make-ahead recipes from Tastes Better from Scratch, The Pioneer Woman, and Culinary Hill (who also has make-ahead turkey!)

If you're wondering what else is currently in season, check out my calendars to see what produce is in season each month (and coming up soon).


Leave a Reply