Butternut squash are vining plants that naturally spread along the ground, but with just a little help they easily climb up a trellis. The trellised vines are pretty, of course, but the benefits are more than skin deep.
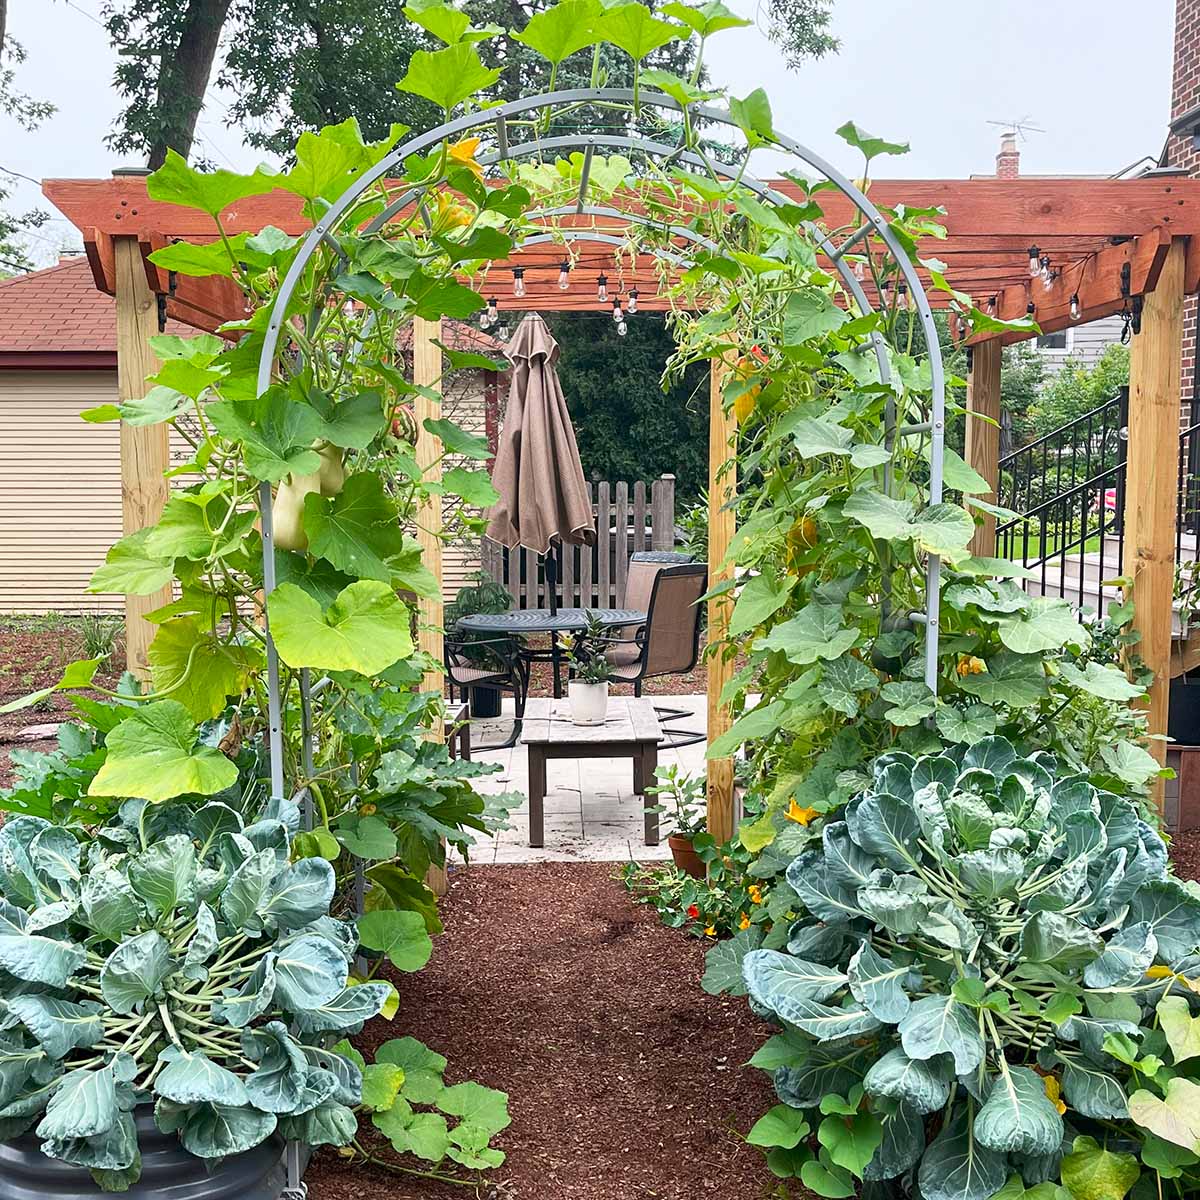
I grew honeynut and butternut squash on this trellis last year and it's the only way I'll be growing winter squash going forward. The vines are fairly low maintenance when grown on a trellis, and the squash don't even need support (unlike melons, which will fall off the vine without support).
Jump to:
Why grow butternut squash on a trellis
Butternut squash doesn't need a trellis, but growing them up one has been gaining popularity for good reasons:
- Takes up less space
- Lower risk of pests, disease, and rot
- Low maintenance
- Looks attractive
Let's look into a few of these in more detail.
Save space
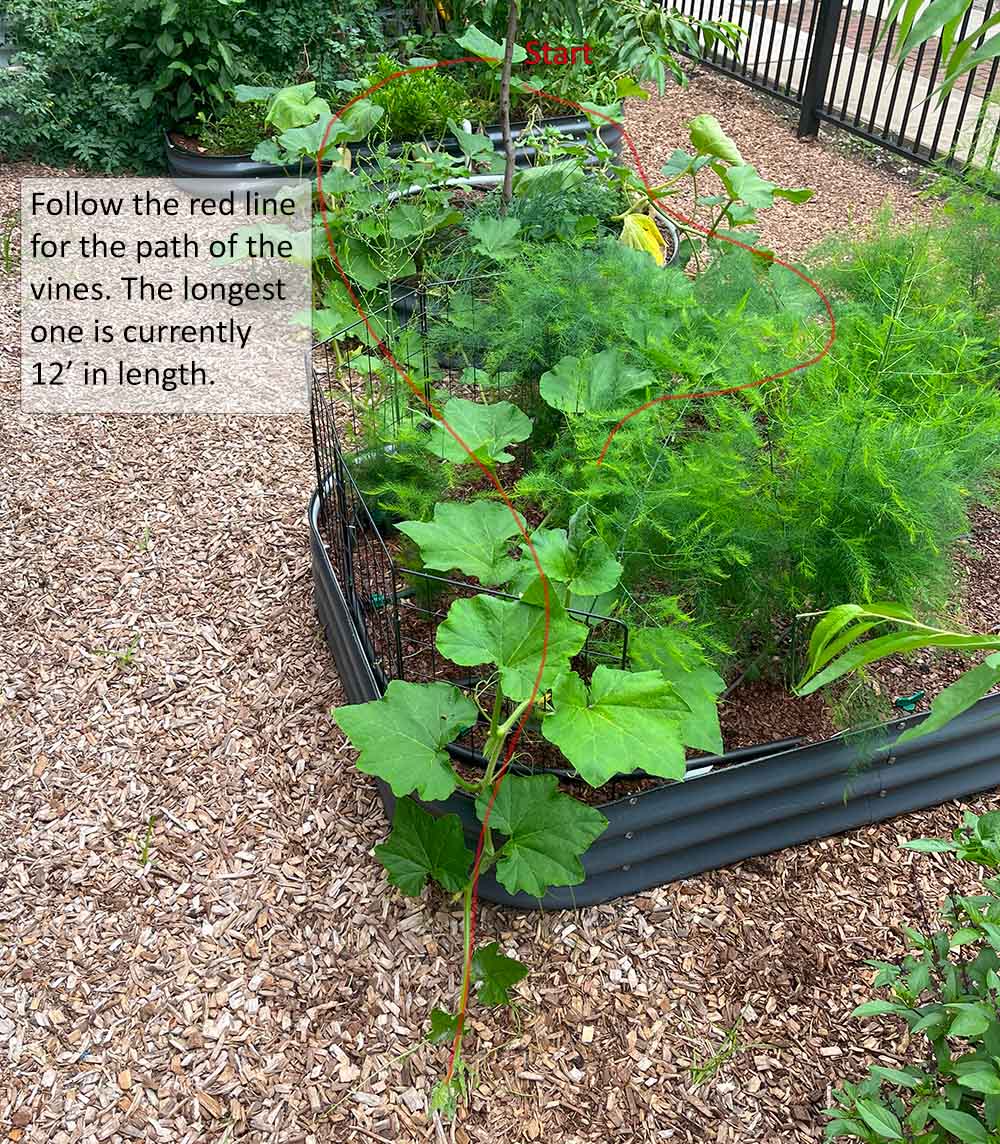
Butternut squash plants put out 5 or more vines each. Those vines often grow 10-15 feet long, rambling through your garden in every direction. The vines can be trained to grow in specific directions or pruned to a shorter length (at the expense of extra butternut squash).
When growing butternut squash along the ground, it's recommended to plant seeds 3 to 6 feet apart. But when growing them up a trellis, they are happy with just 1 square foot of space. This allows you to reclaim a significant amount of space in your garden.
Reduce pests
Growing butternut squash on a trellis is better than the ground because it reduces the risk of pests and soil borne diseases from destroying the plant.
Squash bugs like to hide at the base of the plant under leaves and debris, and then they lay their eggs on the leaves. Growing vertically on a trellis takes away their preferred habitat while also making them easier to spot for early removal.
Another pest, squash vine borers, are much easier to spot early on trellised butternut. Most winter squash varieties (including butternut squash) are much more resistant to this pest than summer squash. But if you've had problems in the past, growing butternut vertically might be worth a shot.
Squash vine borers lay eggs on the main stem, somewhat near the base. The larva burrows into the stem and causes damage. The eggs and early damage is much more exposed in vertical growing because the stem is in clear view, unblocked by leaves and other vegetation. Early detection and removal will save your plant. A popular prevention method, wrapping tin foil around the base, is also easier to implement and maintain when grown vertically.
Reduce disease & rot
Wet environments cause a majority of the problems for squash plants. It encourages disease and rot, since many diseases thrive in wet conditions. As the University of Minnesota's extension office says, "All plant diseases love the wet leaves that poor airflow provides."
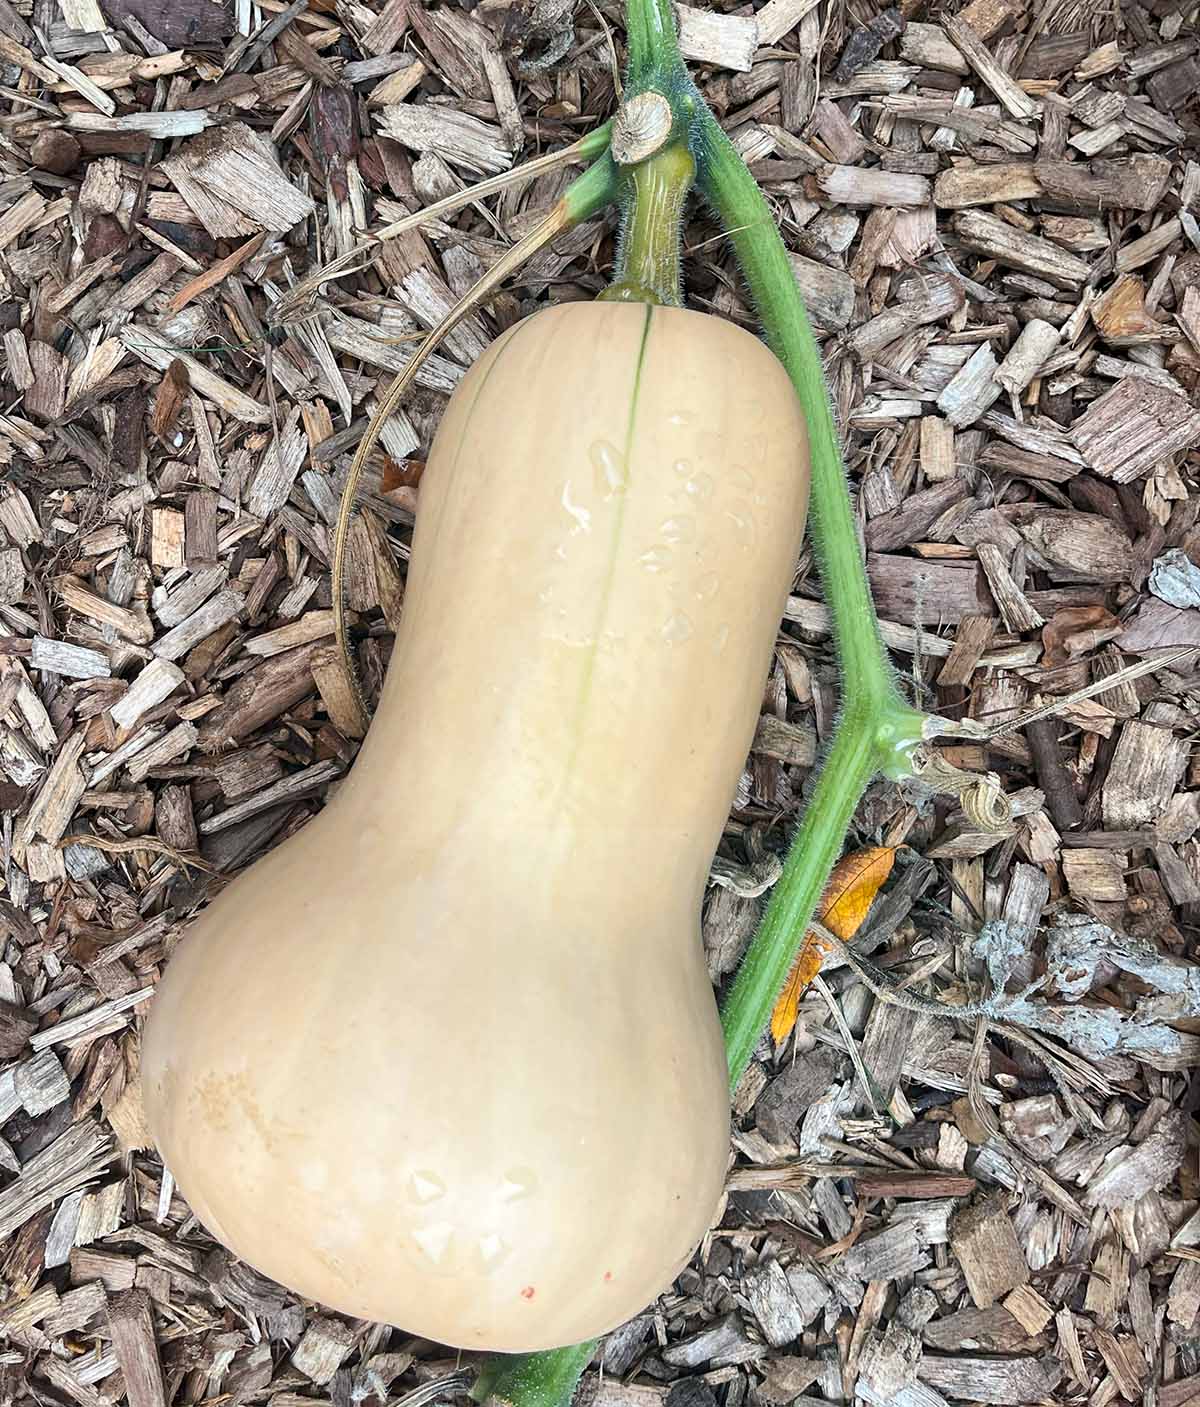
Growing vines along the ground creates a wetter environment when it rains or if you water overhead. Here's how that can affect butternut squash when it grows along the ground (instead of a trellis).
- During a heavy rain, the leaves lean over and rest on the saturated soil.
- Rainwater (or overhead watering) splashes soil borne diseases onto the leaves.
- Squash sitting on wet soil can start to rot
On the other hand, when trellised, the vines are fairly protected from these problems. The rainwater runs right off the leaves and they dry out faster with even a light breeze. Meanwhile, rot isn't even a concern!
One of the most common problems for all types of squash is powdery mildew, which doesn't actually need wet conditions to spread. The University of Oklahoma points out that "rainy weather is not necessary for powdery mildew development." Fine Gardening further explains that spores germinate "when the leaves are dry, when plants are in shade, and when there is little air circulating between plants." You can see how vines climbing up a trellis instead of along the ground can help reduce powdery mildew problems.
Less maintenance
Butternut squash (and other types of squash) are one of the easiest vegetables to grow in a garden. They don't need much maintenance, but they do require that you keep an eye out for pests and measures to prevent rot (which we already covered).
Winter squash take a relatively long time to mature, unlike zucchini and other summer squash that mature in the blink of an eye. When butternut squash spend months sitting on the ground, often on wet soil, their chances of rot dramatically increase. A lot of people place bricks, stone slabs, or plastic stands under the squash to keep them off the ground. You don't have to do that on a trellis!
Trellised butternut vines do increase two maintenance tasks if you don't plan for them, however. When grown along the ground, their shade prevents some weed growth and keeps the soil more moist.
Instead of leaving the soil bare, grow other plants or ground cover to shade the soil. Nasturtium is a great option - it's edible and it also helps to deter squash bugs. Dill attracts beneficial insects that eat squash bugs and radishes are supposed to deter squash vine borers.
Which direction should the trellis face?
Ideally, a trellis arch will face north and south - that means you can walk under it when walking north or south. This gives all plants the most sun exposure possible, no matter where they are on the trellis.
Plants growing on the East side will get more morning sun, and plants on the West side will get the hotter afternoon sun. Some plants love that hot afternoon sun, and others don't. Plan accordingly! All of my winter squash seemed to perform equally on either side.
If the trellis arch faces east/west, then the plants growing on the south side would get constant sun, and the plants on the north side would be in shade.
Buying or building a trellis
Buying trellises can range from fairly affordable to extremely expensive. I recommend some of the more affordable options. First, let's look at what makes a good trellis for butternut squash vines.
Trellis dimensions
Height
The ideal trellis for growing butternut (and other winter squash) is to be at least 5 feet tall. The trellis needs to be tall enough to let the vines grow up and over. Since the vines easily get 10 feet long, and sometimes longer, a 5 foot minimum height is best.
I liked the 7 foot tall ones in my garden because I could comfortably walk under them, even with the butternut squash hanging down. At 5'8", I was just a bit too short to reach the top of the trellis if a vine needed to be moved or trained in a different direction. For me, a trellis height of 6.5' might have been perfect.
Arch or single panel
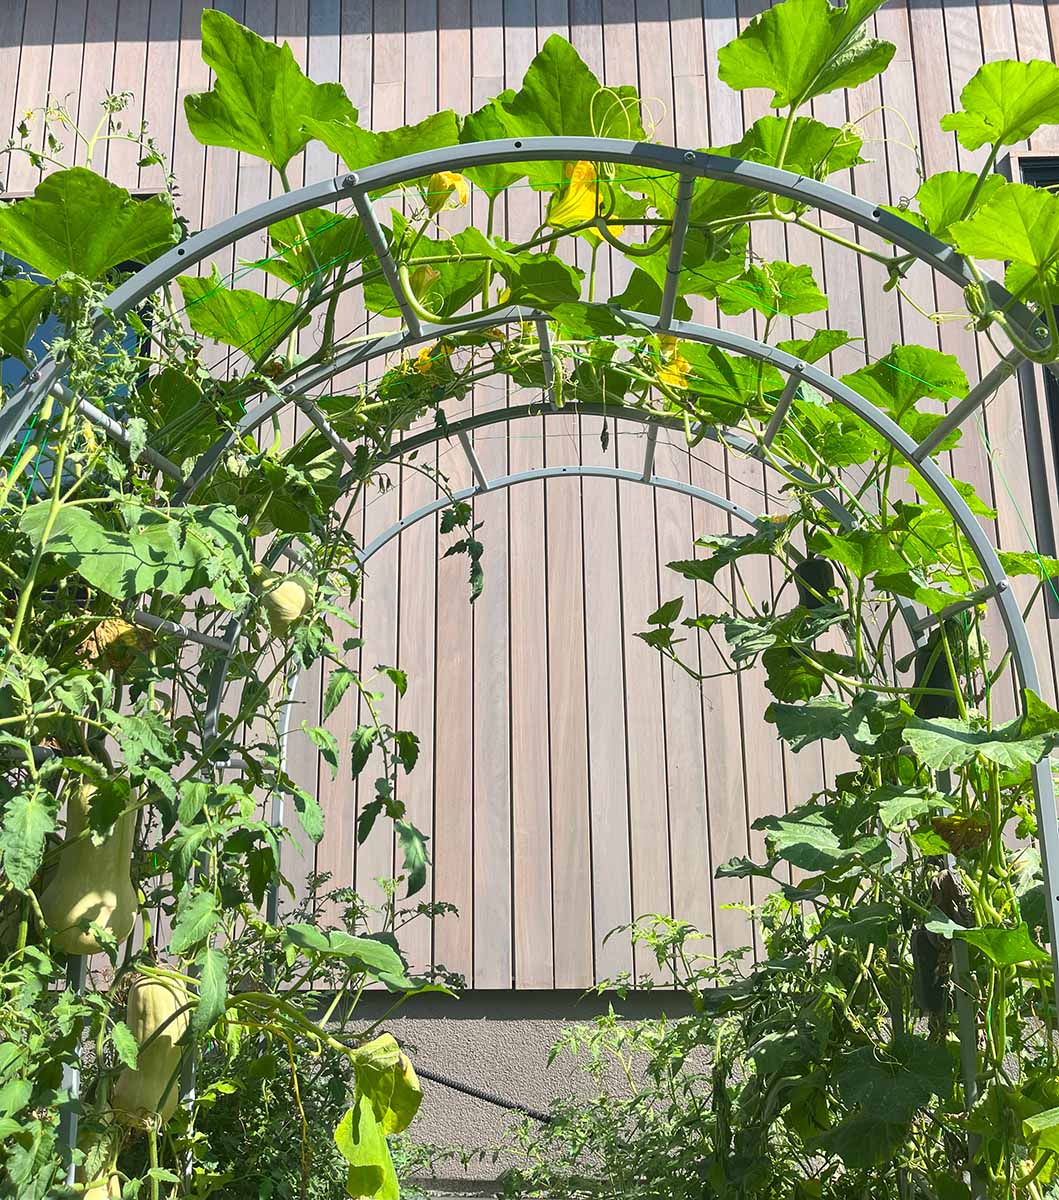
The trellis can be an arch or a single panel. An arched trellis is slightly better because it gives the vines a nice, gradual curve to grow over and back down, on a very sturdy structure that holds up to the wind.
A single panel can work, but will require you to be a bit more careful when the vine bends over the top to grow back down so it doesn't get pinched or break. It also needs to be well supported for windy weather, as the butternut squash and vines can make it fairly heavy.
Support size & spacing
Trellises that have thin string or wire grids work the best for butternut squash. The vines have little tendrils that curl around skinny things to naturally support the vine as you train it to climb vertically.
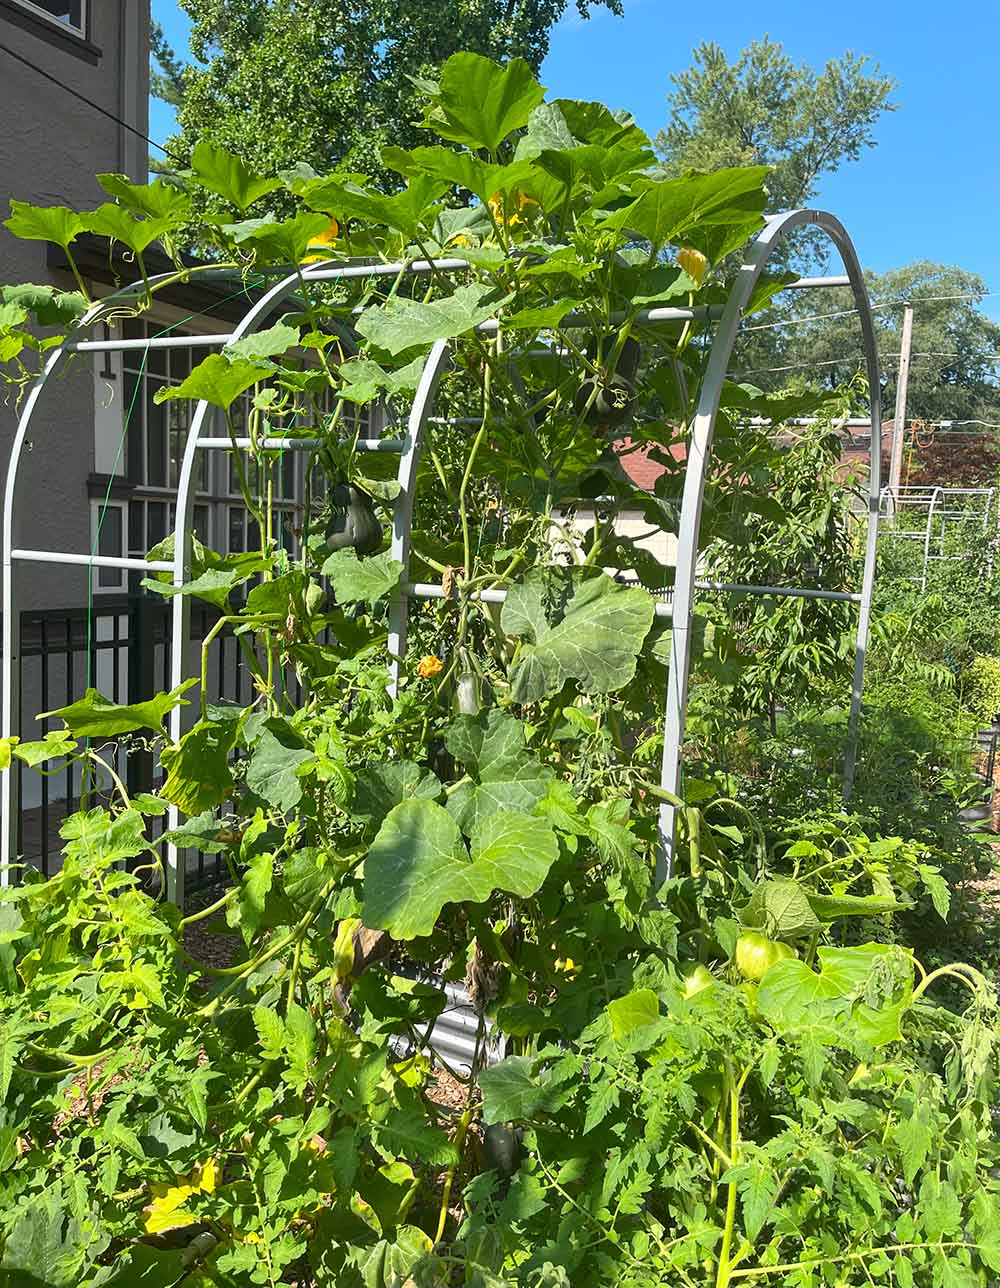
Trellises with thick supports, like many decorative ones below, still work but not as well. The vines will need extra support. Twine can be wound around the stem as it grows up, similar to the Italian style of growing tomatoes (shown in this video). In the image below, I trained my vines using a coated garden wire (watermelon vines pictured).
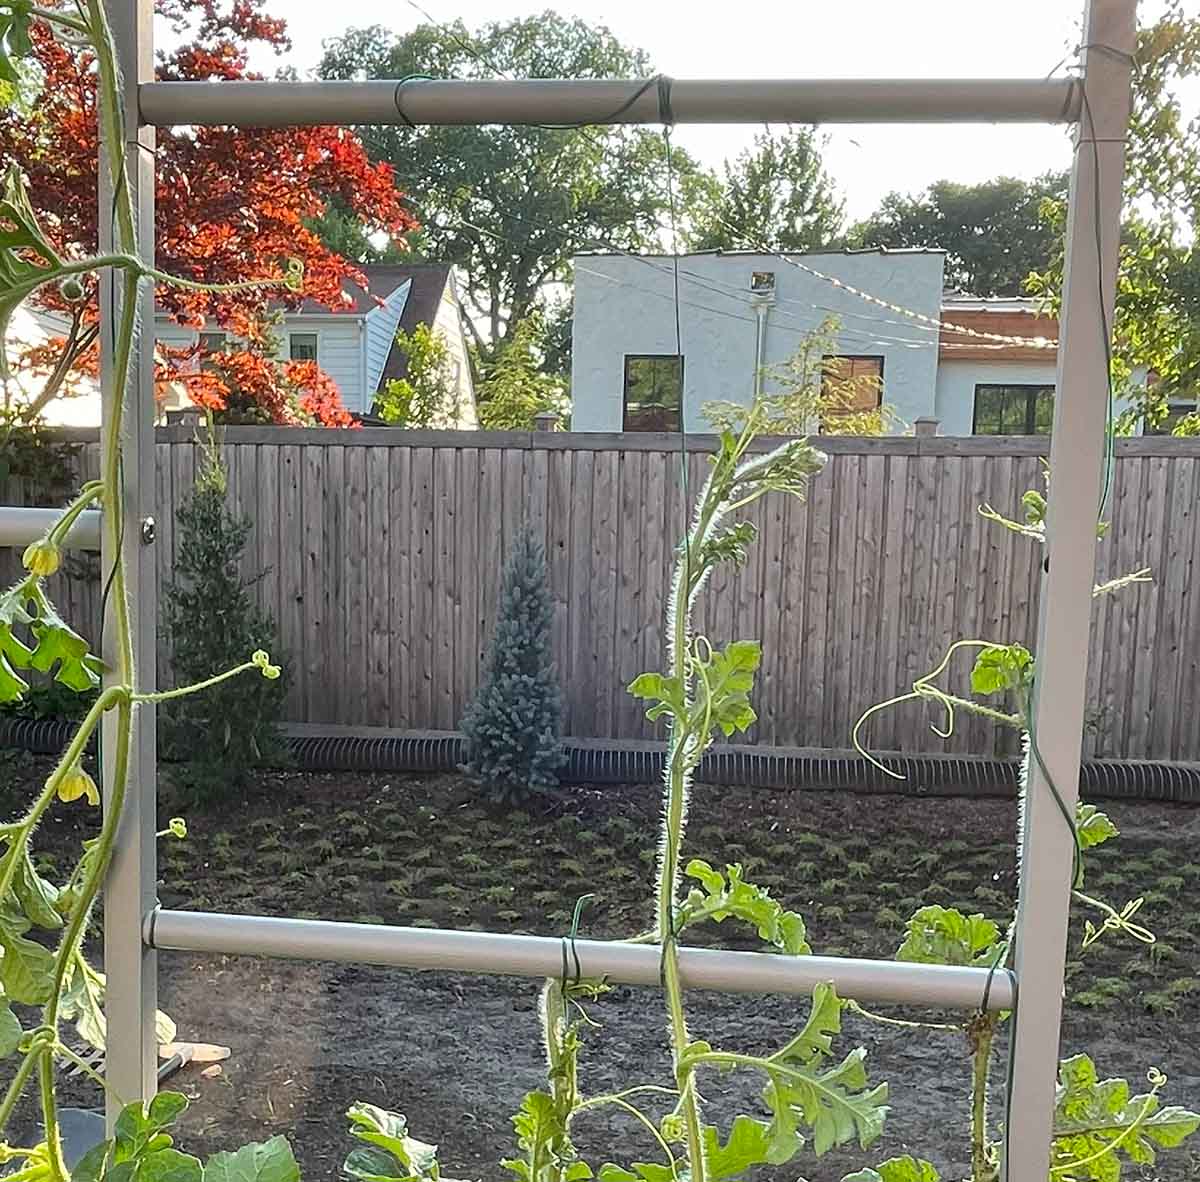
I also prefer trellis options that have more open grids for a couple of reasons. First, I like to allow the vegetables to hang through them when growing over the top. Second, I want my hands to fit through any openings for training and maintaining the vines.
Buying a trellis
Trellises are pretty popular so it should be easy to find at any big box garden center or take your pick on Amazon. Below are some examples from Amazon - they are affiliate links but I want to be up front to let you know I have not tried these myself. If you do, please come back and leave a comment so we can share it with other readers.
- Amazon trellises
- Trellis with skinny wire-grid, a potential winner for the vine tendrils to cling to. 7' tall by 6' long.
- 2 raised beds and a trellis with net overlay. A good price for the package if the quality of the beds is good. As a note, I do find netting to be more tedious to work with than wire when I do the cleanup in fall. The vines get tangled in the netting and can be harder to separate out.
- A simple arch 2-pack. This could be really cute for growing a couple vines up each side.
The trellises I used were from a raised bed garden kit from Vego. The kits are quite clever and very well built. It was admittedly the most expensive option, but I was very short on time and wanted to try them out.
I think the product is truly excellent, but I also think the price is way too high to recommend, costing about $750 for 2 beds and a trellis between them. (Yes, it's ok to be shocked, but at least they were slightly less expensive when I bought them before the price increases!) I'm very happy with the product but definitely not the price.
If for some reason you do want to buy them, I'd recommend Amazon or Big Lots instead of direct (their direct customer service and shipping isn't great when I ordered direct.). I specifically call out Big Lots because they often run a promo for 10-15% off orders for new customers, which I took advantage of when I bought an extra set of garden beds after ordering direct.
Where to buy:
- Vego Garden direct
- Amazon (affiliate link)
- Big Lots
Building your own
I think a few of the options listed above are affordable enough that you wouldn't save a whole lot by building one yourself. That said, every little savings does count.
There are a lot of ways to build your own trellis, here are a few examples:
- PVC pipe: PVC is the white (or black) plastic-like tubing often used for waste pipes in your house. It bends easily to make an arch. Search YouTube for "PVC trellis" for some DIY tutorials, as there are several ways to build them. Here's one example.
- Electrical conduit: These are thin metal tubes that electricians run wires through. There are different shaped connectors to help you build a rectangular trellis (not quite an arch!). Search YouTube for tutorials. Here's one example.
- Cattle panel: these are wire grids used to make fences for cattle. They bend easily to make an arch and just need a some simple support at the base! They can also easily be taken down, flattened out and stored over the winter (but they can stay outdoors all year too). They come in 16' lengths which is perfect for making a 6-7' tall arch. They are 50" wide. They are flat, so getting them home could be tricky without a truck (or opt for delivery or rent a truck from home depot, etc). Here's a little video tutorial or the accompanying article.
- Other options: there are many other options to use wood or other things you might have around the house (like old wire shelving). This video walks through 10 different trellis options.
How to grow butternut squash vertically
Once you have a trellis, growing butternut squash vertically is really easy.
Climbing
Plant seeds or transplants at the base of your trellis. Give them about a square foot of space between other plants. As they grow, they might try to spread along the ground. Gently lift them up and weave the vine through the arch supports. (If you have a more open trellis, train them up a piece of twine or wire).
Let them grow up and over the trellis. You will see flowers, then baby butternut squash will start to grow.
Maintaining
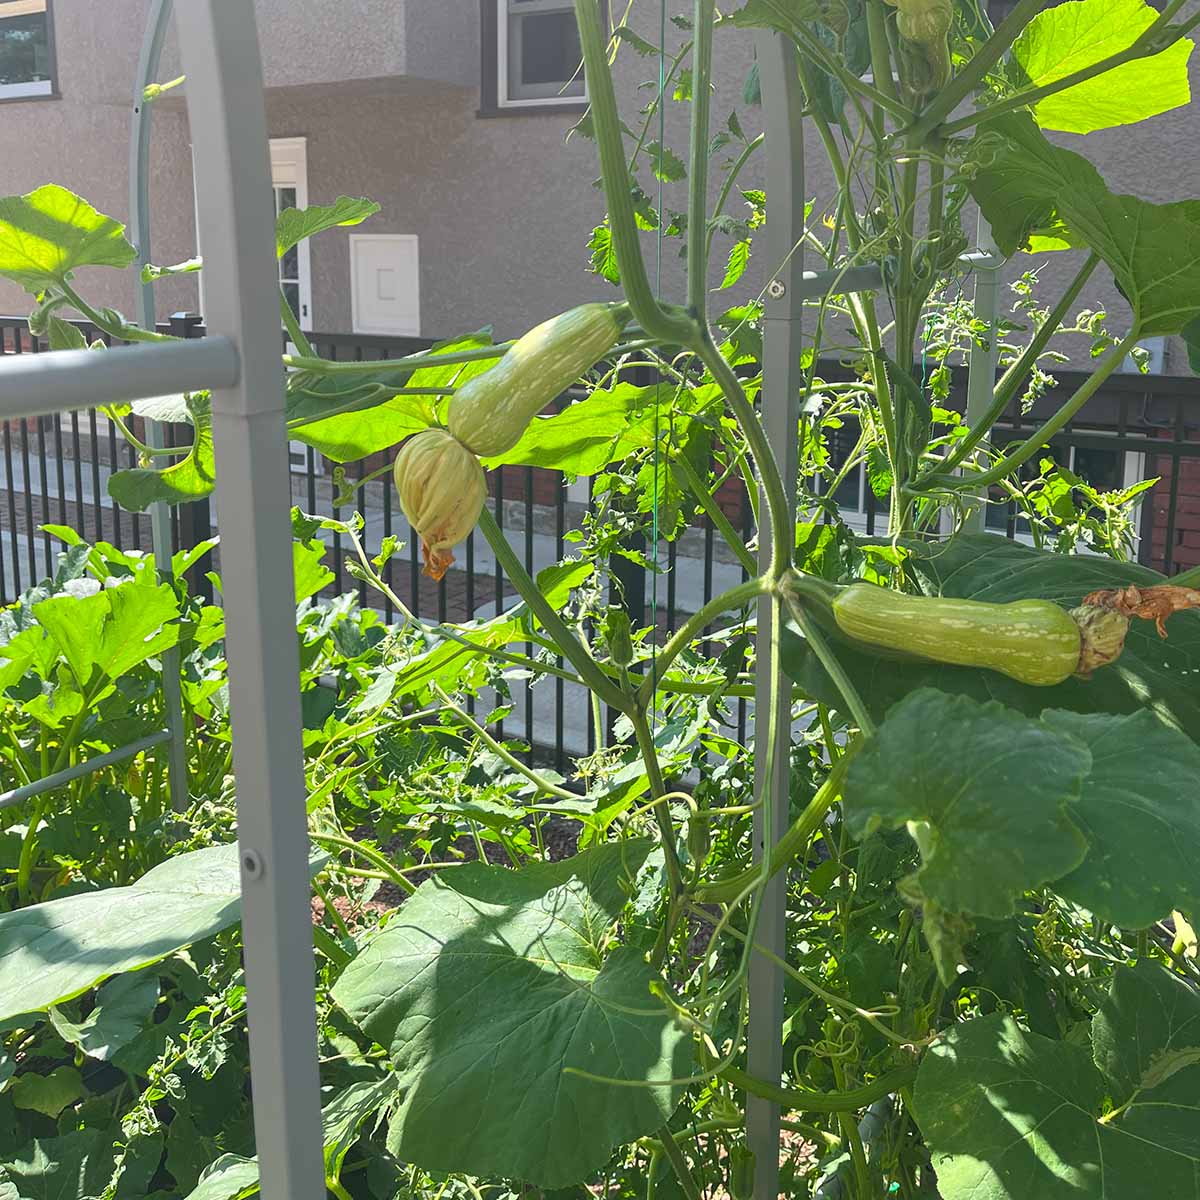
The vines require very little maintenance. Keep an eye out for bugs, diseases, and powdery mildew. Fix as needed. During this time, vines will grow to 10 or 15 feet long. The butternut squash will start to increase in size. The vines can totally support their weight without additional help. Just sit back and watch them grow.
In case you are wondering, many other winter squash varieties don't need extra support either. This includes acorn squash, along with any smaller winter squash varieties (including delicata and honeynut). Watermelon, even small ones, do need support (as I learned when a couple pretty small ones fell off the vines.
Harvesting
Knowing the moment butternut squash is ready to harvest is difficult to pinpoint. However, they can hang on the vine for quite some time, even after they are ready for harvest. So when in doubt, leave them on the vine.
Picking any winter squash too early results in lower quality flesh. That's because the seeds will finish maturing at all costs - pulling nutrients and energy from the flesh when not provided by the plant itself.
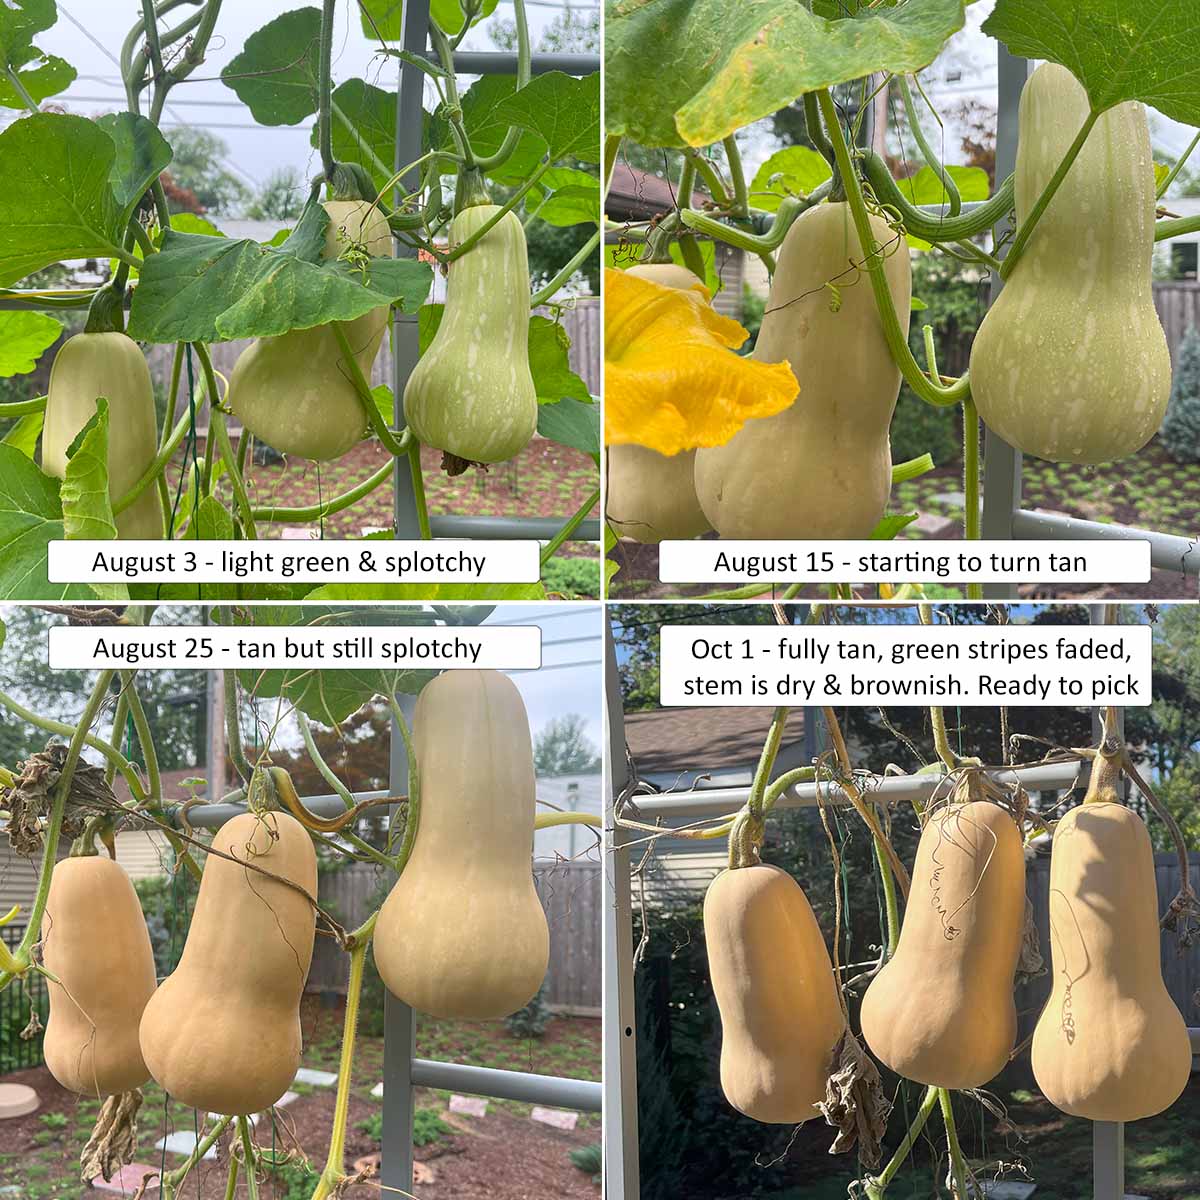
So how do you know if butternut squash are ready to be picked? While the skin turns from orange to tan as they ripen, it's not a good indicator. They turn tan long before they are ready for harvest (usually at least several weeks before they are ready).
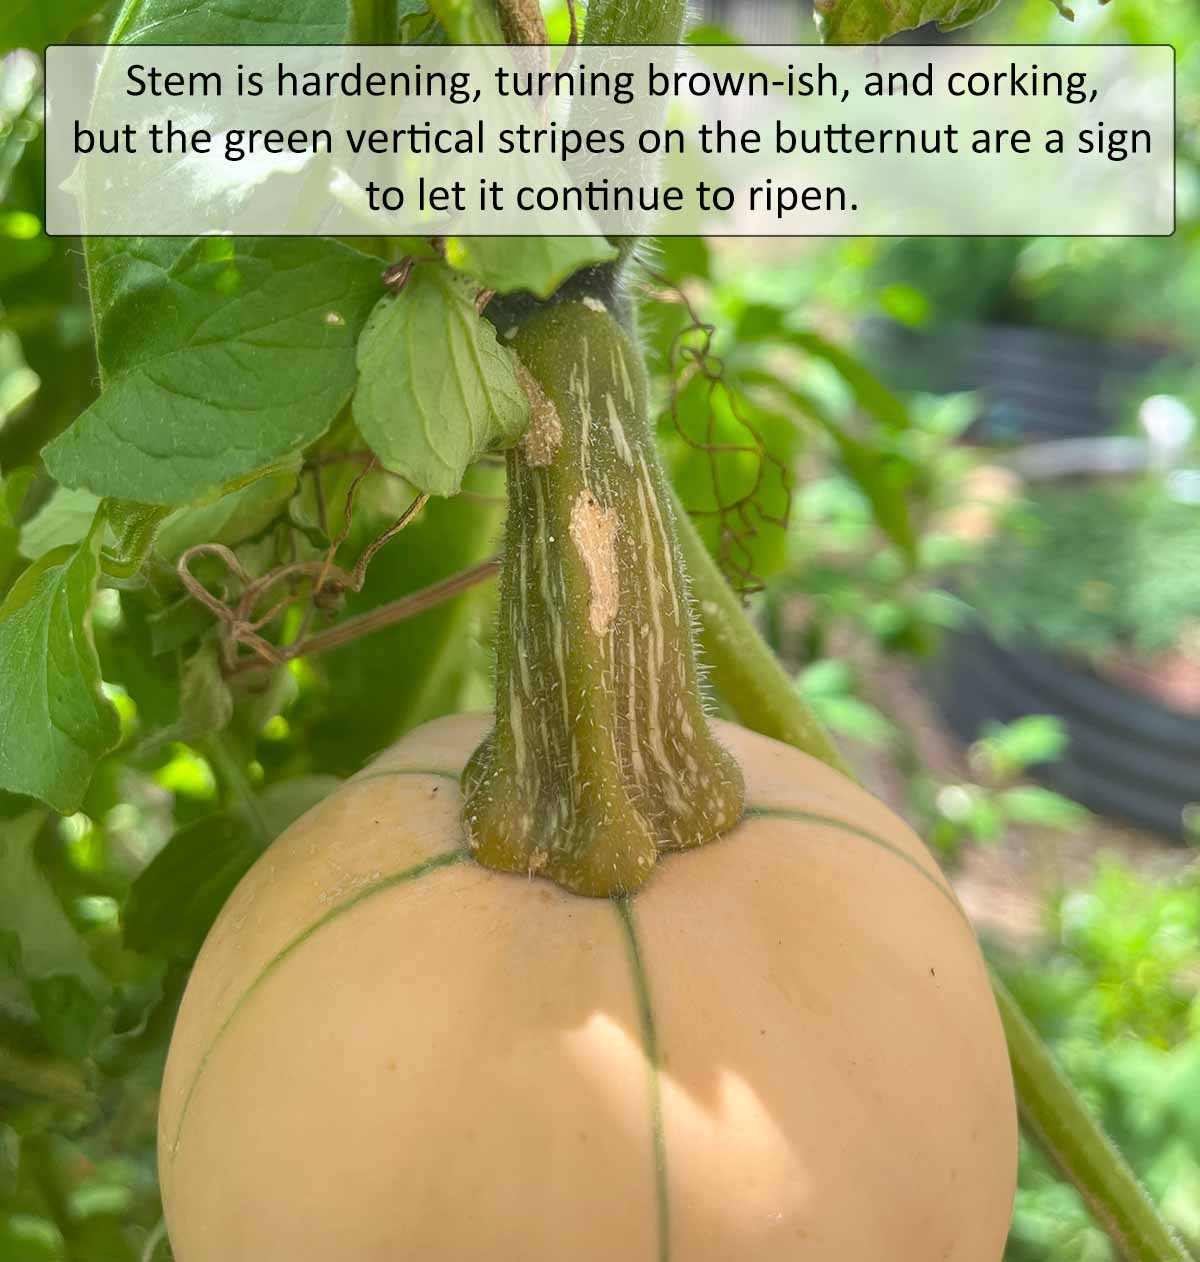
Butternut squash are ready to harvest when all of the following conditions are met:
- Skin is tan and any green striping has faded
- Stem shows corking (stretch marks) and will be woody and brownish
- Skin is hard to pierce with your fingernail
There are two scenarios when you don't want to leave them on the vine if they are already ripe (or ripe enough) - they are both related to the weather.
- If the weather forecast calls for frost, pick them and bring them inside
- If a large amount of rain is expected, pick them so they don't split by soaking up too much rain water (like tomatoes split)
Read the in-depth tutorial on harvesting & storing butternut squash with plenty of pictures, rules, and exceptions.
Curing & storing
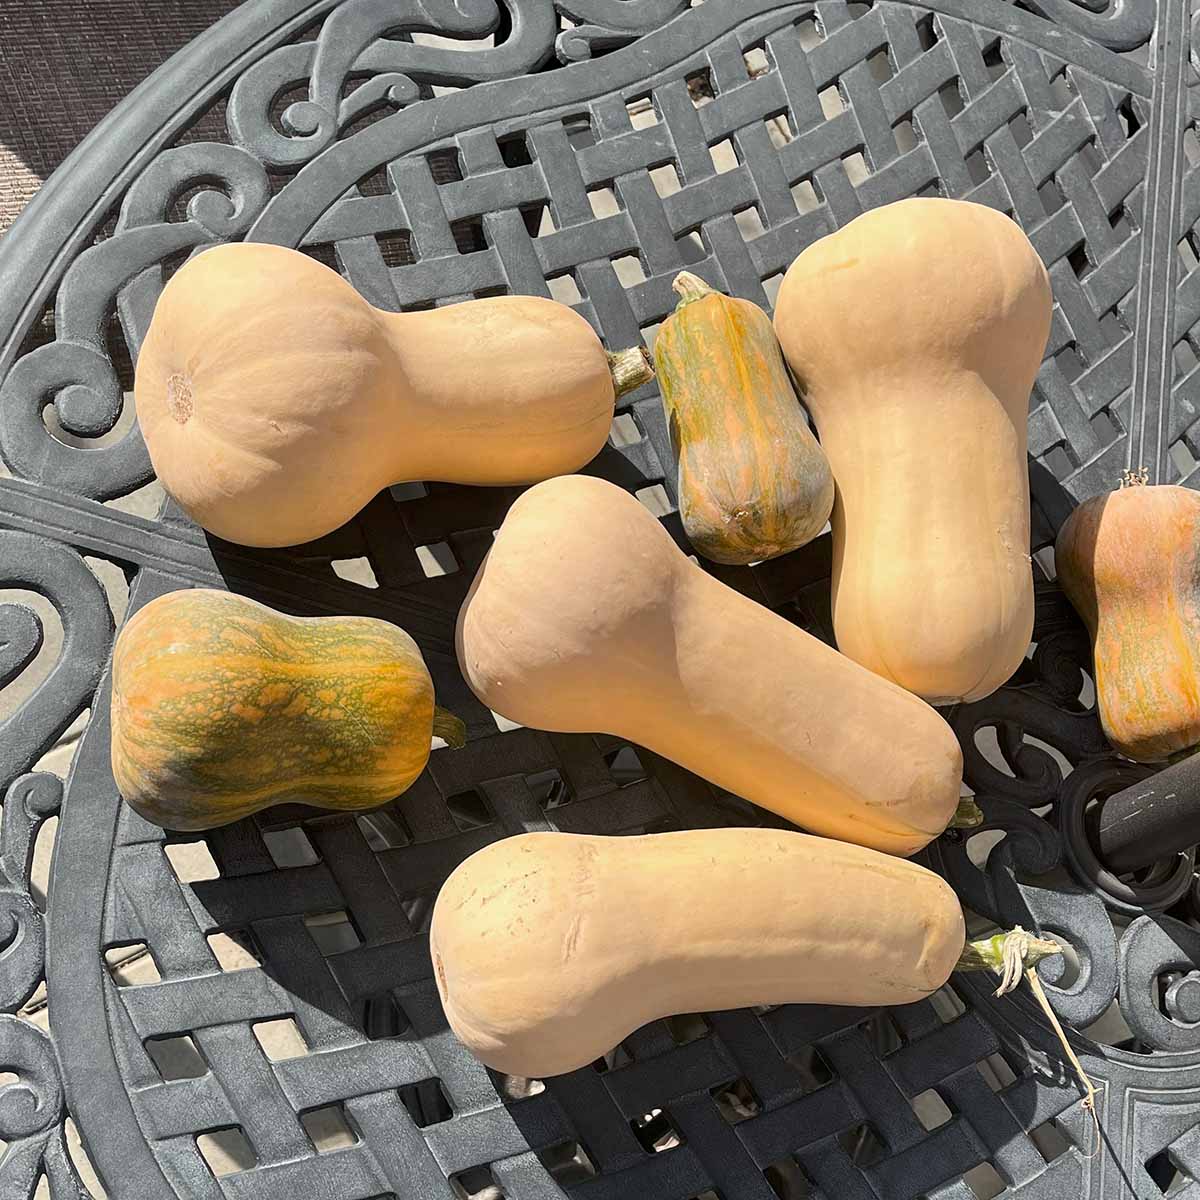
Once harvested, butternut squash benefit from curing. It's a simple process where the squash are left outside in the sun to harden the skin. Leave them outside for 5 days to 14 days in a sunny location with good airflow.
Additionally, butternut squash flavor improves after at least several weeks of storage. The starches in the flesh convert to sugar, and the flavor itself intensifies as well.
Butternut squash will last 3-6 months when stored properly in a cool, dark environment with good air flow. I harvested most of mine last year in October and was still eating them into April.

Leave a Reply